If your toilet tank is not filling up after a flush, the cause is almost always one of three things: the shut-off valve under the bowl is closed or only cracked open, the float is stuck or set too low, or the fill valve has failed. All three are DIY fixes once you know which one you have.
Before you take anything apart, know what a healthy tank looks like. Water should sit about an inch below the top of the overflow tube, and a full tank should refill in roughly 10 to 30 seconds. If yours takes minutes, or stops a third of the way up, that difference tells you where to start looking.
Here is the order I would work in: cheapest and most likely first, hardest jobs last. Most people who follow it end up replacing one part, not the whole toilet.
Table of Contents
- What You Need
- Step-by-Step: Test Each Part in the Simplest Order
- Step 1: Why Is My Toilet Tank Not Filling Up? Check the Water Supply
- Step 2: Test the Fill Valve and Float
- Step 3: Check the Flapper and Overflow Tube
- Step 4: Verify the Repaired Water Level
- Common Mistakes That Turn a Small Fix Into a Flood
- Frequently Asked Questions
- Why does my toilet tank keep filling after it reaches the correct level?
- Can a toilet tank not fill because the float is stuck?
- How long should a toilet tank take to fill?
- Why is my toilet tank filling but then flushing immediately?
- Do I need to replace the whole toilet if the fill valve fails?
- Should I call a plumber if water keeps running in the toilet tank?
- Conclusion: What to Do First
What You Need
Nearly every repair on this list needs the same small kit. An adjustable wrench, a flat-head and Phillips screwdriver, a sponge, a flashlight, and old towels or a shallow bucket to catch water.
Have a rag handy for the tank lid. Porcelain lids chip at the edges easily, and a cracked piece falling into the tank is a new problem on top of the old one. If your toilet sits in a tight alcove, a 3/8-inch socket set and a short-handled wrench save a lot of knuckles.
Before you buy, match the part to the tank. Universal valves come in different shank heights and thread sizes, and a valve that is too short for your tank is a frequent reason a new toilet still stops filling partway. Take the old valve’s height with you, or take the whole removed part to the store if you would rather not guess.
Almost none of this needs a plumber. Plumbers come in when the leak is hidden, the supply line is inside a wall, or the ceramic itself is damaged.
Step-by-Step: Test Each Part in the Simplest Order
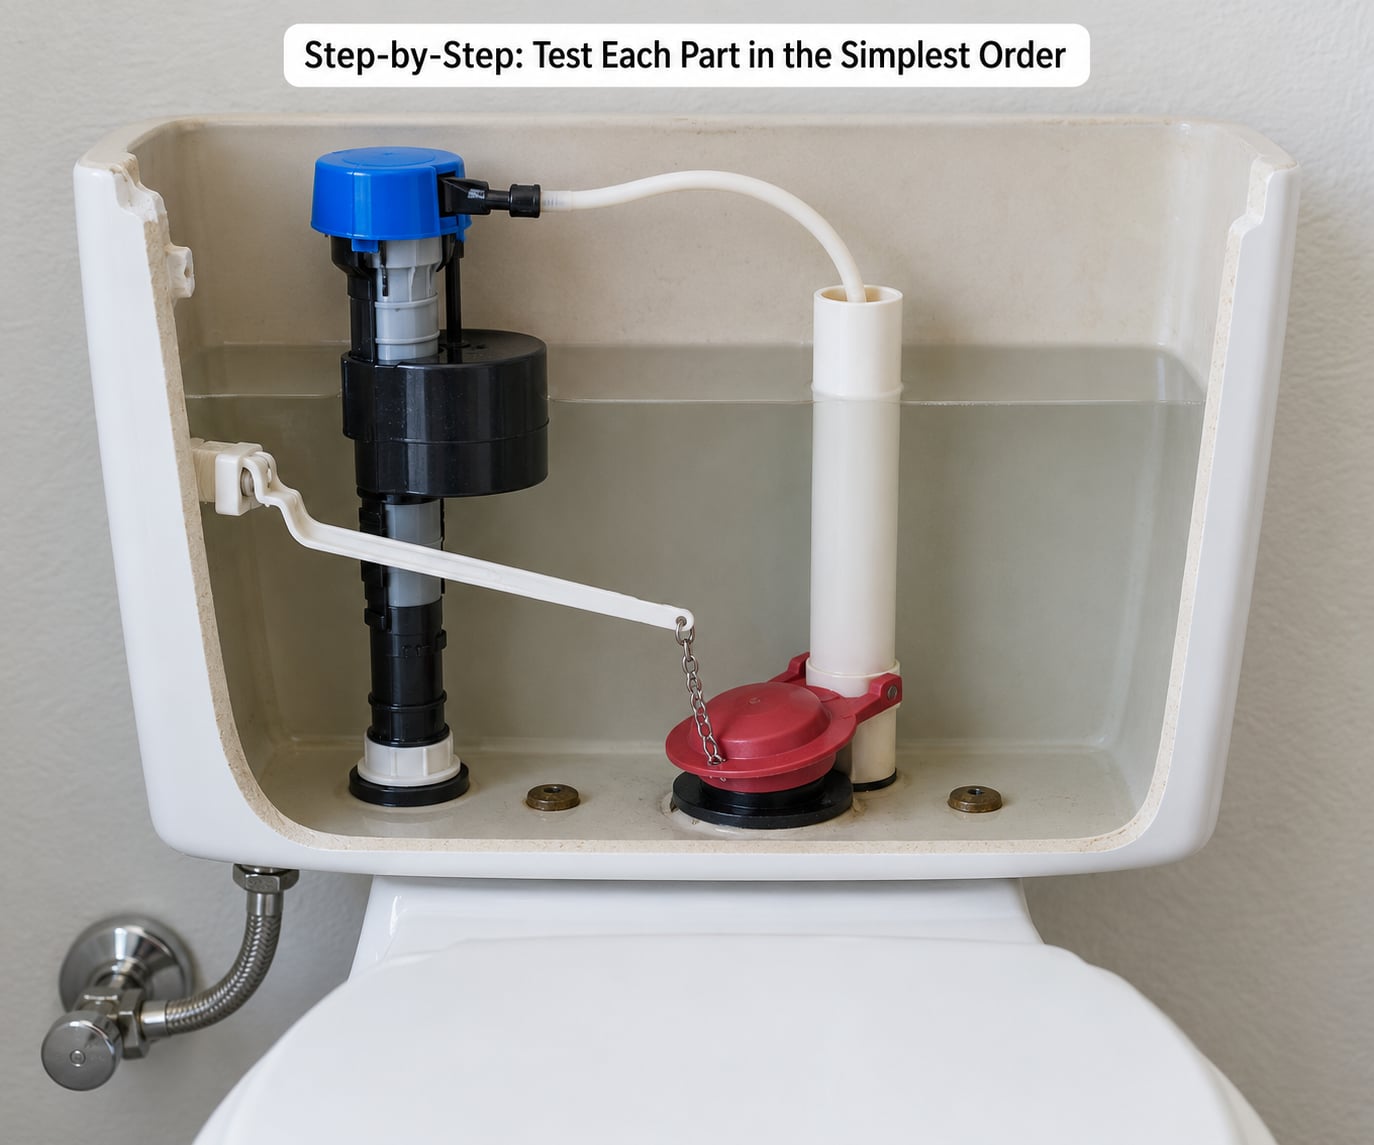
Work through these in order, and stop when the tank holds water for a full minute without running. The order matters because the shut-off valve costs nothing to check and catches a surprising share of cases.
Match your symptom first:
- Fills very slowly, or not at all – partly closed shut-off valve, clogged fill valve inlet, or genuinely low water pressure.
- Fills partway then stops – float set too low, float stuck, or a fill valve too short for the tank.
- Water runs straight into the bowl without refilling – flapper stuck open, or water escaping past a cracked flush valve seat.
- Fills only every second or third flush – a flapper that sticks intermittently, or a debris-crumbling supply washer.
- Keeps filling after it reaches the right level – float that never rises, or a fill valve that will not shut off.
- Tank overflows – a float stuck high, an overlong refill tube, or a fill valve stuck open.
- Tank fills but the bowl stays low – refill tube off the overflow tube, or a closed bowl rinse tube cap.
Step 1: Why Is My Toilet Tank Not Filling Up? Check the Water Supply
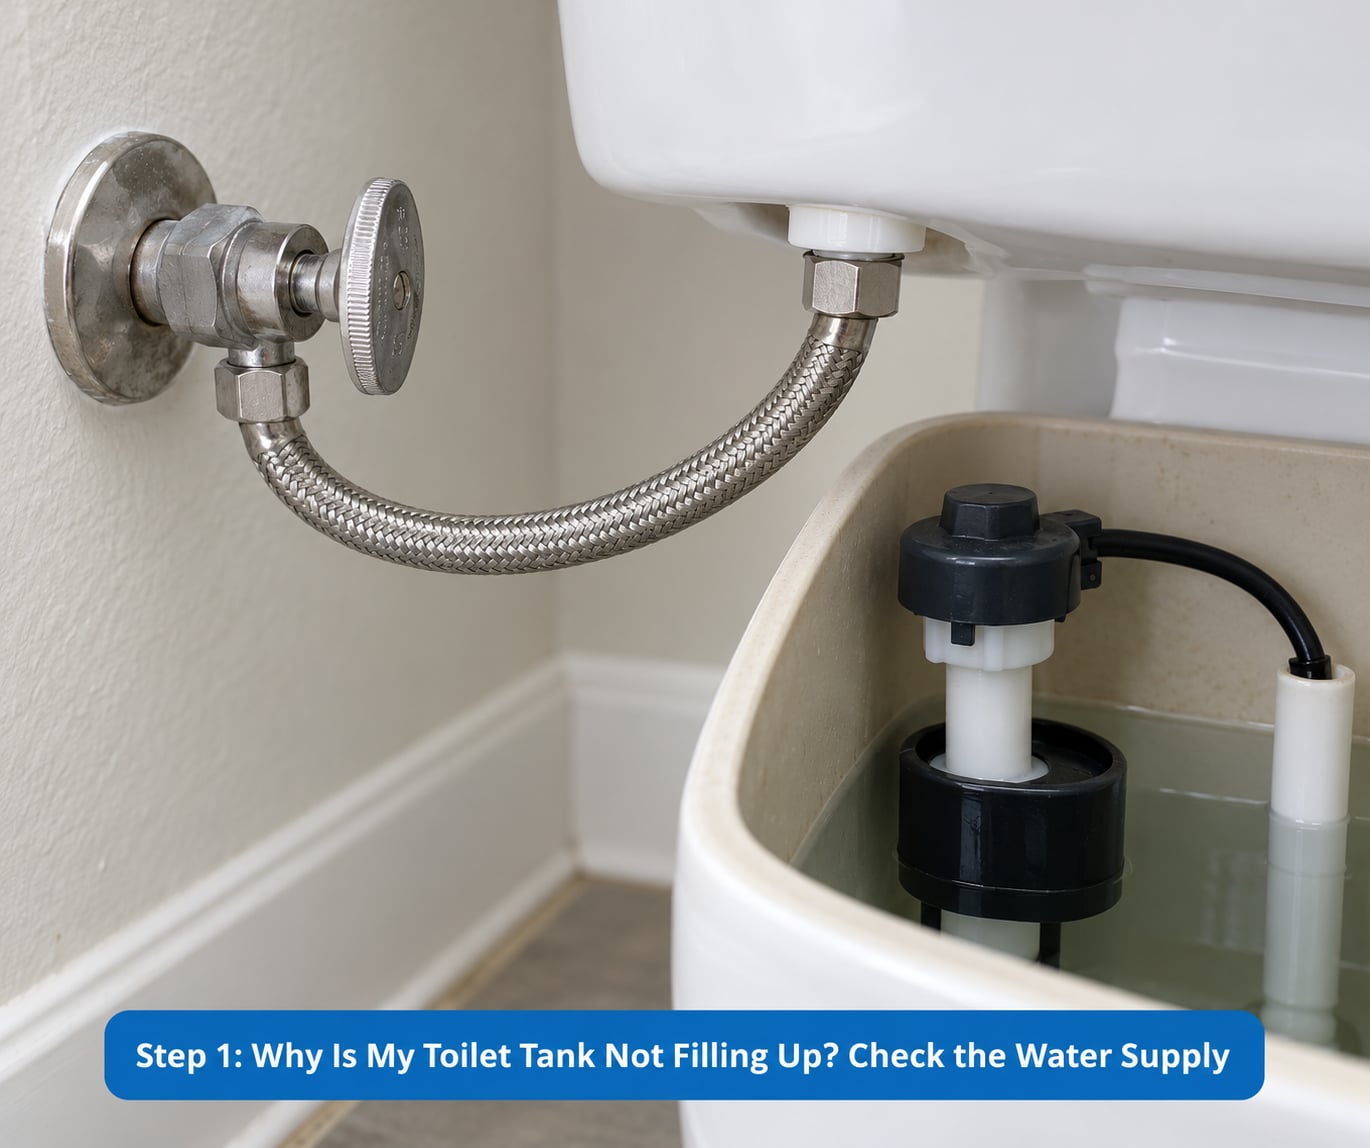
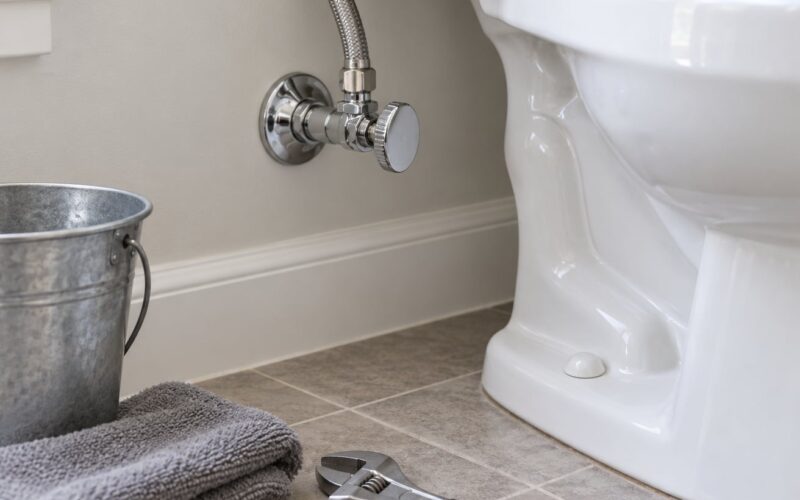
Start where the water enters. Turn the angle stop under the bowl fully counterclockwise until it stops. It often sits at a lazy half-open position after a plumber or a house sitter nudged it, and that alone stops the tank from refilling properly.
Next, look at the supply hose. A braided line should feel firm all the way along; a bulged or flattened section means water is being squeezed and the fill cycle slows to a trickle. Press the hose down while the toilet refills and see whether the flow picks up. If it does, replace the hose.
To test whether the line itself is clear, unscrew the hose from the fill valve and hold a bucket underneath while you blow into it. A sharp whistle and steady stream means the line is fine. A weak sputter means debris, usually a supply washer that has crumbled into bits and lodged in the valve inlet or the valve seat itself.
Replace the hose washer while the hose is off, and check the little rubber or plastic screen at the bottom of the fill valve. That is where the crumbs collect. This is the most under-rated fix in the whole list, and it costs very little.
On a low-pressure or well-fed system, no amount of cleaning changes a fill that drips. If every other fixture in the house also runs slow, you are looking at a pressure problem, not a toilet problem.
Step 2: Test the Fill Valve and Float
Put a finger under the fill valve’s shank while the tank is filling. You should feel water entering. If nothing comes out, or the water runs but shuts off almost immediately, the valve is clogged or dying. Shut off the water, flush the tank down with a sponge, then take the fill valve apart and rinse the cap and the valve seat under cold water. A small nylon brush clears limescale without scratching the seat.
Now lift the float by hand while the water is on. If the tank fills, the valve is fine and the float is not telling it to stop. Owners on plumbing forums describe this exact test as the moment their “dead” toilet started filling again, and a float that responds to a nudge but not to rising water is usually a linkage or float cup that is swollen, jammed on its rod, or waterlogged if it is an old ball float.
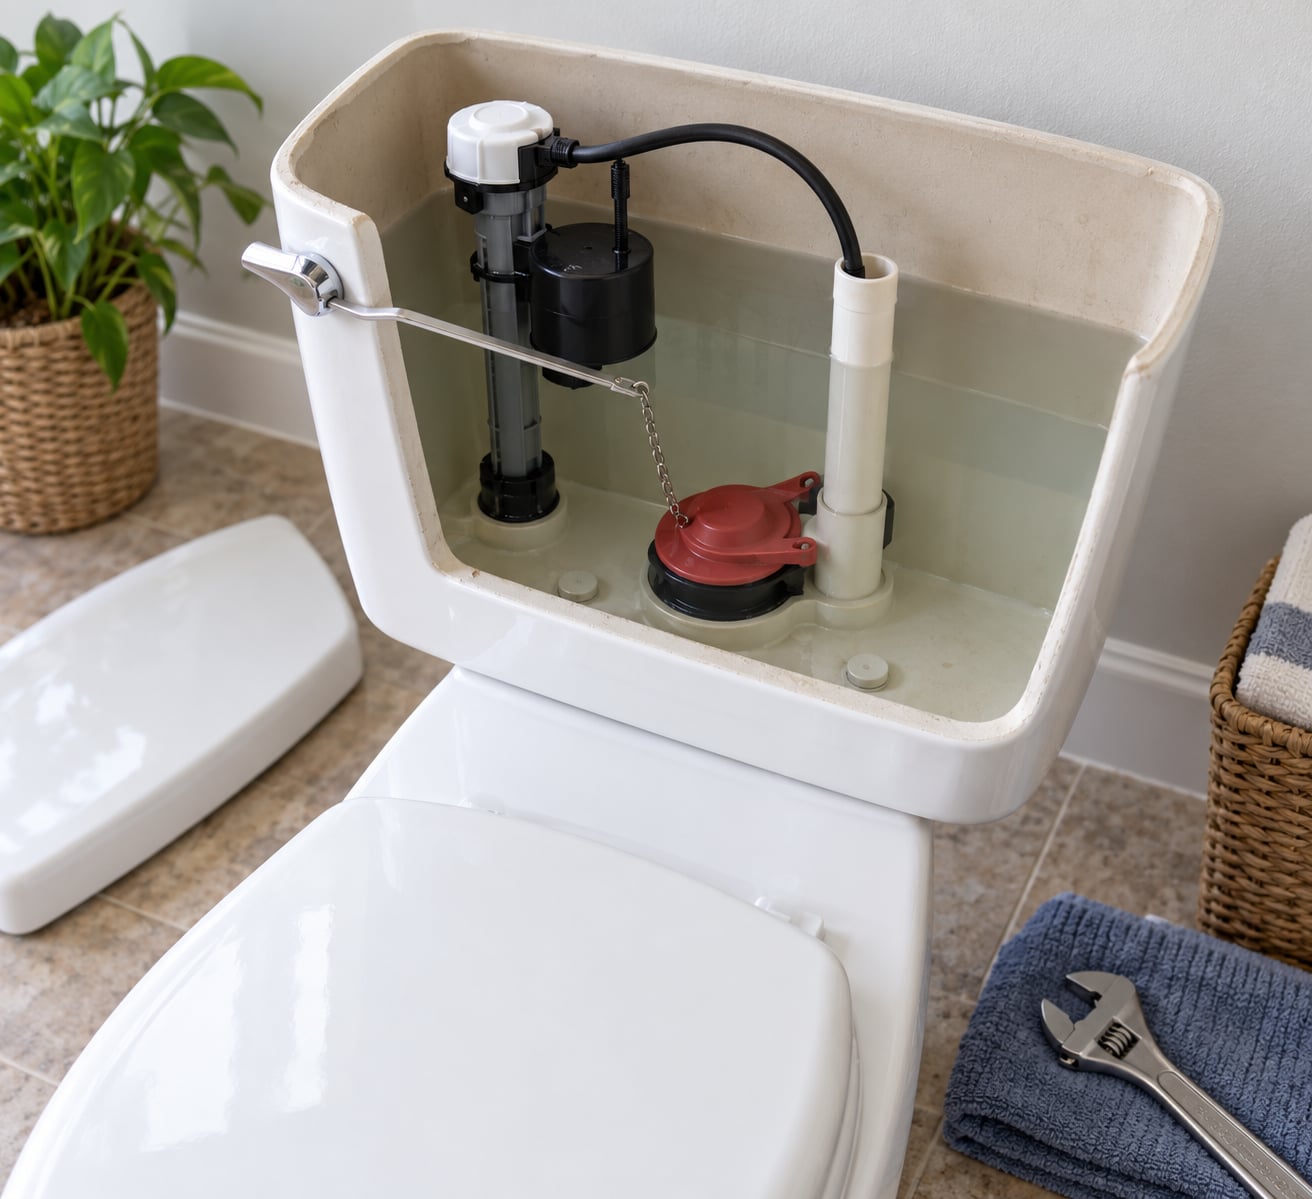
Check the height next. A correctly set tank stops about an inch below the overflow tube, with the float cup’s waterline at that mark. On a ball float, the arm should sit roughly level, not angled up. Turn the small adjustment screw or the float clip a quarter turn at a time, then refill and watch. Do not force a screw that will not turn; those shafts seize, and a seized shaft usually means replacing the whole valve.
If the tank stopped partway up right after you fitted a new valve, the part is almost certainly too short for the tank. Taller valves and riser kits solve this, and it is worth checking the shank height against the old valve before you reinstall the same type.
On dual-flush and button-flush toilets from Kohler, TOTO and similar brands, the fill valve sits under a plate at the top of the tank rather than behind a lever. Remove the flush plate carefully, and expect a separate small hose feeding the bowl that has to be reconnected.
Step 3: Check the Flapper and Overflow Tube
A tank that empties and then runs straight into the bowl is telling you the flapper is not sealing. The fastest test happens during a flush: push the flapper down with a finger. If the water stops going into the bowl, the flapper is the fault, not the fill valve.
Three things keep a flapper open. The chain is too slack, so the flapper never seats squarely. The chain is too tight, which holds the flapper lifted just enough to leak. Or the flapper itself is warped, or its rubber has gone hard and shiny with age. Leave a little slack, about a quarter inch of movement, and test again before replacing anything.
If a fresh flapper still leaks, the flush valve seat underneath is worn or cracked. That is a bigger job, and a whole flush valve assembly is the correct part rather than another flapper.
While the lid is off, check two more items. The refill tube is the small hose that clips onto the top of the overflow tube and sends water down into the bowl. Unclipped or disconnected, the tank fills fine and the bowl stays low, which drives people to replace a perfectly good fill valve. A bowl rinse tube also has a cap that must be removed or pierced for flushing toilets that use one.
The overflow tube itself should be open, clear, and about an inch taller than your normal water line. Check it with a wire, not a finger, in case it is cracked at the base where it meets the flush valve. Water going down the tube instead of stopping at the fill valve means the tank has topped out past its normal line.
If the whole tank is filling slowly and none of the above explains it, check the tank-to-bowl bolts and the gasket. Water weeping from the bolts leaves a ring on the floor; water going into the bowl with a dry floor points to a cracked flush valve seat or a cracked tank instead.
Step 4: Verify the Repaired Water Level
Turn the shut-off valve back on and let the tank fill without flushing. Listen to the whole cycle. A healthy tank hisses for a short burst and then goes silent, usually within half a minute.
Check the level against the mark stamped inside the tank or about an inch below the overflow tube. If the float is set too high the tank will overflow into the tube and the bowl will run; too low and the flapper may not have enough water to seal, which is the classic low-water complaint.
Then run one full flush and watch the refill. The bowl should come back to its normal level. A bowl that stays low means the refill tube is the issue, not the fill valve.
If the tank fills only every other flush, watch the flapper closely during the next two flushes. Intermittent seating is the usual culprit, and a chain with a bit of slack usually fixes it. If the fill valve then keeps running after the tank is full, replace it rather than adjusting it again.
For a toilet that stopped filling after a water shut-off or a stretch of time empty, reopen the angle stop all the way, lift the float cup by hand, and hold it up until the tank stops. That primes the valve. Letting the float back down should now start a normal fill cycle.
Common Mistakes That Turn a Small Fix Into a Flood
The biggest one is working on a running toilet without shutting off the water. Close the angle stop first, every time, even if the tank looks empty. It may not be.
Second, overtightening plastic. The lock nut under a fill valve and the nut on the supply line are plastic or thin brass, and they crack when you lean on an adjustable wrench. Snug plus a quarter turn is plenty. Hand-tight plus a cloth works too.
Third, forcing a stuck water level adjustment screw. If it will not turn with light pressure, the shaft is seized and the valve assembly needs replacing. Pushing through usually snaps the float linkage.
Fourth, raising or lowering the fill height without marking the original position. Note the waterline before you touch anything, then move it in small steps and retest each time. Too high causes overflow; too low causes a flapper that will not seal.
Fifth, replacing parts on a guess. A new fill valve, a new flapper and a new supply line in the same afternoon is a lot of money for a fault that was a half-open valve the whole time. Test in order, and replace the one part you have evidence for.
Two smaller ones worth knowing. Lifting the tank lid by the flush lever or the flush plate is a good way to crack it; lift the lid by the rim with both hands and set it on a folded towel somewhere out of the way. And a refill tube left off the overflow tube after a fill valve swap is the reason many people think their brand-new valve is still broken.
To keep the problem from coming back, flush the fill valve once a year and add a drop of food coloring if you ever suspect a flapper leak. A tank that quietly refills all night can waste hundreds of gallons a day, and coloring in the bowl will show you within an hour.
Frequently Asked Questions
Why does my toilet tank keep filling after it reaches the correct level?
Something is stopping the fill valve from closing: a float that will not rise, a linkage that is stuck, or a failed valve seat. Lift the float by hand. If the water shuts off, the float is jammed or set too low; clean the shaft and adjust the height. If the water keeps running with the float held up, replace the fill valve.
Can a toilet tank not fill because the float is stuck?
Yes, and it is common enough to test first. If lifting the float by hand starts the fill, the valve is fine and the float or its rod is the problem. A waterlogged ball float sinks too low, and a swollen float cup slides stiffly. Clean or lubricate the shaft, or replace the float assembly.
How long should a toilet tank take to fill?
A healthy 1.6 gpf tank refills in about 10 to 30 seconds, stopping roughly an inch below the overflow tube. A refill that takes minutes points to a partly closed shut-off valve, a clogged fill valve, a kinked supply hose, or low household water pressure rather than a broken part.
Why is my toilet tank filling but then flushing immediately?
The flapper is not staying seated, so the fill valve and the flush valve are both open at once. Push the flapper down during a flush. If the flow into the bowl stops, adjust the chain for a little slack or replace the flapper. If it keeps running, the flush valve seat is worn.
Do I need to replace the whole toilet if the fill valve fails?
Almost never. Fill valves, float cups, flappers, refill tubes and supply lines are all sold separately, and universal valves fit most tanks once you match the shank height and thread size. Replace the tank only when the ceramic is cracked, which is rare and usually shows up as water on the floor or in the bowl.
Should I call a plumber if water keeps running in the toilet tank?
Call a plumber when the leak is concealed, when the supply line runs inside a wall, when the toilet is still running after a new flapper and fill valve, or when there is low pressure throughout the house. Before that, shut off the angle stop to stop the water waste, then test the flapper, float and fill valve yourself.
Conclusion: What to Do First
Open the angle stop all the way, look at the supply hose, then refill the tank and listen to the entire cycle. A healthy tank hisses for a short burst and goes quiet; a tank that runs into the bowl is a flapper problem, and a tank that stops partway up is a float or valve-height problem.
Those two tests answer most cases before you buy a single part. Turn the water off before you touch anything, replace the one component you can prove is faulty, and keep checking that the tank stops about an inch below the overflow tube.
Call a plumber when the leak is concealed behind a wall, when the ceramic tank or bowl is cracked, when the flush valve seat has gone and the job is bigger than a flapper, or when every fixture in the house is running low. Those are the four situations where the money is better spent on a wrench with a licence than on a Saturday.