You insulate a garage door from the inside: measure every panel, cut your insulation to fit between the horizontal rails or fasten it to the inner face, then replace the jamb weatherstripping and bottom seal so air has nowhere to leak through. A standard two-car sectional door takes most of a Saturday, and the payoff is real. Door manufacturers cite figures of roughly 12F warmer in winter and 25F cooler in summer for an R-18 insulated door, and a retrofit gets you a meaningful share of that for a fraction of the cost of swapping the whole door.
The part people skip is the sealing. Insulation sitting in a door with a cracked bottom seal and hardened jamb weatherstripping is close to decorative, because the leaks around the edges move more air than the panels do. Seal first, insulate second, test the balance last.
Table of Contents
- What You Need
- Tools
- Materials
- Matching materials to your door
- How to Insulate a Garage Door Step by Step
- Step 1: Inspect the garage door and choose the insulation method
- Step 2: Measure each panel and mark the cut lines
- Step 3: Clean and prepare the door surface
- Step 4: How to insulate a garage door panel without removing it
- Step 5: Add weather seals and threshold insulation
- Step 6: Test the finished garage door for gaps and movement
- Common Mistakes
- Frequently Asked Questions
- What is the best insulation for a garage door?
- Can I put insulation on a garage door with windows?
- Should I use reflective garage-door insulation or rigid foam panels?
- How thick should garage-door insulation be?
- Can I install garage-door insulation myself?
- How do I know if my garage door is properly insulated?
- Where to Start
What You Need
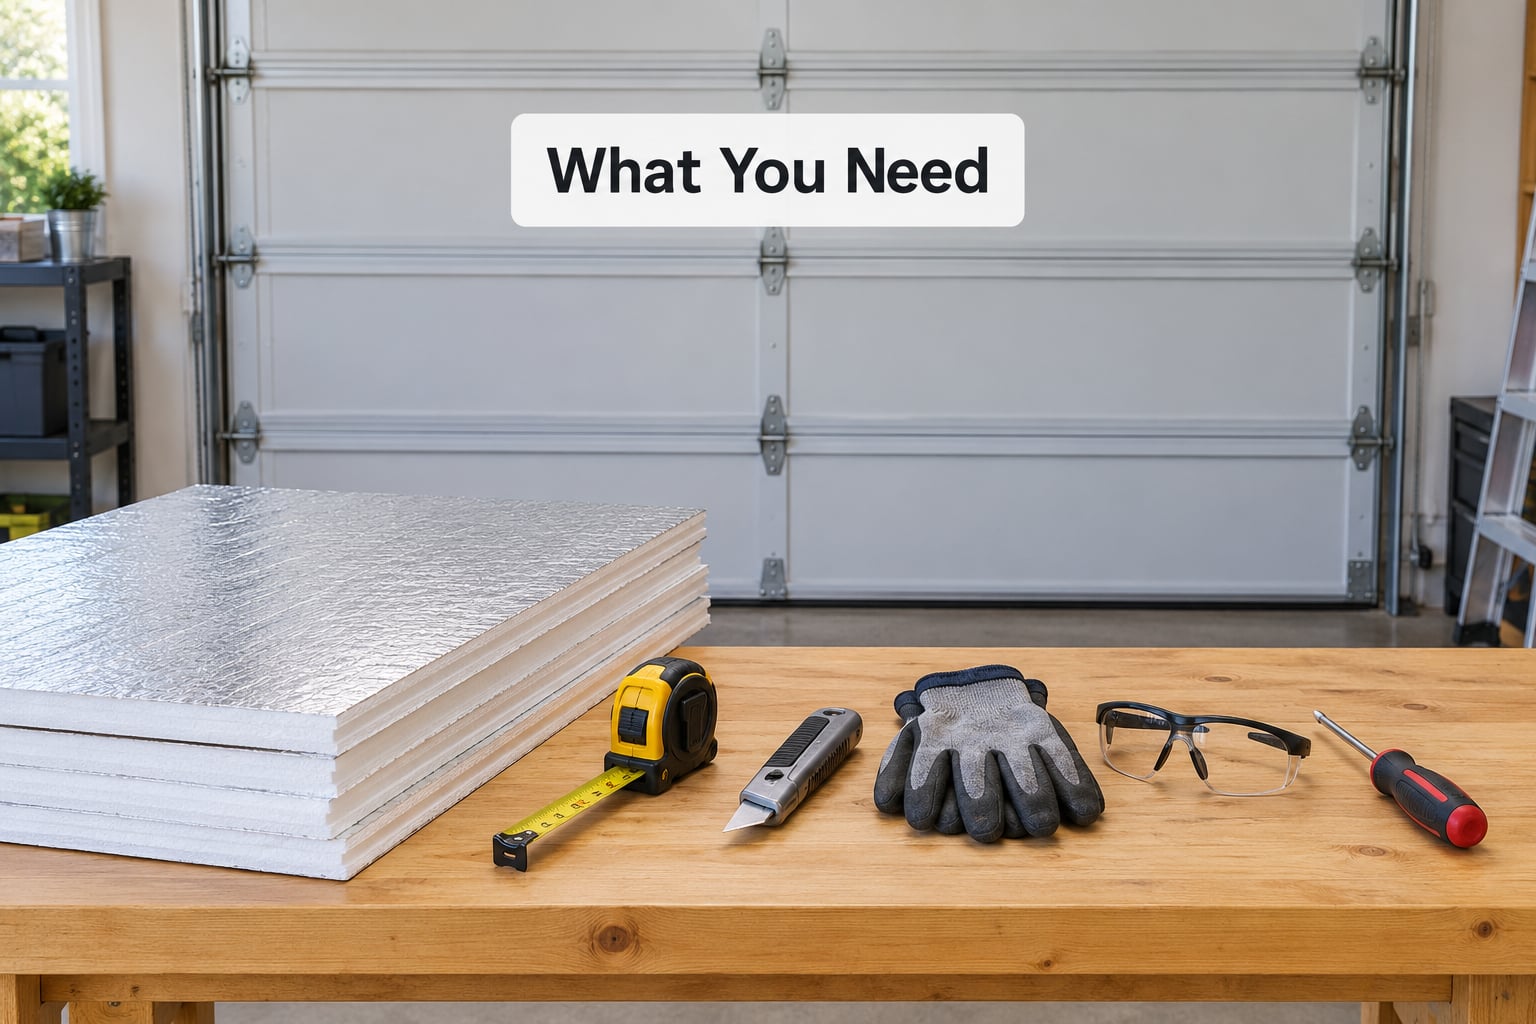
Tool list first, then materials, because the tools are the same regardless of which insulation you pick.
Tools
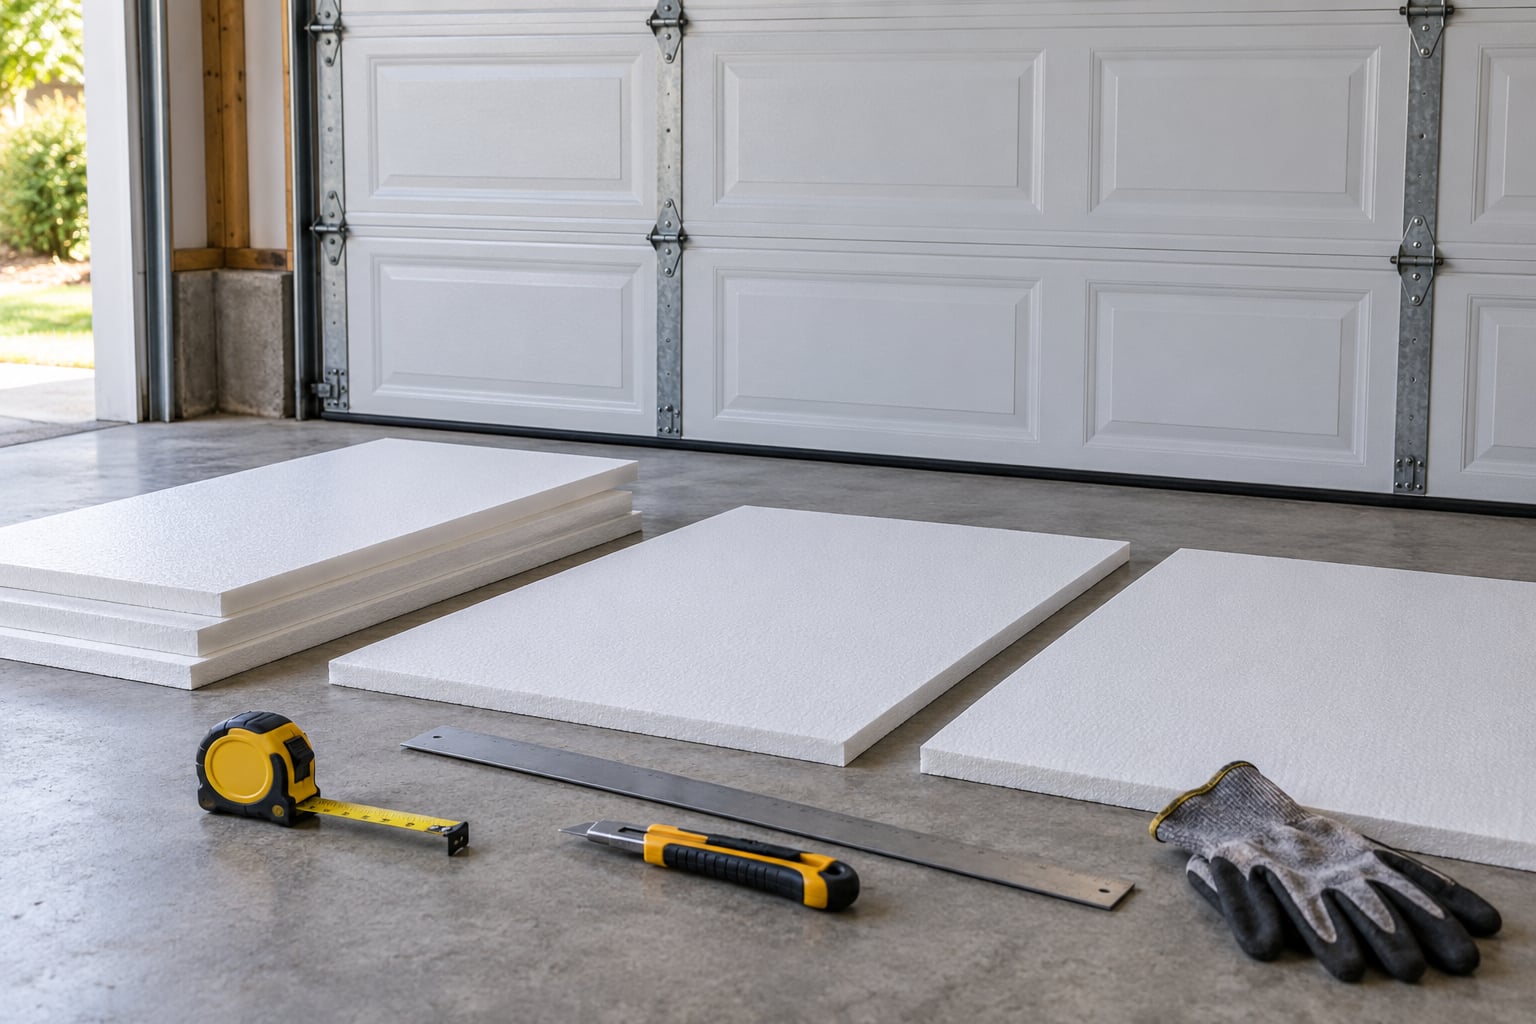
- Tape measure
- Utility knife with plenty of fresh blades
- Straightedge or drywall T-square for straight cuts
- Work gloves and safety glasses
- Flat screwdriver and a hammer
- Shop vacuum or stiff brush
- Caulking gun with exterior-grade silicone sealant
Materials
- Insulation: a precut vinyl-faced fiberglass batting kit, rigid foam board, or reflective foil-faced wrap
- Fasteners: retainer pins and retainer caps, or double-sided tape, or spray adhesive such as 3M 77
- Self-tapping sheet screws as a backup hold-down
- Vinyl doorstop weather stripping for the top and both sides
- A vinyl bottom seal sized to your door
- Degreaser or diluted dish soap, plus scrapers for old adhesive
Matching materials to your door
Match the material to the door and you will barely notice the weight change. A steel sectional door with open cavities between its ribs takes foam board or batting easily. A newer insulated door with a bonded core usually needs nothing at all. A door with glass or lite panels needs insulation cut to fit around each lite, and the glazing itself still loses heat no matter what you do to the steel.
Reflective foil-faced wrap is the lightest option and the fastest to install, which matters on a sun-exposed west or south wall. Rigid foam board is the cleanest-looking and the best all-around balance of weight, cost, and R-value. Precut batting gives the highest R-value per inch but is the heaviest, and it is the material that makes door balance the biggest concern.
How to Insulate a Garage Door Step by Step
This is the practical route for a standard sectional garage door: measure, cut, fasten, seal, test. Follow your door manufacturer’s instructions where they conflict with anything below, and never block the hinges, the safety sensors, or the emergency release cords. Added weight changes how the door hangs, so the balance test in Step 6 is not optional.
Step 1: Inspect the garage door and choose the insulation method
Look at the door before you buy anything. Steel doors have a face skin, a ribbed back, and horizontal rails that create the cavities you will fill. Fiberglass and wood doors behave differently, and some older doors already have an insulation layer that is sagging or waterlogged.
Check three things while the door is closed. Look for daylight around the top and sides, which means the jamb weatherstripping has hardened. Run a hand along the bottom seal, which should be flexible, not cracked or flat. Open and close the door slowly and listen for scraping, binding, or a door that wants to run away from you.
Then pick the method:
- Reflective garage-door insulation addresses radiant heat from the sun, is very light, and installs fastest. It does almost nothing for conductive heat, so treat any printed R-value on the packaging with suspicion.
- Rigid foam panels deliver real R-value at a modest thickness, weigh little, and give you a finished-looking interior face. XPS, EPS, and polyisocyanurate (ISO) all work; 1 inch of XPS is about R-5 and 1 inch of ISO is about R-6.
- Fiberglass or cellulose batting gives the highest R-value per inch and the softest look, but it sags, can trap moisture, and is the heaviest option.
Unfaced, non-fire-rated XPS is highly flammable and gives off toxic fumes when it burns. If you go rigid, buy foil-faced, fire-rated board marked UL 900 or equivalent, especially in a heated garage.
Step 2: Measure each panel and mark the cut lines
Measure every section separately as you go. Panel heights are not identical along a door, and the top section is often shorter than the one below it, so a single door-wide measurement is the most common early mistake.
Measure the usable width between the vertical ribs on the interior side, then measure from the bottom horizontal rail up to the next one. Subtract roughly a quarter inch from each dimension so the piece fits without buckling. Count your sections and multiply to work out how many kits or boards you need; a 16-foot-wide two-car door generally takes two kits’ worth of material.
Do all your cutting on a piece of scrap plywood or cardboard laid on the floor, not on the door. Mark the cut lines with a fine marker, run the straightedge, and score with a fresh utility blade. Wear gloves. Cut slightly undersize and trim rather than fighting a piece that refuses to fit.
Step 3: Clean and prepare the door surface
Vacuum the interior face of the door, then wipe each panel with a degreaser or diluted dish soap and a clean rag. Grease, dust, and webbing will stop tape and spray adhesive from ever holding.
Scrape off loose paint flakes, drips, and hardened adhesive with a plastic scraper or the back of the utility knife. Old adhesive is the number one reason insulation peels off a month later.
Let the panels dry completely before you attach anything. Work with the door closed and locked, or with the opener disconnected and the door on the floor in a supported position. Never work under a door held open only by a prop stick or a stack of paint cans.
Step 4: How to insulate a garage door panel without removing it
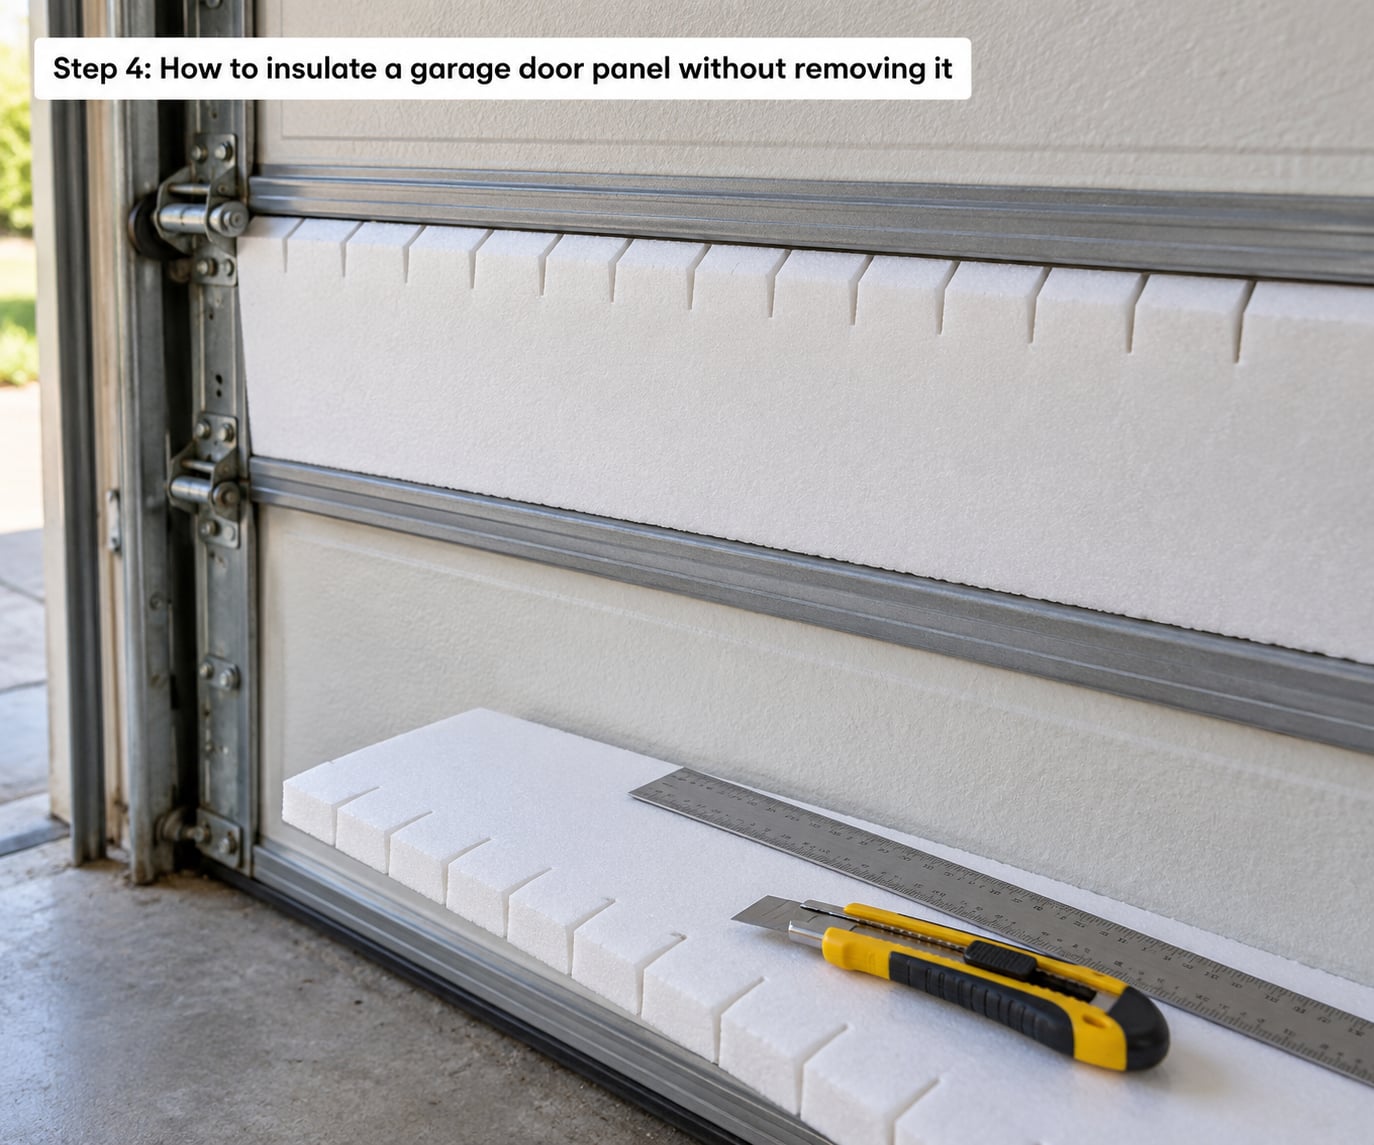
You do not have to remove the sections. The rails create natural cavities, and the trick is to make relief cuts so the material can bend into them instead of buckling across them.
Measure the cavity between two horizontal rails, then cut the piece a fraction wider than the opening. Make two or three short slits at the middle of the piece, each cut running from the edge to about a third of the way across. That flexibility lets the foam form to the rail behind it. Homeowners on r/DIY report this is where most first attempts fail, and the fix is always more relief cuts, not more force.
Three fastening methods work well:
- Retainer pins and caps push through the door skin from the inside and lock the batting in place. They hold the best and leave the cleanest surface, and you can pry them out later if you ever want to remove the insulation.
- Spray adhesive such as 3M 77, applied in a light even pattern with the required open time before you set the piece down.
- Double-sided tape along the top and bottom edges of each panel for thin, light materials.
Keep every handle, window, strut, hinge, and the photo-eye safety sensors clear. A sensor covered by a strip of batting will not see the floor, and your opener will reverse every time. Cut around a lite panel with a slow steady pass and seal the cut edge with foil tape so the facing does not fray.
Finally, run the door up and down by hand. If you feel rubbing, a bulge, or a panel catching a track, take the piece back off and trim it. The insulation should sit flat and clear of everything that moves.
Step 5: Add weather seals and threshold insulation
Replace the vinyl weather stripping snapped into the doorstop molding on the top and both sides. Pull out the old brittle piece with a flat screwdriver, then press or nail the new one into the channel. This is the highest-value ten minutes of the whole job.
For the bottom seal, the vinyl strip sits in a track crimped into the bottom of the lowest panel. Open the crimp with pliers or a flat screwdriver, slide the old seal out, and slide the new one in. Close the track with a hammer and a scrap of wood so you do not dent the skin.
Test the seals with the door closed. Shut off the lights and look for light along the jambs and the threshold. Then slide a sheet of paper around the frame and the bottom edge and pull it: any place you can pull it free with little resistance is still leaking. Adjust the doorstop until the paper drags evenly on all four sides.
Step 6: Test the finished garage door for gaps and movement
Walk the closed door and look for exposed gaps, lifted corners, or batting hanging out of a cut line. Re-attach or trim anything loose. Open and close the door three or four times and watch for a section rubbing the track or bulging outward as the door travels, which usually means a cut piece is slightly too large.
Then check the balance, which is the step that matters most. Disconnect the opener using its red cord, lift the door by hand to about waist height, and let go. A balanced door stays where you left it, or drifts slowly down. If it slams to the floor or shoots up to the ceiling, the added weight has thrown the balance off and the torsion spring tension needs adjusting. Do not touch the spring itself. Call a garage-door technician; it is a two-minute job for them and a genuinely dangerous one for a homeowner.
Repeat the half-way lift test with the opener reconnected but the door still on the manual setting, then plug the opener back in and run it from the floor. If it reverses with nothing in the path, the safety sensors are blocked or misaligned.
Common Mistakes
- Measuring the whole door instead of each panel. Fix: measure every section separately, because heights vary along the door and the top section is usually shorter.
- Insulation too thick for the track. A piece that binds can bow the panel, stop the door mid-travel, or trip the opener’s force limit. Fix: trim to a quarter-inch clearance and re-test travel by hand.
- No relief cuts, or too few. Foam across a rail either buckles or leaves an air gap. Fix: two or three short slits across the middle of each piece.
- Covering the windows, handles, or photo-eye sensors. A covered sensor will reverse the door on every cycle. Fix: cut out and leave the sight lines clear.
- Insulating a steel door and skipping the seals. Fix: replace the doorstop weather stripping and crimp in a new bottom seal before you judge any result.
- A bottom seal installed into a closed track. The seal bunches and gaps at the corners. Fix: open the crimp, lay the seal flat, then re-crimp.
- Trusting the printed R-value on reflective foil. Foil blocks radiant heat, not conductive heat. Fix: pick a real R-rated material when you need real R-value.
- Using unfaced, non-fire-rated foam board. It is flammable and the fumes are toxic. Fix: foil-faced board with a UL 900 or equivalent listing.
- Skipping the balance test. Fix: the half-way lift test, and a technician for any spring adjustment.
One more thing worth knowing before you start. In a hot climate, a well-insulated garage with no cross-ventilation can hold heat through the evening because the door no longer lets it escape. Leave a window or gable vent cracked at night in summer.
Frequently Asked Questions
What is the best insulation for a garage door?
Rigid foam board is the best all-around choice for most homeowners: real R-value at 1 inch thickness, light enough that door balance rarely changes, and a clean interior face. Precut vinyl-faced fiberglass batting gives the highest R-value per inch if you can accept the extra weight and the fluffy look. Reflective foil-faced wrap wins when sun exposure is the main problem and you want the least load on the opener.
Can I put insulation on a garage door with windows?
Yes, but you cut around each lite. Insulation is fitted to the steel around the glass, never over it, and the cut edges get sealed with foil tape so the facing does not fray. Keep photo-eye sensors and window cranks clear. The glass itself still loses heat, so a windowed door will never perform like a solid insulated one.
Should I use reflective garage-door insulation or rigid foam panels?
Use reflective foil-faced wrap on a west- or south-facing door where solar gain is the main complaint and you want almost no added weight. Use rigid foam when you need real conductive R-value, a finished look, or a door that is exposed to cold winters. Foam is the safer default because foil blocks radiant heat and adds little true R-value.
How thick should garage-door insulation be?
One inch of rigid foam is the usual starting point: about R-5 for XPS and about R-6 for polyisocyanurate. Thicker boards add R-value but take up clearance the door needs to travel, so anything past about 2 inches needs careful checking. Precut batting kits commonly come at R-8. Match thickness to the cavity between the rails, not to the R-number on the box.
Can I install garage-door insulation myself?
Yes. Most homeowners finish a two-car door in three to four hours with a tape measure, utility knife, and adhesive or retainer pins. The one job to leave alone is adjusting torsion spring tension. Test the balance by lifting the door halfway and letting go, and if it drops or races, call a door technician to re-tension the spring.
How do I know if my garage door is properly insulated?
Test the seals first: with the lights off, look for daylight around the jambs and under the threshold, and pull a sheet of paper around the frame to find remaining drafts. Then check the panels themselves, looking for gaps or lifted edges. For temperatures, log the garage high and low for a week before and a week after. One r/HomeImprovement owner with a glass-panel door reported highs dropping from the low 80s to about 74.
Where to Start
Start at the frame, not the panels. Replace the doorstop weather stripping and crimp in a new bottom seal, then check for daylight and drafts again. Once the leaks are gone, insulate each panel with a quarter-inch of clearance, keep every sensor and lite clear, and finish with the half-way lift test. If the door holds, you are done; if it does not, a technician adjusts the spring and you keep the insulation.
If the goal is a workshop, gym, or living space rather than a warmer garage, a door alone will not get you there. Insulating the walls and ceiling around the door is what actually holds the temperature steady, and it is worth doing in the same project.