Adding insulation to an attic is mostly about airflow, moisture and steady coverage rather than piling material in. The order matters: find and seal air leaks, protect the vents, then fill to the depth your climate zone calls for. Most homeowners finish the ceiling in a weekend, plus a few days for drying out and sealing.
The catch is that insulation hides its own mistakes. A soffit blocked with cellulose looks finished and quietly rots the roof deck, and a batt shoved into a bay too tight looks tidy while losing a chunk of its rating. Check the attic before you touch it, wear real protective gear, and go slowly around anything electrical.
Attics are usually the biggest source of heat loss in a house, which is why this one project pays back faster than almost anything else a homeowner can do. That is the short version of how to add insulation to an attic: seal first, protect every vent and fixture, then fill evenly. Below is the whole process in the order that actually works.
Table of Contents
- What You Need
- Safety gear
- Materials
- Tools
- Step-by-Step
- How to Prepare and Inspect Your Attic
- How to Choose the Right Attic Insulation
- How to Install Batt Insulation Between Joists
- How to Install Loose-Fill Insulation Evenly
- How to Add Insulation Without Blocking Airflow
- How to Check That the Insulation Is Done Right
- Common DIY Insulation Mistakes and How to Fix Them
- Safety Rules and When to Hire a Pro
- Frequently Asked Questions
- Can I just add insulation over the insulation I already have?
- What is the 7 by 7 rule for attic ventilation?
- How much does it cost to add extra attic insulation?
- When is the best time of year to insulate an attic?
- Should I use blown-in or batt insulation in my attic?
- Can you put too much insulation in an attic?
- Conclusion
What You Need

Gather everything before climbing up. Attic work is unpleasant enough without a trip back down the ladder for the one thing you forgot.
Safety gear
- N95 or better dust respirator, plus safety glasses with side shields
- Long sleeves, long pants, gloves and a knit cap, because loose fill finds every gap in your clothing
- Sturdy shoes with good grip, plus boards or pre-cut plywood to stand on so you never walk on the ceiling drywall
- A bright headlamp and a second light source, since attic light is poor even on a clear day
- A buddy. Attic work alone is a bad bet, both for falls and for managing a blower hose.
Materials
- Insulation at the R-value your climate zone requires (see the choosing section below)
- Exterior-grade sealant or fire block caulk for sealing, and expanding spray foam in larger gaps you cannot caulk
- Rafter vent baffles or wind blocking for every bay along the eaves
- Weatherstripping and rigid foam board for the attic hatch
- Wire mesh or a metal barrier to keep insulation away from unapproved fixtures and chimneys
- Plywood or OSB walkway panels if you want storage or regular access afterward
Tools
- Tape measure, utility knife, straightedge and a marker for depth lines
- Staple gun and long staples for batt insulation
- A rented blower machine with the hose, coupler and agitator for loose fill
- Shop vac, work light and a camera on an extension stick so you can look behind ductwork
How much you buy depends on what is up there now and what your climate zone wants. If the existing fill is at or barely above the joists and stays even, you usually need less than a full empty cavity. Where it is patchy or bare, plan for the full depth. Cellulose settles, often by 10 to 20 percent over time, so buying a little extra is sensible. Most suppliers publish a bag coverage chart by square footage and target depth; measure your floor area, use the chart, and add your margin for settling.
Match the material to how the space is used. A walk-up attic with stored boxes wants loose fill and walkway panels, because a person can step between the joists. An attic someone will finish later wants raised platforms regardless of material. A conditioned or finished attic changes the rules completely, because you are insulating the roof deck instead of the floor and the ventilation requirements invert.
Step-by-Step
How to Prepare and Inspect Your Attic
Spend real time up here before you disturb a thing. You are looking for three categories of problem: hazards, moisture, and gaps in the existing envelope.
Wear your respirator from the moment you open the hatch. Decades of dust, mouse droppings and whatever the old insulation was are all in that air, and you will stir all of it up.
- Look for vermiculite. Loose gray, silvery, granular material in older homes is often vermiculite that may contain asbestos. Do not touch it, do not sweep it, and do not blow air across it. Stop and get it tested by a professional before anything else.
- Find old wiring. Knob-and-tube wiring, cloth-sheathed cable or aluminum branch wiring are all reasons to slow down and involve an electrician. Buried wiring is the single most common attic mistake, and it is the easiest one to avoid.
- Identify recessed lights. A can marked IC is rated for insulation contact. Anything unmarked or marked non-IC must keep a 3 inch clearance of insulation around it, or be replaced with an IC-rated fixture before you cover anything.
- Check for water. Look for staining around chimney sides, around plumbing stacks and along the eaves, and for daylight through roof decking. Daylight means failed caulking and rot behind it.
- Look for pests. Droppings, chewed wiring and insulation pulled into a wall cavity all mean the infestation gets resolved first.
- Map what is there. Note ducts, bathroom and kitchen exhaust fans, chimneys, flues, and any vent that already exists. Photograph the bays before you disturb them.
If you find asbestos-suspect material, active pests, damaged roofing, or wiring that needs work, stop and call the appropriate professional before you install anything. Covering a problem with insulation makes it worse and harder to find later.
Once it is clear, decide whether you are adding to existing insulation or starting over. Uniform old fill at or above joist height, dry and clean, can usually be topped up. Loose, contaminated or settled material should come out, and that is a much bigger job than topping up.
How to Choose the Right Attic Insulation
Three materials cover almost every attic. They install completely differently and suit different homeowners, so pick on your attic and your comfort level, not on a brand list.
| Insulation | R-value per inch | Install method | Best for | Watch out for |
|---|---|---|---|---|
| Fiberglass batts | About R-3 to R-4 | Cut, fit and staple between joists | Small attics, irregular shapes, anyone new to insulation work | Must stay uncompressed; gaps at every edge |
| Loose fill (cellulose or fiberglass) | About R-3 to R-4 | Hose from a blower machine to marked depth | Larger open attics, topping up uneven fill, whole-house projects | Settles, needs depth markers, needs a helper at the hose |
| Spray foam | About R-6 to R-7 | Sprayed in place by a trained applicator | Odd shapes, sealing and insulating at once, rim joists | Professional equipment, not a weekend project |
Batts are the forgiving option for a first-timer because mistakes show immediately and cost nothing to fix. Loose fill covers more square footage per hour and handles messy attic geometry far better, but a hose full of material is a two-person job. Spray foam seals and insulates in one pass, which is why it wins in tight, complicated spaces, and why most of it is applied by contractors.
Target depth follows your climate zone, not your preference. Roughly, moderate and mixed climates want around R-38 to R-49, cold and very cold climates want R-49 to R-60. Energy codes list the exact floor requirement by zone, and in 2026 the IECC still uses the same climate zone map your local code is based on. Check your state energy office or your utility, which often offers rebates or free assessments in exchange for a newer R-value.
On facing: faced batts carry a vapor-retarding facing and work well in cold climates. Unfaced batts and loose fill are the right choice in warm or mixed-humidity zones, where a trapped vapor barrier can push condensation into the assembly. If you are unsure, ask a local building science advisor rather than guessing, because a misplaced vapor barrier does more harm than the insulation it wraps.
How to Install Batt Insulation Between Joists
Batt work is a puzzle. Measure first, cut second, and never trim a batt to fit a bay that is smaller than the roll.
- Choose the width. Walls usually take a 15 inch or 16 inch batt for a 2×4 or 2×6 wall cavity. Ceiling joists are commonly 2×4, so use a 15 inch bat and let the sides rest against the joist faces rather than jamming them tight.
- Cut to length. Cut each batt slightly longer than the cavity is wide, so the ends press slightly against the framing. Push it in, then pull the paper facing up and staple it to the joist faces every few inches.
- Keep the full loft. If the paper is cut back to fit, the batt loses much of its rating. This is the classic compressed-batt mistake.
- Trim around obstacles. Split the batt with a utility knife and cut two separate pieces rather than trimming around a pipe or a wire in one piece. Never paper-wrap a hot pipe or a flue.
- Respect the lights. Slice each batt into quadrants and pull the center section out around a recessed fixture. Leave the 3 inch clearance for any non-IC can and add a barrier if you cannot maintain it.
- Leave bays alone. If you need attic access, mark full-depth, full-width bays with permanent markers on the joists and skip them. Filling them later means pulling all of it back out.
- Fill around ducts. Cut batts to fit tightly around ductwork rather than pushing them into the duct. Where a duct needs a heat barrier, use foil-faced or a listed wrap, not loose batt.
Check the same rule for anything white and round poking through the floor: keep a clearance and a barrier rather than burying it. Once the batts are in, put an unfaced layer on top and run it perpendicular to the joists. That second layer covers the thermal bridging where the batts cross the framing, which is the whole reason for cross-hatching rather than simply going deeper in one direction.
How to Install Loose-Fill Insulation Evenly
Loose fill is fast and forgiving, and it hides every mistake until the winter heating bill arrives. The technique is simple: mark your depth, hold it, verify it.
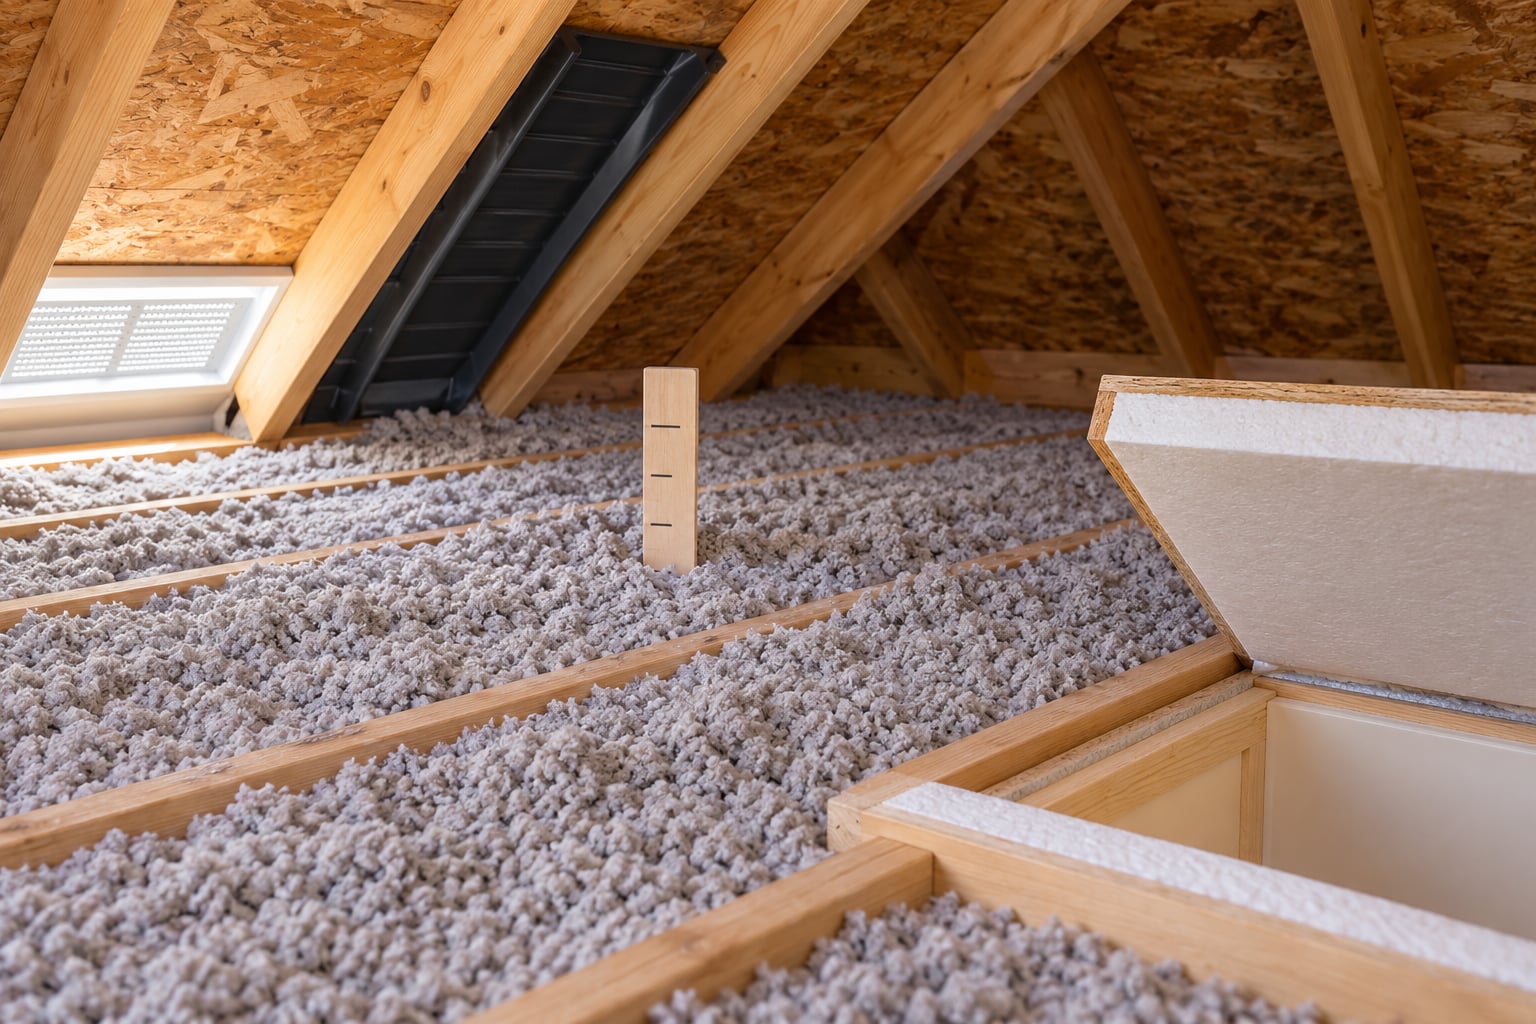
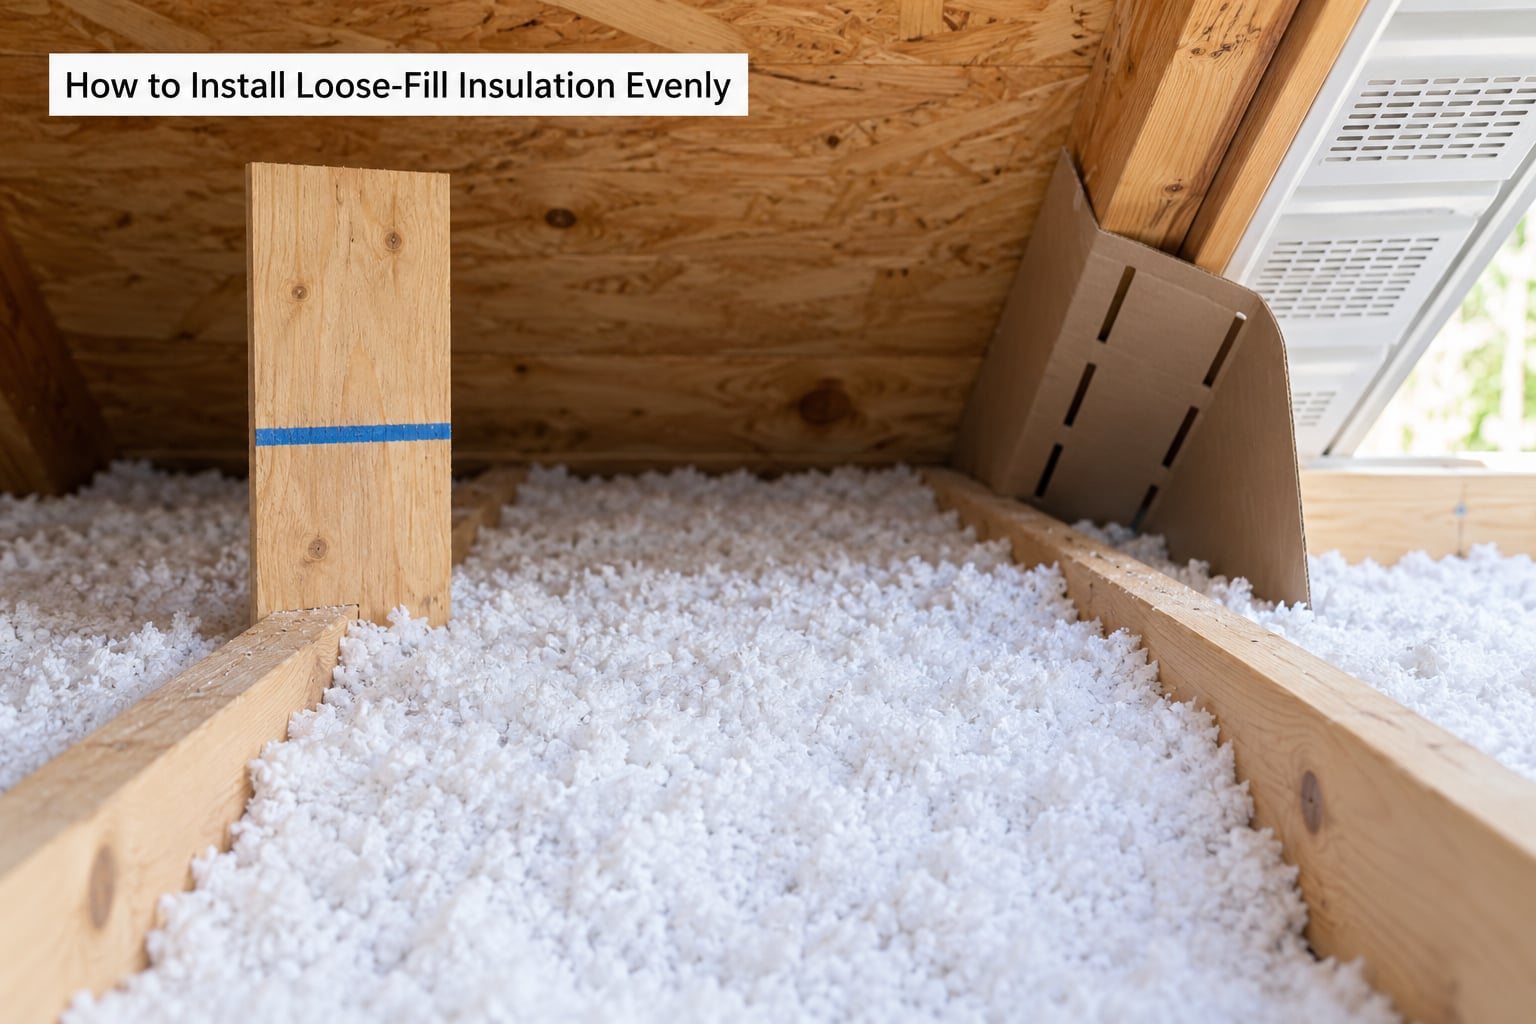
Before you blow anything, mark reference lines on the joist faces or on the sheathing so you have something to measure against. Nail a depth marker board to a joist and set the top of it at your target height, so the hose operator can glance down and see the level without crouching.
- Build a working platform if the joists are spaced widely enough that you would be straddling, or lay walkway boards as you go.
- Set the coupler and agitator per the machine instructions. Clumpy material in the hose means the agitator is not fluffing it, which produces uneven piles and clogs.
- Work in one direction across the attic, sweeping the hose side to side, rather than dumping material in one spot and pushing it around later.
- Fill bays first, then the perimeter, keeping a steady buffer away from the soffit vents so nothing spills toward them.
- Check depth in several places, including the corners and the bays next to gable walls. Edge bays almost always come up short.
- Level roughly with a rake, then re-measure. Rake marks across the surface show exactly where the high spots are.
Cellulose compacts as it dries and cools, so the depth you read on installation day is not the depth you will have in a year. For that reason, blowing slightly above your target line is common practice, and keeping a few extra bags for a top-up later is a good idea. Mark the bays you skipped for access, and keep a clear path to any duct or equipment so the next inspection is not a dig.
How to Add Insulation Without Blocking Airflow
Ventilation is what keeps an attic’s moisture from condensing on the roof deck in cold weather. Filling it carelessly traps that moisture against the sheathing, and the damage shows up years later as rot.
Confirm first that your attic is actually meant to be ventilated. Many homes have mixed systems, and some newer airtight attics are unvented by design. If soffit and ridge vents are present, keep the channel between them open end to end.
- Install rafter vents or baffles. Push a flexible baffle into the gap between the roof sheathing and the wall plate in every bay along the eave, so the intake air has a protected path. A simple cardboard baffle works; a rigid one holds its shape better in deep bays.
- Add wind blocking. On windy sites, air can blow past the baffle and knock loose fill out of the soffit area. A strip of plywood, a cardboard baffle or a properly fastened sheet closes that off.
- Build a dam, not a plug. At the ridge, leave insulation below the roof line rather than piling it into the ridge vent channel.
- Keep gable vents open. Where gable vents exist, leave a clear gap around them.
- Keep the air barrier above the fill. A layer of air-impermeable sheeting, drywall or a rigid foam air barrier above the insulation keeps wind from blowing through it, which is a large part of why blown insulation underperforms in real homes.
Bathroom and kitchen exhaust fans need the same attention. Ducting them into the attic dumps warm, moisture-laden air onto cold sheathing, and it will condense. Run a duct to an exterior gable end or roof vent instead, or use a fan with a timer on a humidistat. Check the duct run while you are up there, since so many of them terminate in a duct box that leads nowhere.
How to Check That the Insulation Is Done Right
Walk the attic with a tape measure and answer these before you call it finished.
- Depth reads consistently above your reference line, at the joist edges and in the corners, not just in the middle of bays.
- Batts stand at full loft with no bowed or flattened edges, and no gaps wider than a few inches at the framing.
- No bay is packed tight against the soffit, and the baffles are visible where they should be.
- Recessed fixtures are either IC-rated with insulation touching them or surrounded by a clear 3 inch space and a barrier.
- No wiring is buried, no junction boxes are covered, and no cable is pinched or nicked.
- Clearance rules around chimneys and flues are met, and any heat-producing fixture has its listed clearance or a barrier.
- Access bays and walkway panels are in place, and you can reach the HVAC equipment, a bath fan duct and any electrical panel without moving insulation.
Run a blower door test if you want to see how your air sealing performed rather than guess. The same test before and after the project gives you a number instead of an opinion. Beyond that, a home energy assessment is worth it when the attic has unusual geometry, when insulation is going on over a vaulted or complicated roof, or when you are converting a vented attic into living space.
Common DIY Insulation Mistakes and How to Fix Them
Homeowner forums repeat the same handful of failures over and over. Most are cheap to fix while the insulation is still movable.
- Blocking the soffit vents. The most common mistake by a distance, and the one with the worst long-term consequences. Fix: pull the fill back from the eave, fit baffles in every bay, and add wind blocking in exposed locations.
- Compressing batts to fit. A squashed batt can lose roughly a third of its rated performance, and it is invisible from below. Fix: cut batts to length instead, or rip out the pieces that do not fit full loft.
- Insulating before sealing. Loose fill stops air far better than batts do, but neither performs to rating in a leaky attic. Fix: seal top plates, penetrations and rim joists with appropriate sealant and expanding foam before any fill goes in.
- Skipping the perpendicular second layer. One layer between joists still loses heat through every stud and joist. Fix: add an unfaced layer across the top at a right angle.
- Filling the access bays. The attic becomes a space you cannot inspect, and a future leak goes unnoticed for years. Fix: mark full-depth bays permanently and leave them empty.
- Covering non-IC recessed lights or old wiring. This is a fire risk, not a comfort issue. Fix: fit IC-rated fixtures or maintain the required 3 inch clearance with a barrier.
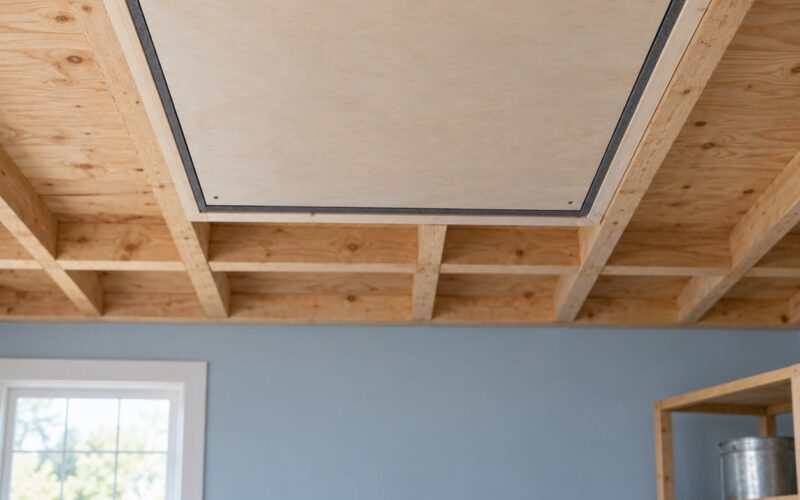
- Ignoring the attic hatch. A hollow hatch door leaks more heat than most walls. Fix: build a rigid foam box above it with foam, and add weatherstripping around the frame.
- Under-buying material. Running short mid-job wastes an afternoon. Fix: measure the floor area, use the supplier coverage chart for your depth, and add a margin for settling.
- Running the blower hose alone. Fine material on a ladder, with a machine running, is a bad combination. Fix: one person feeds, one person places.
On plywood over loose fill: it can work as a walkway if it is supported so it does not press into the insulation and if the clearances are maintained, but it will hold cold spots under it. A small platform raised above the fill, with its own joists, protects the insulation better. Full decking is usually a separate project with its own ventilation and moisture implications.
Safety Rules and When to Hire a Pro
Attics injure people in boring ways. Head injuries, falls through a ceiling joist and dust inhalation are all common, and all are avoidable.
- Step only on joists, decking or your own boards. A ceiling drywall is not a floor, however convincing it looks.
- Never work alone in a dark attic.
- Put on the respirator before you move anything, and take a break if you are still coughing an hour later.
- Do not work around exposed or questionable wiring. Knob-and-tube, cloth-sheathed and aluminum branch circuits need an electrician’s opinion before anything is laid over them.
- Do not disturb vermiculite or any suspect loose material without professional testing.
- Watch heat. Attics in summer can exceed 120 F with no wind, and heat stress builds fast in a heavy respirator.
- Keep required clearances around chimneys, flues, skylights and any other heat-producing fixture, or install the listed barrier.
Hire a qualified contractor when the attic contains asbestos-suspect vermiculite, when there is active rot or a roof leak, when pests need treatment, when wiring needs to be changed or rerouted, when the space is being converted to living area, when you need the roof deck insulated instead of the floor, or when you simply cannot get safe footing. Spray foam also falls here, since the equipment and the training are the product.
Frequently Asked Questions
Can I just add insulation over the insulation I already have?
Usually yes, if the existing fill is even, dry, clean and free of pests, and sits at or above the joist depth. Uneven or settled material should be pulled back and redistributed before you add more. Some older materials such as vermiculite should be tested for asbestos and removed by a professional, and any wiring or recessed lighting issues need resolving first. Adding over top without fixing uneven coverage just builds thin spots at a higher level.
What is the 7 by 7 rule for attic ventilation?
It is a quick check that soffit intake vents have a clear air path into the attic. Run a tape measure or length of string from the soffit opening into the rafter bay: if you can travel about 7 inches through the bay and about 7 feet into the attic space, the channel is open. Anything shorter usually means insulation or wind-blown debris is blocking intake, and that path needs to be cleared before the attic can vent moisture properly.
How much does it cost to add extra attic insulation?
Prices vary widely by region, material and how much preparation the attic needs, so treat any figure as a rough guide rather than a quote. Material is only part of it. Removing old insulation, sealing leaks, fitting baffles around every bay and building a proper hatch box often cost more than the insulation itself. A blower machine rental and the extra bags for settling add up too. Get two or three local quotes and ask what each one includes.
When is the best time of year to insulate an attic?
Late fall through early spring is the comfortable window, because attic temperatures stay closer to outdoor temperatures and you avoid both summer heat and winter cold. Any time works, though, as long as the roof is dry and you can work safely. Seal the roof and get any leaks fixed before you start. In a hot climate, an early morning start in summer is workable if you keep the attic vented and take frequent cooling breaks.
Should I use blown-in or batt insulation in my attic?
Use batts for small or awkwardly shaped attics, and for your first attempt, because every mistake is visible and cheap to fix. Use loose fill for larger open spaces, for topping up uneven existing coverage, and when you want the fastest square footage per hour. Batts must stay uncompressed or they lose a lot of their rating. Loose fill settles over time, needs depth markers to stay even, and takes two people. Neither choice matters more than sealing the air leaks first.
Can you put too much insulation in an attic?
Yes, and the two common ways are burying vent channels and pressing on top of fragile fixtures. Too much loose fill around the eaves blocks soffit intake, which traps moisture against the roof deck and can cause rot. Too much against a non-IC recessed light, a chimney or old wiring is a fire risk. Use depth markers rather than eyeballing it, keep the required clearances, and leave access bays marked and empty.
Conclusion
Start by opening the hatch, putting on your respirator, and walking the attic before you move anything. That inspection decides whether this is a weekend project or a call to a professional.
Once it is clear, the order never changes: seal the air leaks, fit baffles and protect every vent and fixture, then fill evenly to the depth your climate zone requires and add the perpendicular second layer. Check your local energy code or utility guidance for the target R-value in 2026, and measure twice before you order a single bag.