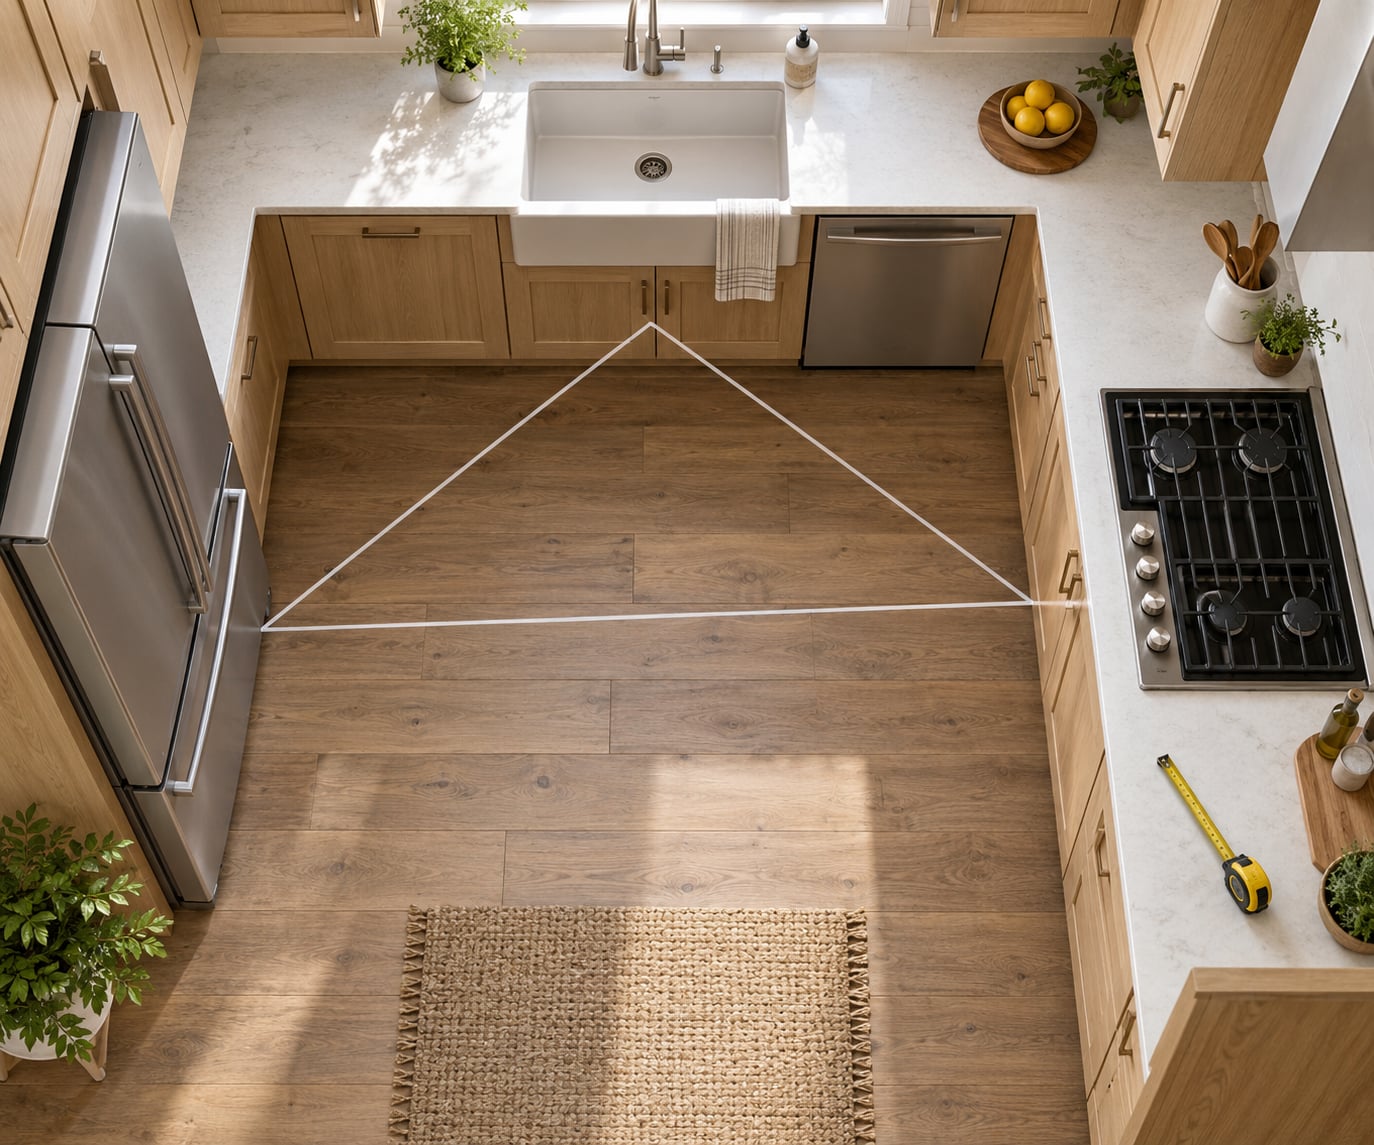
The kitchen work triangle is a layout rule that connects the sink, the cooktop and the refrigerator so the distance you walk while cooking stays short and stays out of the way of everyone else in the house. Those three points are called work centres, and the lines between them form an imaginary triangle drawn on your floor plan. It has been the standard test for kitchen design since the 1940s, and most remodelers still check it before anything else.
This is the kitchen work triangle explained without the design jargon: what each number actually means, how to measure the triangle in your own kitchen, and where the rule earns its keep.
Table of Contents
- What Is the Kitchen Work Triangle?
- Kitchen work triangle explained: the key measurement rules at a glance
- How Should the Three Work Centers Be Arranged?
- What Is the Ideal Distance for a Kitchen Work Triangle?
- How to Measure Your Existing Kitchen Work Triangle
- Step 1: Mark the three work centres
- Step 2: Measure each leg
- Step 3: Add the three legs
- Step 4: Check the rules the tape does not cover
- What Makes a Work Triangle Feel Efficient?
- Do Modern Kitchens Still Need a Work Triangle?
- Common Work Triangle Mistakes to Avoid
- How to Improve the Layout Without a Full Remodel
- Frequently Asked Questions
- What are the three points of a kitchen work triangle?
- How far apart should the sink, stove, and refrigerator be?
- Is the kitchen work triangle an outdated design rule?
- Should the kitchen work triangle include an island?
- What are the most common kitchen work triangle mistakes?
- Conclusion: Start With Your Three Work Centers
What Is the Kitchen Work Triangle?
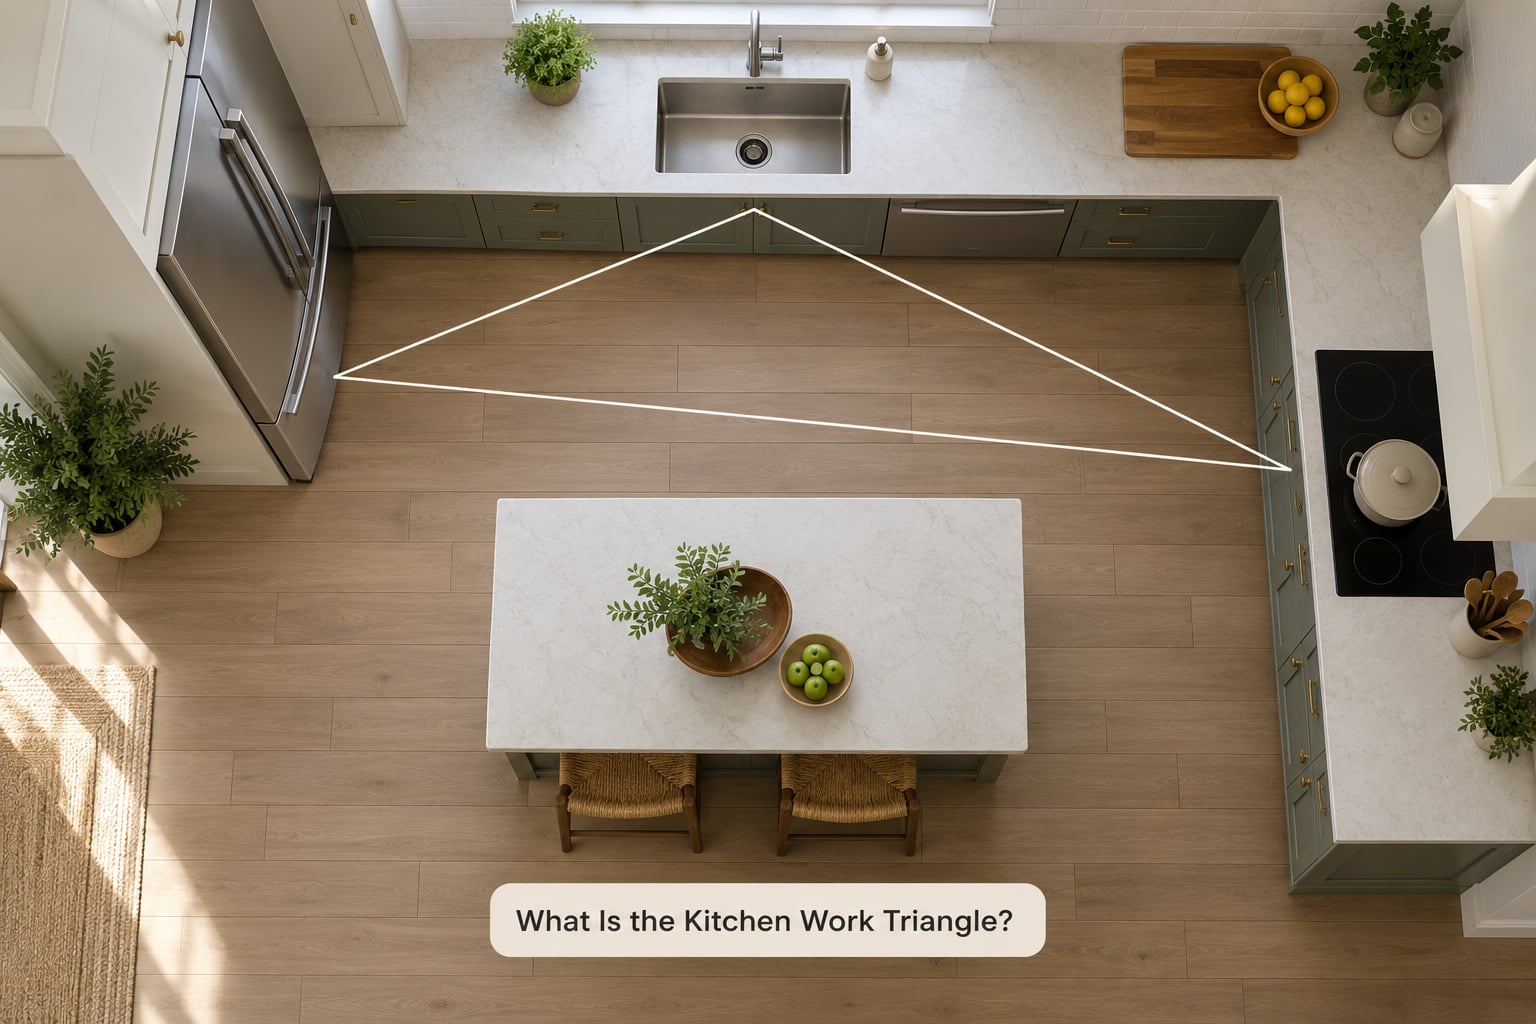
Three work centres, three legs, one total distance. That is the whole idea. You walk from the refrigerator to the sink, from the sink to the cooktop, and from the cooktop back to the refrigerator, and the triangle measures how far that loop takes you.
| Work centre | What it does | Movement it creates |
|---|---|---|
| Refrigerator (storage centre) | Where ingredients are kept and meals start and end | Longest walk of the three legs in most kitchens |
| Sink (cleanup centre) | Washing produce, filling pots, clearing up | Central point you pass through repeatedly |
| Cooktop or range (cooking centre) | Chopping, boiling, frying, plating | Standing point where you spend the most time |
The origin story matters because it explains the obsession with numbers. The rule came out of time-and-motion efficiency work associated with the University of Illinois School of Architecture in the 1940s, and it is still carried in National Kitchen and Bath Association guidelines. It is a design guideline, not a code requirement.
Kitchen work triangle explained: the key measurement rules at a glance
- Each individual leg should measure 4 to 9 feet, which is 1,200 to 2,700 millimetres.
- The three legs together should total 13 to 26 feet, which is roughly 4,000 to 7,900 millimetres.
- No island, peninsula or tall cabinet should cut into a leg by more than 12 inches, about 300 millimetres.
- No leg should cross a main path through the kitchen, such as the route from the front door to the dining table.
How Should the Three Work Centers Be Arranged?
Think about order before you think about distance. The natural flow is refrigerator, then sink, then cooktop, then back to the refrigerator. Groceries get dropped at the fridge, produce gets washed, pans go on the hob, and the loop closes when finished plates travel back to the sink and the fridge.
That order is also why the sink is usually the middle of the triangle. It is the point you return to more than any other, so it should not be jammed into a dead corner where you step sideways to reach it.
| Work centre | Best position | Counter space to keep clear |
|---|---|---|
| Refrigerator | At one end of the run, with the door swing clear of walkways | 18 to 24 inches of landing space beside it |
| Sink | Centrally placed, near the cooktop but not next to it | At least 24 inches on one side for a board |
| Cooktop | With an easy view across the room, away from a doorway | At least 12 inches on one side, 15 inches on the other |
Between the sink and the cooktop you want a run of countertop roughly 24 to 36 inches, which is 600 to 900 millimetres. That strip is where you chop, drain and set down hot pans. Cut it short and a hot pan ends up on the same board you were cutting raw chicken on.
In a small or open kitchen the same logic works at a smaller scale. A galley kitchen can hold a tidy triangle of maybe 4, 4 and 5 feet, and that is genuinely fine. A cramped triangle that nobody else walks through beats a spacious one where a side door cuts straight across it.
What Is the Ideal Distance for a Kitchen Work Triangle?
Each leg should be between 4 and 9 feet, and the total of all three legs should fall between 13 and 26 feet. Here are the same numbers in both measurement systems, because most suppliers still quote one and most other countries quote the other.
| Measurement | Imperial | Metric | Why it matters |
|---|---|---|---|
| Minimum length of one leg | 4 feet | 1,200 mm | Shorter than this and you are bumping into the next appliance |
| Maximum length of one leg | 9 feet | 2,700 mm | Longer than this and the walk starts to feel like crossing the room |
| Minimum total of all three legs | 13 feet | 4,000 mm | Below this the three centres are crowded together |
| Maximum total of all three legs | 26 feet | 7,900 mm | Above this you are doing a lot of walking to cook |
| Maximum island intrusion into a leg | 12 inches | 300 mm | An island may sit inside the triangle, but only this far into it |
| Walkway past a single cook | 42 inches | 1,070 mm | Room to open an oven door and still pass |
| Walkway where two people work | 48 inches | 1,220 mm | Room for one person to pass behind another |
These are planning guidelines rather than strict building code. A cabinet installer will not fail a permit because your leg measures 10 feet, and no inspector will measure your sink for you. The numbers exist so that two kitchens with the same square footage feel different to work in, and one of them is the one you want.
Obstacles are where the real failures hide. An island is the usual culprit: it is allowed to sit inside the triangle, but it may not project more than 12 inches into any leg, and the walkway between island and counter should still be 42 inches. A wall, a peninsula or a tall pantry that crosses a leg has the same effect as a permanent island, and a corner is not floor space at all.
How to Measure Your Existing Kitchen Work Triangle
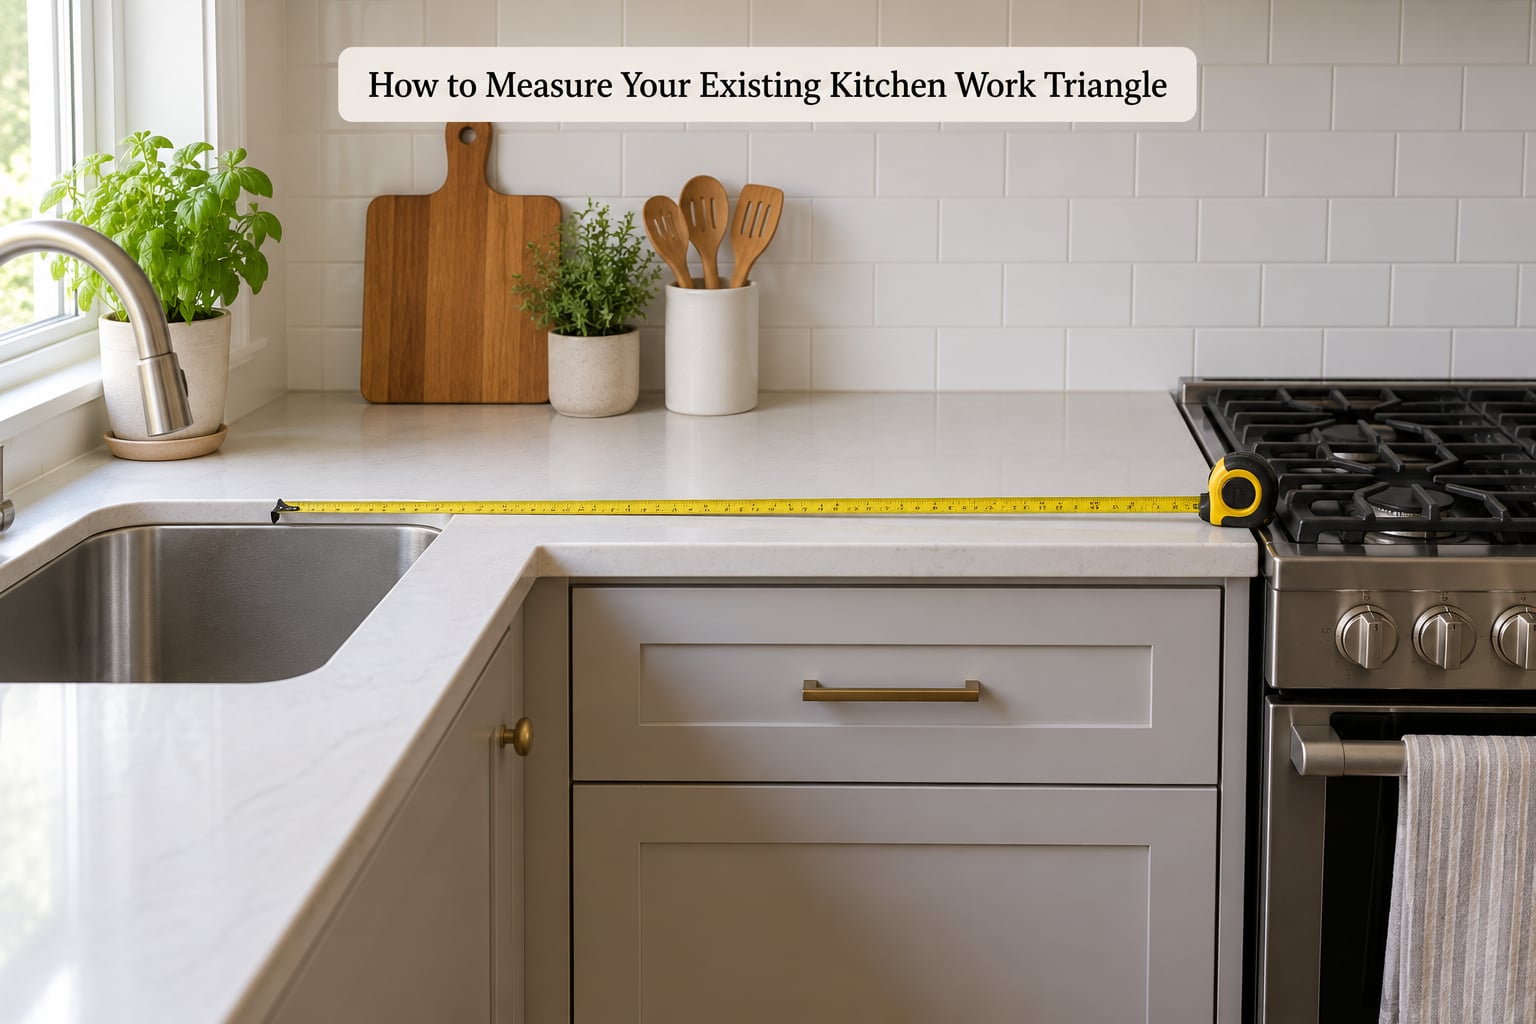
You need a tape measure, a pencil and about ten minutes. Work on the floor plan or measure across the room in a straight line, whichever is easier.
Step 1: Mark the three work centres
Stand at each appliance and mark the point where you naturally stand to use it: the front centre of the refrigerator door, the front centre of the sink cabinet, the front centre of the cooktop. These are the three vertices, not the far corners of the appliances.
Step 2: Measure each leg
Measure refrigerator to sink, sink to cooktop, and cooktop back to refrigerator. Write the three numbers down straight away, because a tape measure lying on the floor invites you to forget.
Step 3: Add the three legs
Worked example from a real 10 by 14 foot kitchen: 5 feet from the fridge to the sink, 6 feet from the sink to the range, 7 feet from the range back to the fridge. That totals 18 feet, which sits comfortably inside the 13 to 26 foot window, and every leg clears the 4 foot minimum.
Step 4: Check the rules the tape does not cover
Now the part people skip. Does any leg cross a doorway, a path from the front door, or the route to the dining table? Does the refrigerator door open into someone’s path? Does an island push more than 12 inches into a leg? A kitchen can pass every number and still be a nuisance, and this is the step that catches it.
A failing example looks like this: fridge to sink 4 feet, sink to cooktop 5 feet, cooktop to fridge 21 feet because the range sits at the far end of a long galley. The total is 30 feet, well past the 26 foot ceiling, and the 21 foot leg is the fridge door all but touching the cooktop. Pulling the refrigerator to the end of the same wall, opposite the range, fixes it in an afternoon.
What Makes a Work Triangle Feel Efficient?
Distance is the number you can measure, but it is not the whole feeling. In the kitchen work triangle explained above, those distances are only the first of four things that decide whether a kitchen actually works day to day.
First, unobstructed walking space. If you have to turn sideways to get past an open dishwasher, the distances on paper stopped meaning anything. Leave 42 inches in front of every open appliance door.
Second, landing area. Every work centre needs countertop next to it for the moment when a hand is full: grocery bags at the fridge, a colander by the sink, a hot pan beside the hob. NKBA guidance is 24 inches of landing space at the refrigerator and 12 to 15 inches on at least one side of the cooktop.
Third, total counter capacity. A generous triangle still feels cramped if there is nowhere to put a hot dish, and most households want more uninterrupted counter than the design brief usually allows. Count the continuous runs of at least 24 inches, not the square footage.
Fourth, your actual habits. Cook one big meal on a Sunday and the sink to cooktop leg matters more than anything. Bake on Saturdays and a small oven and a corner worktop outrank a perfect triangle.
Compare two layouts. In a compact L-shaped kitchen, a 4 foot fridge-to-sink leg and a 5 foot sink-to-hob leg, a single cook never crosses a doorway, and everything happens inside one corner, and the kitchen feels fast. Add an island that pushes 30 inches into the sink-to-hob leg and a walkway pinched to 36 inches, and the same cook now zigzags around a peninsula, opens the dishwasher into the walkway, and carries hot pans past a bin. Same appliances, same square footage, a much worse kitchen.
Do Modern Kitchens Still Need a Work Triangle?
Mostly yes, but not as the only test. The rule was built around a single cook moving through a single loop, and a lot of kitchens no longer match that description.
| Layout | Triangle shape | How to apply it |
|---|---|---|
| Single-wall (straight line) | Flat, very compressed | Order matters most: fridge, sink, hob, left to right. Keep legs as even as possible. |
| Galley (two parallel runs) | Long and narrow | Put the fridge at one end and the hob at the other so the sink sits mid-way. Avoid a third centre across the aisle. |
| L-shaped | Right-angled, two legs along walls | The most forgiving shape. The third leg crosses the open floor, so keep it clear. |
| U-shaped | Three sides, efficient but enclosing | Works well, though a corner sink creates a dead length of counter. Watch corner cabinet doors. |
| G-shaped with peninsula | Small triangle, heavily enclosed | Needs real discipline. Keep a 42 inch walkway and check that the peninsula does not block the triangle. |
| Open plan with island | Depends on island position | The island becomes a fourth point. Most families use it as prep and plating, not as a work centre. |
Where the triangle genuinely weakens is in a large open plan with an island and two people cooking at once. Designers increasingly argue for work zones instead: a cleanup zone with the sink and dishwasher, a prep zone on the island, a cooking zone with the range and hood, a serving zone near the dining end, and a storage zone on the pantry wall. Zones let each person work independently. A single triangle forces everyone into the same loop.
Designers and homeowners weighing the two approaches often say the same thing: a rigid triangle kills the workflow in a big luxury space, and an island placed carelessly puts the triangle in the middle of a path of travel. Both complaints are fair, and both are about traffic rather than distance. The practical answer is to use the triangle as your first check and then layer zones on top of it.
One related rule you may see is the 3 by 4 kitchen rule: a kitchen measuring at least 3 feet by 4 feet, which allows a cook to stand with doors open and still pass. It is a minimum size guideline, not a triangle measurement, but the clearance thinking behind it is the same.
Common Work Triangle Mistakes to Avoid
Each of these shows up in real remodels, and each has a straightforward design response.
A leg crosses a busy walkway. This is the most common fault and the one homeowners notice daily. A sink or hob that lands between the front door and the dining table means someone walks through your cooking space every time a guest arrives. Response: move the centre off the traffic path, or reroute the traffic with a peninsula or a wider entry.
The refrigerator blocks the sink. A door that opens straight across the sink, or a fridge handle that catches your hip as you carry a heavy pot past it, ruins the cleanup leg. Response: leave the full swing of the fridge door clear and at least 42 inches of walkway in front of the sink.
The island extends too far into the triangle. Islands are allowed inside the triangle, but only by 12 inches into any leg. Response: shorten the island, shift it, or use it as a fourth work centre rather than pushing it into the loop.
Not enough landing space. A technically perfect triangle with nowhere to set down a hot pan fails the first time you cook. Response: add counter beside the hob and the fridge before adding counter anywhere decorative.
Treating a corner or doorway as floor space. A corner cannot hold a walkway, and a doorway needs clearance to open. Response: measure walkways along the actual path a person takes between the three centres, not the straight line on the drawing.
How to Improve the Layout Without a Full Remodel
If you are renting, or the cabinets are staying, most of the benefit comes from adjusting what sits on the floor and on the counter rather than moving plumbing and gas.
Reset the countertop first. Clearing the sink of dishes and small appliances instantly gives back the landing space the design assumed, and it makes an existing triangle feel longer. Give each work centre one dedicated board or tray so prep materials have a home.
Reposition the small appliances. A coffee maker sitting in the middle of the prep run is chopping space stolen from your cooktop landing area. Move the toaster, coffee machine and stand mixer to a side counter or a rolling cart, and keep the island purely for prep.
Check the fridge door swing. If the door hits a wall or a chair, you are losing your largest leg every time you unload groceries. Moving the fridge within the same alcove, or swapping it for a slightly narrower model, sometimes fixes the whole loop.
Add movable storage. A slim trolley beside the sink gives you a place to land washing-up, and it rolls away when two people need to pass. Under-cabinet pull-out drawers in the existing run add storage without touching the floor plan.
Improve the lighting, which costs nothing structurally. Under-cabinet task lighting over the prep run and the sink removes the shadows that make a tight triangle feel tighter, and it makes a corner counter usable at night.
Finally, add one compact secondary prep surface if you cook for a crowd. A slim cart, a butcher block on a narrow run, or a fold-down surface near the hob takes the pressure off the triangle without a remodel. If you do plan a remodel, decide the triangle before the cabinet drawings are finalised; moving a drain or a gas line later is a different conversation entirely.
Frequently Asked Questions
What are the three points of a kitchen work triangle?
The three points are the sink, the cooktop or range, and the refrigerator, each treated as a work centre. The vertices sit at the front centre of each appliance, where a cook naturally stands. Connecting the three gives you the legs of the kitchen work triangle, and the total of those legs tells you how far you walk per loop.
How far apart should the sink, stove, and refrigerator be?
Each leg should measure 4 to 9 feet, which is 1,200 to 2,700 millimetres. The three legs combined should total 13 to 26 feet, roughly 4,000 to 7,900 millimetres. These are NKBA planning guidelines rather than code requirements, and an island may project no more than 12 inches into any leg.
Is the kitchen work triangle an outdated design rule?
Not outdated, but incomplete. The kitchen work triangle explained in most textbooks assumes one cook moving through one loop, and it still works well in galley, L-shaped and U-shaped kitchens. In a large open plan with an island and two cooks, designers favour work zones instead, because zones let two people work at once without fighting over the same path.
Should the kitchen work triangle include an island?
An island can sit inside the kitchen work triangle, but it may not extend more than 12 inches, about 300 millimetres, into any of the three legs. The walkway between the island and the counter should stay at 42 inches for one cook, or 48 inches where two people regularly work alongside each other.
What are the most common kitchen work triangle mistakes?
The most common are a leg crossing a busy walkway, a refrigerator door opening across the sink, an island pushing too far into a leg, too little landing space beside the cooktop or fridge, and treating a corner or doorway as usable floor space. Each has a simple fix: clear the traffic path, respect the door swing, and add counter where you set things down.
Conclusion: Start With Your Three Work Centers
The kitchen work triangle explained in one line: measure sink to cooktop, cooktop to refrigerator, and refrigerator to sink, and aim for legs of 4 to 9 feet totalling 13 to 26 feet. It is a test you can do yourself in ten minutes with a tape measure, and it catches more real problems than any finish or fixture choice.
Measure in that order. Start with the three leg distances, since those decide whether the loop feels short. Then check the walking clearance, which is where busy households lose hours, and only then look at countertop landing space around the fridge, sink and cooktop. If those three pass, the rest of the kitchen design is a matter of taste.