A running toilet keeps water moving after you flush: a bad flapper that will not seal, a fill valve that will not shut off, or a tank filled too high, and most cases take 30 to 60 minutes with a screwdriver. Start by lifting the tank lid and watching what happens — how to fix a running toilet depends almost entirely on what you see, and the fix is usually adjustment rather than a new part.
Two patterns cover most of it. If the toilet runs for a few seconds every few minutes with nobody in the house, you are looking at the flapper. If it runs continuously and the water level in the tank never rises, suspect the fill valve or a water level set too high. That rule is the one homeowners on plumbing forums repeat most often, and it is right far more often than it is wrong.
Table of Contents
- What You Need
- Step-by-Step
- Step 1: Turn off the water and drain the tank
- Step 2: Check the flapper, the most common cause
- Step 3: Lower the water level before you buy anything
- Step 4: Test the fill valve and clean out debris
- Step 5: Replace the flapper
- Step 6: Replace the fill valve
- Step 7: Confirm the repair with the dye test
- Still Running After Replacing the Flapper and Fill Valve?
- Common Mistakes
- Frequently Asked Questions
- How long can a running toilet go before it causes damage?
- Can I fix a running toilet myself or do I need a plumber?
- Why is my toilet still running after I replaced the flapper?
- Why does my toilet keep ghost flushing?
- Is a running toilet wasting a lot of water?
- How much does it cost to repair a running toilet?
- Conclusion
What You Need
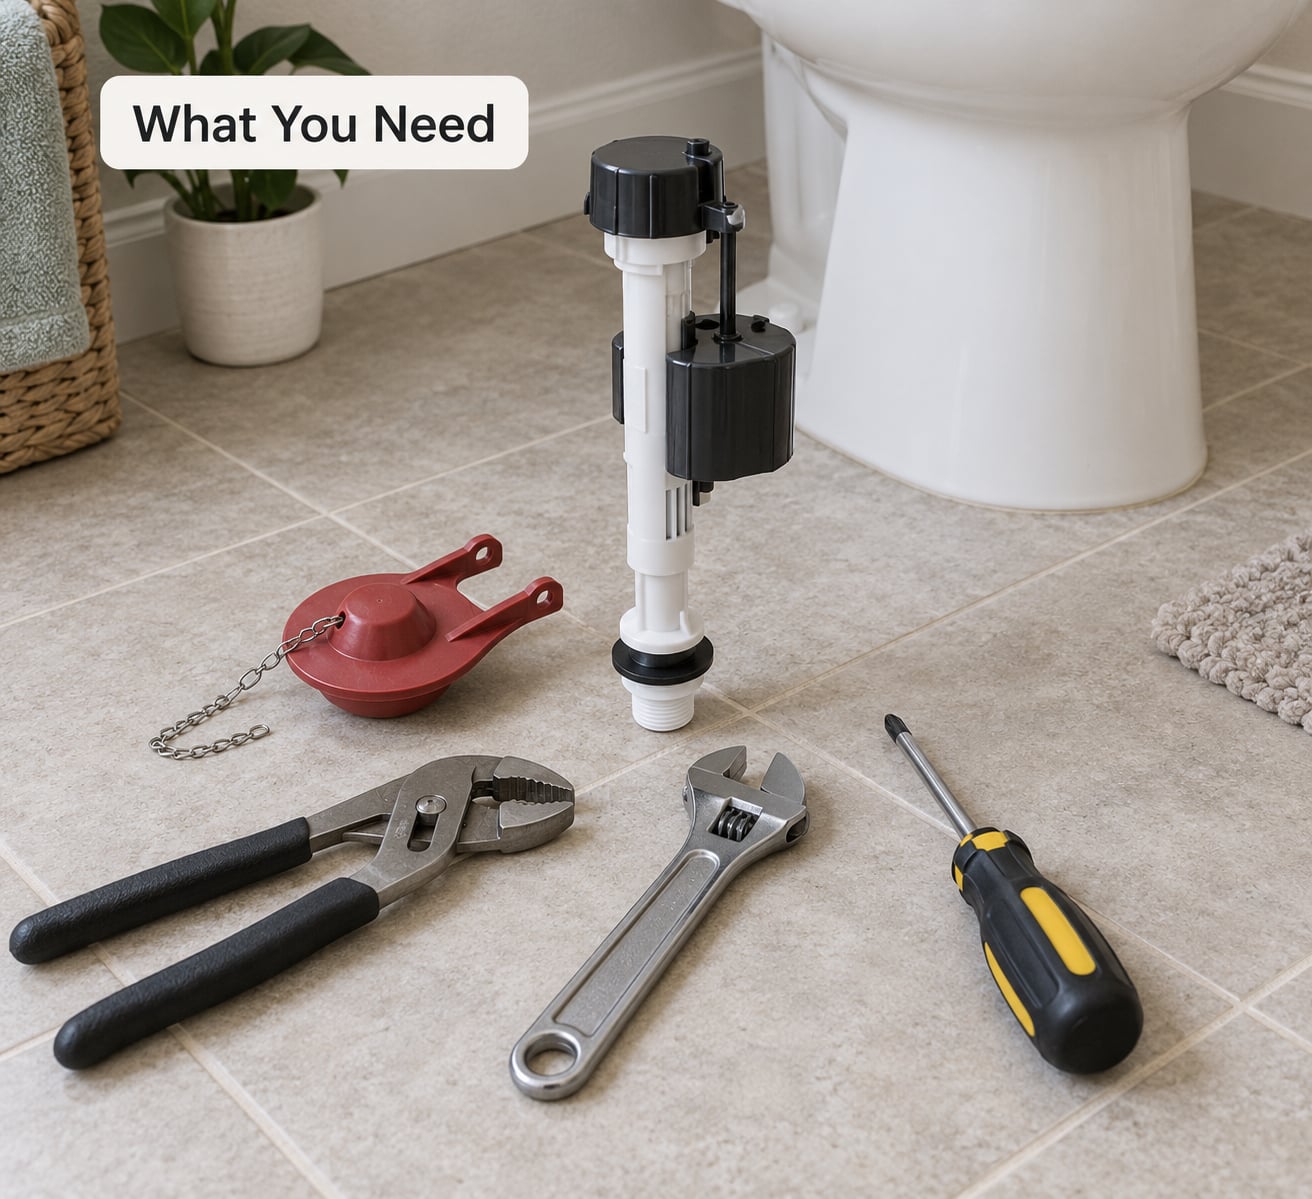
Almost every running toilet is fixable with a flat-head or Phillips screwdriver, a pair of adjustable pliers, a sponge, a small cup, and an old towel. A flashlight helps more than you would expect, because the worst problems hide behind the flush valve.
As for parts, buy nothing until you have watched the flush cycle. A tank flapper is a cheap rubber or plastic part, and a fill valve is a modest plastic assembly — but plenty of what looks like a failed flapper turns out to be a float set a quarter inch too high, and no part fixes that.
If you do need to replace something:
- Flapper: measure the flush valve opening first. Roughly 2 inch on toilets built before the mid-1990s, 3 inch on most newer ones. Bring the old flapper to the store, or write down the diameter.
- Fill valve: most modern valves are universal and fit a 3/8 inch shank opening. Match the height of the overflow tube in your tank, since a tall valve will not fit under a low overflow tube.
- Chain: buy a flapper chain separately only if the old one is rusted, brittle, or stretched. Cheap, and the first thing that breaks when a flapper is dropped on a hard surface.
Two safety rules before you open anything. Water weighs about 8 pounds per gallon, so a full tank is heavier than it looks — carry it slowly and set the tank lid on a towel, not on tile. And if you find a cracked flush valve, a failed tank-to-bowl gasket, or a supply line that will not shut off, stop there and call a licensed plumber. Those three are not DIY work.
Step-by-Step
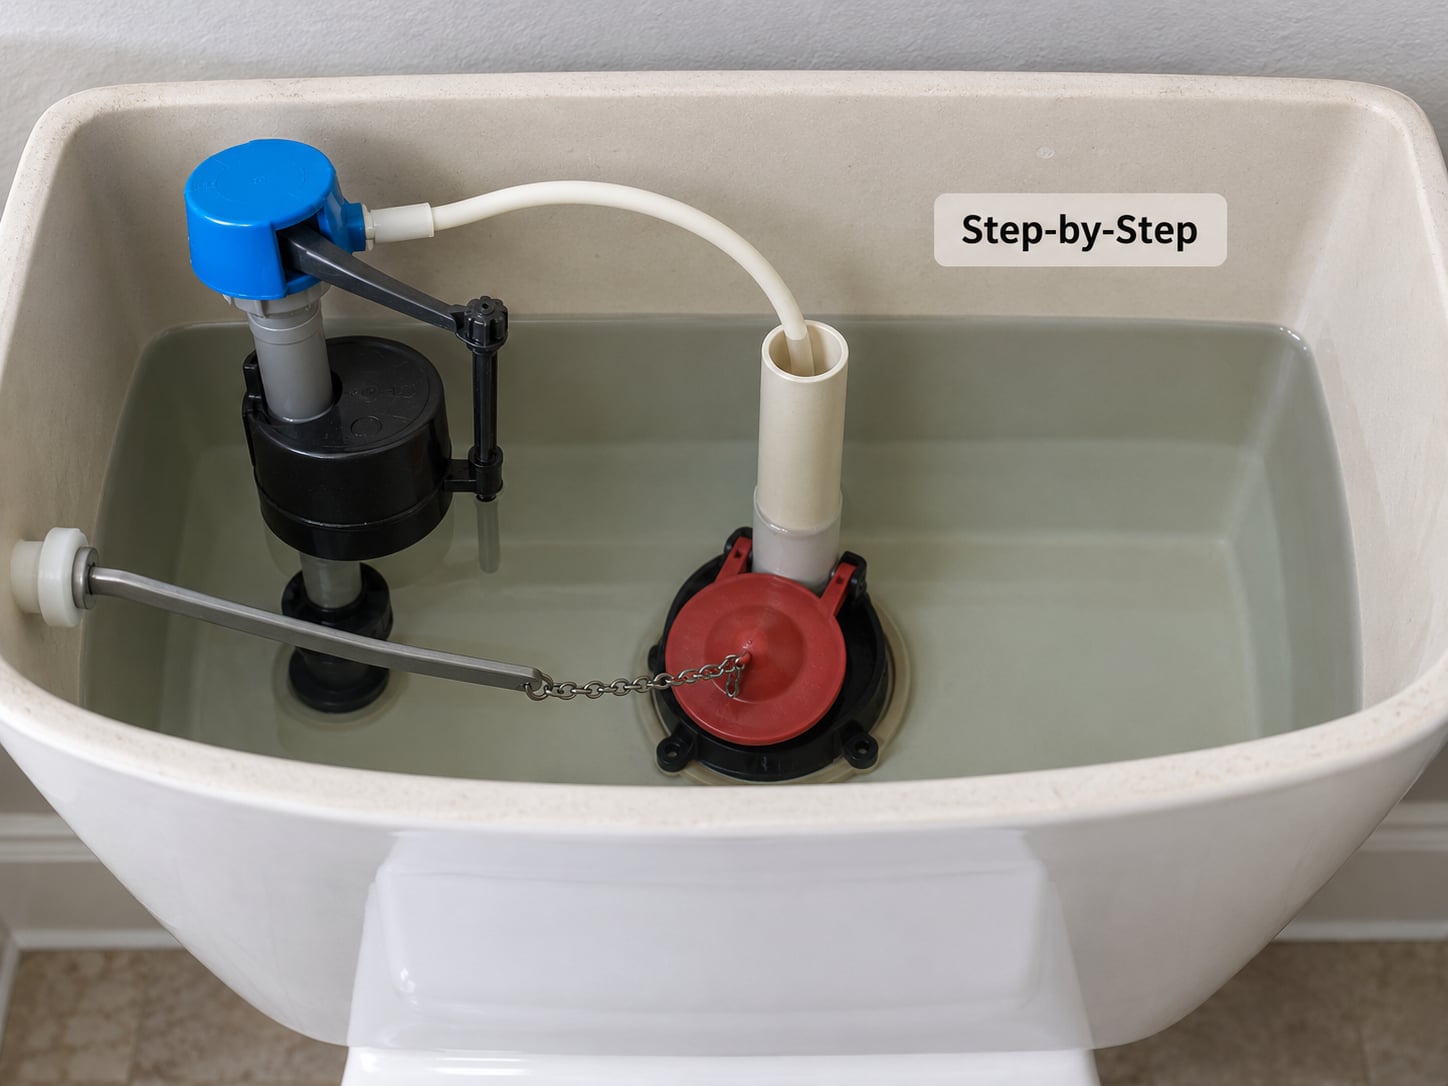
Work through these in order. Each step ends with a way to tell whether it worked, so you are not replacing parts at random.
Step 1: Turn off the water and drain the tank
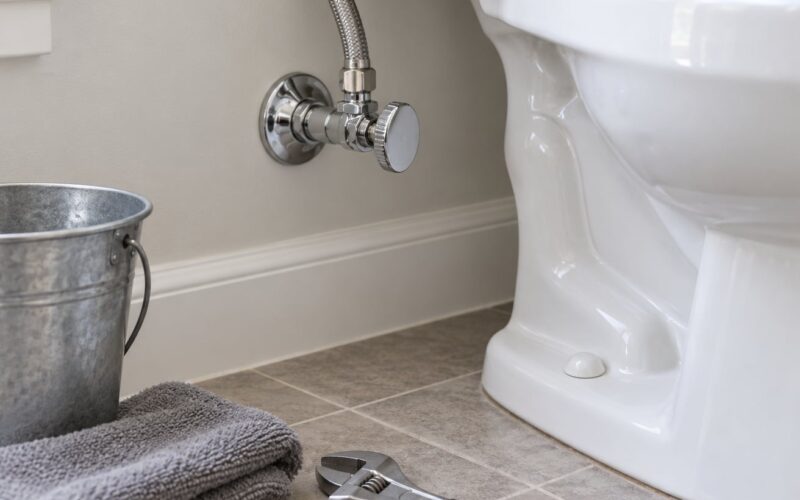
This is the preparation every guide gets right. Close the angle stop valve behind the toilet by turning the handle clockwise until it stops, then flush once to empty the tank. The bowl will still hold water because the fill valve is off, which is normal. Sponge out what is left in the tank and put the lid on a towel.
How to tell it worked: the tank stays dry and empty after a couple of minutes. If it keeps draining while the supply is shut off, skip ahead — that points to the flapper or flush valve seat, not to the fill valve.
Step 2: Check the flapper, the most common cause
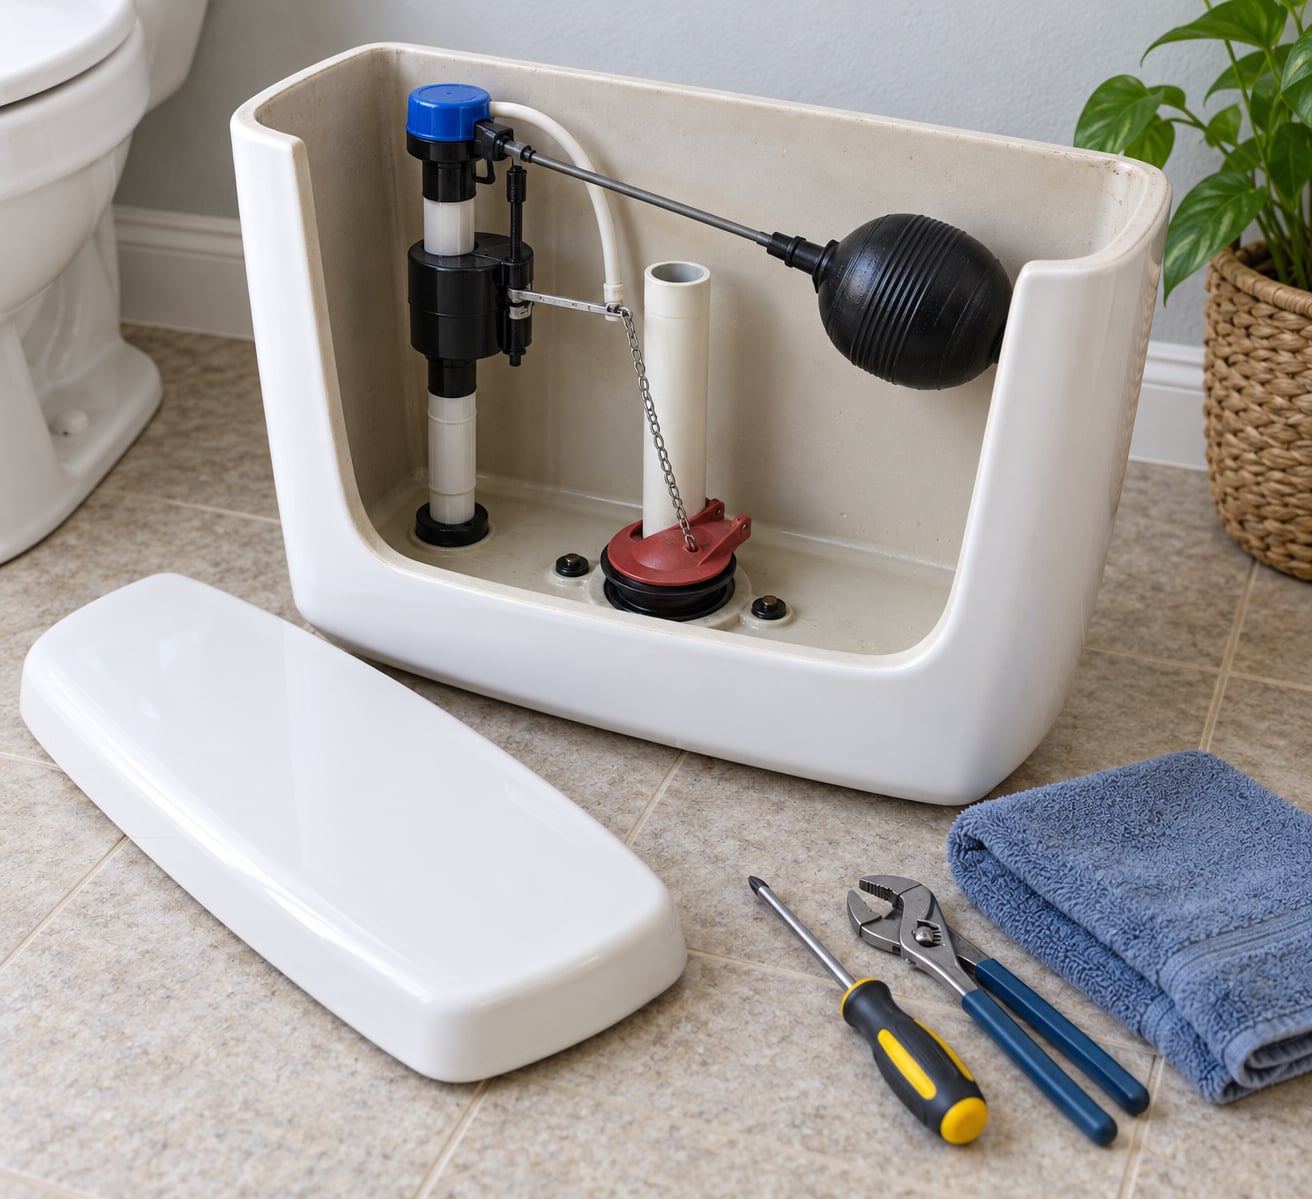
Look at where the flapper sits when the tank is empty. It should rest flat and centered on the flush valve seat. Three things give it away: the flapper is warped or bent at the edges, the chain is so slack that the flapper cannot lift clear of the overflow tube, or the chain is so tight that the flapper is pulled slightly off the seat.
How to tell it worked: this is a visual test, so the answer is whether the flapper looks clean, centered, and able to move freely. Confirm the seal later with the dye test in Step 7.
Step 3: Lower the water level before you buy anything
Fill valves are set to stop just below the top of the overflow tube, usually about an inch of clearance. If the water sits right at the overflow tube, it spills down inside continuously — a sound and pattern almost identical to a failed flapper, and the single most common misdiagnosis in this job.
On most valves you turn the float’s adjustment screw clockwise a quarter turn at a time until the level drops. On float-cup valves, squeeze the lock clip and slide the cup down the shaft. Older rod-style floats bend the rod instead.
How to tell it worked: refill the tank and watch. If the water stops below the overflow tube and stays there, the fill valve is shutting off properly.
Step 4: Test the fill valve and clean out debris
While the tank refills, watch the valve itself. If water keeps running after the tank is full, the valve is not closing — either the float is stuck, the mechanism is gummed up, or a small piece of debris is jammed in the cap.
Disassemble the top of the valve first. Most have a removable black plastic cap; lift it off, pull out the float or stem, and flush it with clean water. People find a washer, a bit of tank insulation, or a plastic fragment sitting right there, and the valve works again as new. Do not force the float linkage — the plastic arm has some give by design, and bending it cracks the arm.
How to tell it worked: the hissing stops the moment the tank reaches the set level. No hiss means the valve is closed.
Step 5: Replace the flapper
Unhook the chain from the flush handle arm, then pull the flapper straight up off the flush valve seat. Scrub the seat ring while you are in there — a hard water film a sixteenth of an inch thick is enough to stop a new flapper from sealing.
Click or hook the new flapper onto the seat so it seals flat, then reattach the chain leaving about a quarter inch of slack. Attach the free end to the handle arm, then flush by hand: the flapper should lift, fall back flat, and hold.
How to tell it worked: the handle arm has room to travel without the flapper staying open, and the flapper rests fully seated. Too tight and it never closes; too loose and it may bump the overflow tube on the way up.
Step 6: Replace the fill valve
Sponge the tank dry first — water under the lock nut is how floors get ruined. Disconnect the fill tube from the top of the valve and the supply line from the bottom, hold the valve body with pliers, and unscrew the lock nut counterclockwise from underneath the tank.
Lift the old valve out, clean any debris off the tank floor, and set the new one in with a thin layer of non-hardening sealant on the shank. Tighten the lock nut snug and hand-tight only — overtightening splits the tank or cracks the shank, and that is a bowl and tank replacement rather than a valve swap. Reconnect the supply line with a washer inside the nut, hook the fill tube onto the refill tube or the overflow tube, and set the float level from Step 3.
How to tell it worked: no drip from the lock nut after refill, and the tank stops filling at the level you set.
Step 7: Confirm the repair with the dye test
Put a few drops of food coloring in the tank and leave it alone for 15 minutes without flushing. Color in the bowl means water is passing the flush valve — a flapper, seat, or chain problem. No color means the seal holds, and any remaining running is coming from the fill valve side.
Then run the full test: turn the water back on slowly, let the tank fill completely, flush once, and leave the house for an hour. If it is still running when you get back, you have a condition a flapper swap will not touch, and the next section is for you.
Still Running After Replacing the Flapper and Fill Valve?
Plumbing forums are full of people who swapped every part in the tank and watched the water keep moving. Once the flapper, fill valve, and supply hose are all new, the remaining suspects are a short list, and each one has its own tell.
The water level is set too high. Still the most common answer, even after two new flappers. If water spills down the overflow tube, the tank sounds exactly like a running toilet while the flapper is perfectly seated. Lower the float until there is about an inch of clearance below the overflow tube.
The flush valve or its seat is cracked. A crack in the flush valve body sends tank water straight to the bowl no matter what the flapper does. The tell is water on the floor near the bowl base that appears while the toilet runs and stops the instant you close the angle stop valve. That pattern rules out the flapper and points at the flush valve seat or the tank-to-bowl gasket underneath.
The flapper never seats because of the seat, not the flapper. On older toilets the flush valve seat itself is pitted, scaled, or worn out of round. A new flapper on a damaged seat leaks just like the old one. Run a finger around the seat ring; if it feels grooved or the flapper rocks when seated, the seat needs replacing with the flush valve assembly.
Something is stuck in the overflow tube or refill tube. A fragment of tank insulation, a washer, or a bit of a plastic shim can sit inside the valve and hold it open. This is Step 4, and disassembling the valve rather than replacing it solves it.
The angle stop valve is weeping. Close it fully and listen. If you hear water moving in the wall or the pipe drips at the joint, the running sound you are hearing at the bowl is coming from the supply line, not the tank at all.
It is ghost flushing. A tank that refills by itself every half hour or so, with no one in the house, is usually a slow seeping flapper rather than a failed part. Some people add a few small stainless washers to the chain to give the flapper extra weight so it drops and seats harder — a real, low-cost fix that most guides skip. The dye test in Step 7 confirms whether water is passing the flapper between flushes.
One more useful test. Lift the fill valve about an inch with the water running. If the flow stops immediately, the valve only needs adjusting, not replacing. That single motion has saved a lot of people an unnecessary part.
Common Mistakes
Replacing the flapper without cleaning the seat ring. The most common repeat failure. Wipe the seat with a cloth and a little vinegar before the new flapper goes on.
Buying the wrong flapper size. A 3 inch flapper on a 2 inch flush valve will not seal, and a 2 inch flapper on a 3 inch seat rattles and leaks. Measure the valve opening, not the tank.
Overtightening the lock nut or the supply line. Hand-tight plus a quarter turn is enough. Snapping a plastic shank or splitting a tank turns a cheap repair into a full toilet replacement.
Setting the float too high out of habit. More water per flush looks generous and quietly wastes several gallons a day. Set the level to the fill line on the tank wall, about an inch below the overflow tube.
Replacing the fill valve when the flapper was the problem. A tank that tops itself back up after every flush is a flapper leak. Read the pattern before you buy anything: intermittent means flapper, continuous means fill valve or water level.
Ignoring the shut-off test. If the tank drains while the supply is off, nothing inside the tank will fix it, because the problem is below the fill line.
Call a licensed plumber when the floor is wet near the bowl base, when the angle stop valve will not fully close, when you find a cracked flush valve or a failed tank-to-bowl gasket, or when the running sound continues after a correct fill valve repair. Those are not adjustment problems. If you are a renter, that is a call to your landlord, and the running angle stop valve is worth mentioning immediately.
Frequently Asked Questions
How long can a running toilet go before it causes damage?
A running toilet wastes water every minute it is open. A small leak that tops the tank back up every few minutes can push 200 to 500 gallons a day through the bowl, and a continuously running fill valve wastes more. There is usually no immediate damage to the floor, but the flapper and flush valve wear out faster, the fill valve runs hot, and in a cold climate an unheated bathroom risks frozen pipes. Fix it the same day you notice it.
Can I fix a running toilet myself or do I need a plumber?
Most running toilets are a straightforward DIY job. If the water is going down the overflow tube or leaking past a flapper, you need a screwdriver, adjustable pliers, a sponge and a cheap part, and 30 to 60 minutes. Call a licensed plumber if water is pooling on the floor near the bowl, if the shut-off valve will not close, or if you find a cracked flush valve or failed tank-to-bowl gasket. Those need the bowl to come apart.
Why is my toilet still running after I replaced the flapper?
Five things cause it: the water level is set too high and spilling down the overflow tube, the flush valve seat itself is pitted or worn out of round, the chain is too tight or too slack, debris is jammed inside the fill valve cap, or the flapper is the wrong size for the seat. Confirm the first two before buying anything more. Lift the fill valve an inch while it runs — if the flow stops, the valve only needs adjusting.
Why does my toilet keep ghost flushing?
Ghost flushing means the tank refills on its own every 30 minutes or so with nobody using the toilet. Almost always a slow leak past the flapper letting a little water down, which the fill valve senses and replaces. Run the dye test: a few drops of food coloring in the tank, 15 minutes with no flushing. Color in the bowl confirms a flapper leak. A cracked flush valve can cause the same pattern.
Is a running toilet wasting a lot of water?
Yes, more than most people expect. An intermittent leak that tops the tank back up every few minutes commonly sends 200 to 500 gallons a day down the bowl, and a fill valve that never closes wastes far more. Since most toilets are older and use 3.5 to 5 gallons per flush, that is the equivalent of flushing dozens of times a day. A meter test, or watching the dial with everything else off, confirms it in minutes.
How much does it cost to repair a running toilet?
For a flapper, a chain, a float adjustment or a universal fill valve, the parts are inexpensive hardware-store items and the work is under an hour. Where cost really goes wrong is replacing parts you did not need, or turning a valve swap into a full toilet replacement by overtightening the lock nut. If you hire a plumber for the same job, the trip and labor run well above the part cost, so try the free checks first.
Conclusion
Lift the lid, flush once, and watch. Whether the toilet runs for a few seconds every few minutes or runs without stopping tells you whether to start with the flapper or with the fill valve and water level, and that one minute of watching saves buying the wrong part.
Most running toilets are a flapper that will not seat, a water level set a fraction too high, or debris in the fill valve — all three fixable at the kitchen table in under an hour. Once the flapper and fill valve are both new and the toilet still runs, stop buying parts and check the flush valve seat and the tank-to-bowl gasket. If water is on the floor near the bowl, or the shut-off valve will not close, that is the point to call a licensed plumber.