Last reviewed: October 2026
To prevent dryer vent fires, keep three things clear: the lint screen after every single load, the exhaust duct behind and above the dryer about once a year, and the exterior vent hood so air can actually leave the building. That is the whole job. Almost every dryer vent fire traces back to one of those three being ignored for years.
The whole prevention routine takes about ten minutes a week plus an hour once a year. If your dryer is not on an exterior wall, the annual part gets harder, and step seven below explains when that means calling someone.
A note on what this is: general safety information for homeowners, not a substitute for an inspection after any burning smell, smoke, or a vent fire.
Table of Contents
- What You Need
- Step-by-Step: How to Prevent Dryer Vent Fires
- 1. Check the Lint Screen Before Every Load
- 2. Clean the Dryer Vent Duct Regularly
- 3. Make Sure the Exterior Vent Hood Opens and Clears
- 4. Confirm the Dryer Has Strong, Steady Airflow
- 5. Avoid Overloading the Dryer
- 6. Install or Maintain the Correct Vent Connection
- 7. Call a Professional When the Vent Cannot Be Safely Reached
- Common Mistakes
- Frequently Asked Questions
- How often should I clean my dryer vent to help prevent fires?
- What are the warning signs that my dryer vent is clogged?
- Can I use a vacuum to clean a dryer vent duct?
- How do I know if the exterior dryer vent is blocked?
- Should I hire a professional to clean a dryer vent?
- Can overloading the dryer cause a vent fire?
- What to Do First If You Smell Burning
- Bottom Line
What You Need
You can inspect and clean most of a vent path with a handful of ordinary tools. None of this is specialty equipment.
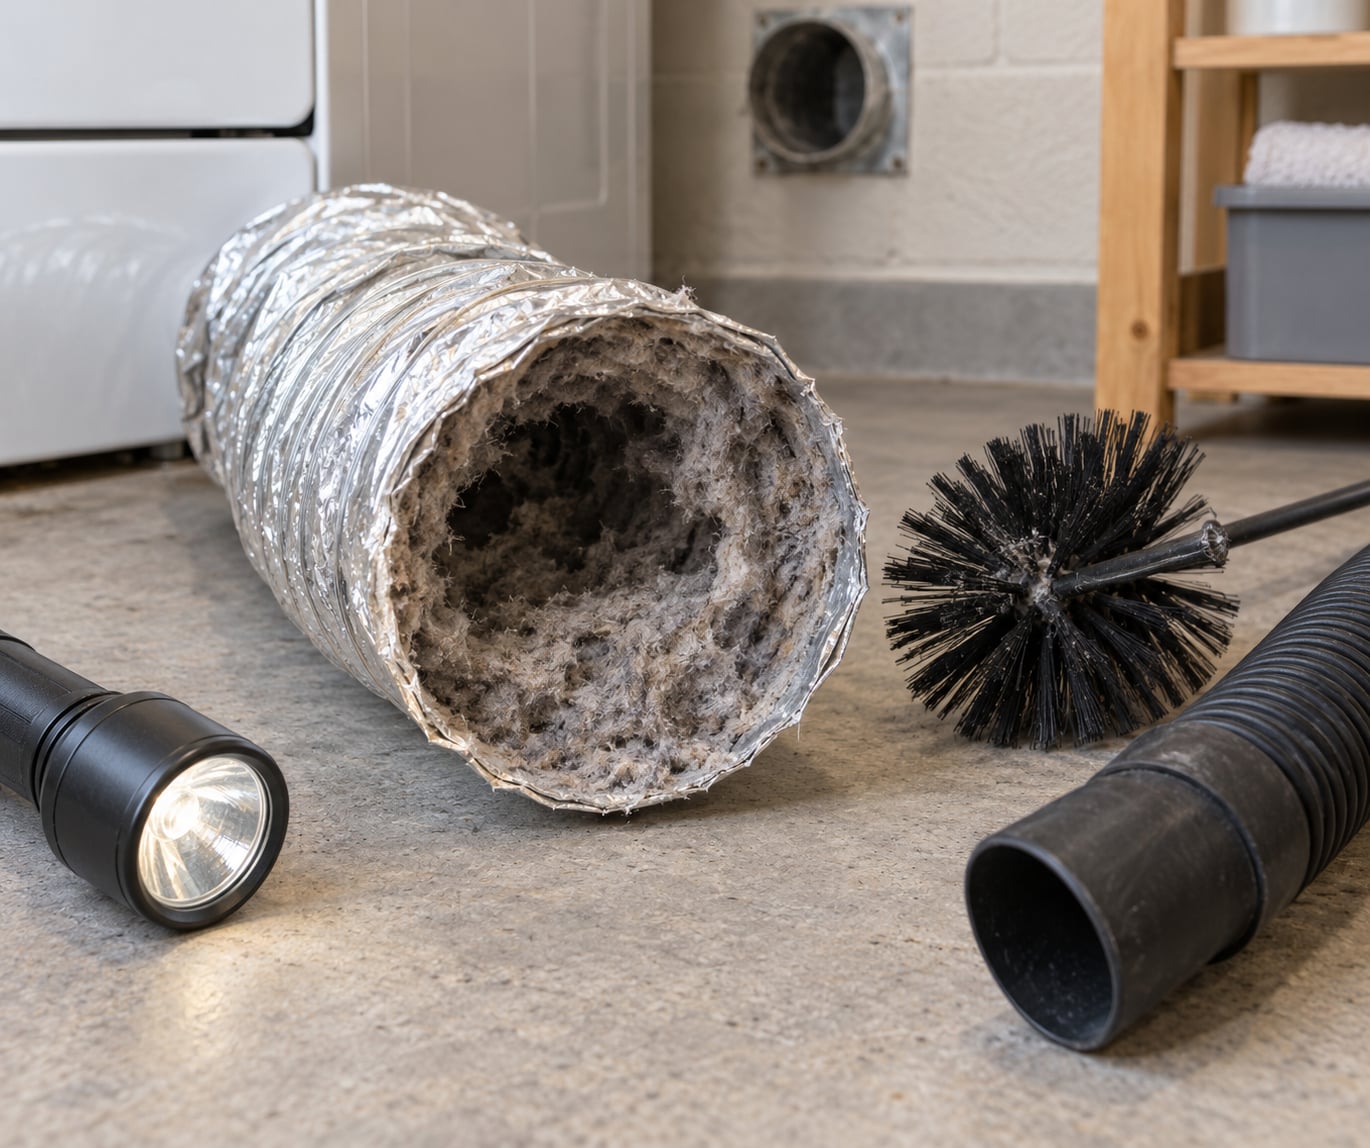
- A vacuum with a hose attachment. A shop vacuum works better than an upright because it holds more lint and does not stall as fast.
- A dryer vent brush kit. These are long-handled wire brushes sized to the duct, usually with a flexible attachment for bends.
- A flashlight. You cannot see a blockage in a dark duct, and you cannot confirm you cleared one either.
- Work gloves. Pulled lint is fine, dry, and easy to breathe in.
- Screwdrivers and a spare duct clamp. You will need them to disconnect the duct from the dryer collar.
- A step stool. For reaching the duct behind the dryer, not for climbing onto a roof.
- Access to the exterior vent hood. From the ground, looking at the wall. Skip this step entirely if the hood is above a second story and you would have to go up on a ladder or roof.
The single best tool on that list is the flashlight. Most people cleaning a vent do it blind, brush blindly, and never learn whether they actually removed anything.
Step-by-Step: How to Prevent Dryer Vent Fires
1. Check the Lint Screen Before Every Load
This is the highest-value habit in the entire list, and it costs about thirty seconds. The lint screen sits in the door frame or the top of the drum opening, depending on the model.
Slide it out, open the panel, and peel the lint off with your fingers. Most of it comes away as one soft gray mat. Wipe the housing and the screen with a damp cloth, dry it fully, and snap it back in. A wet screen left in a closed housing grows mildew, which smells like a blocked vent and sends people chasing the wrong problem.
How you know it worked: the screen looks like mesh rather than felt, and airflow at the screen is obviously moving when the drum spins. If the screen is clean but the drum still moves weakly, the blockage is downstream, not here.
2. Clean the Dryer Vent Duct Regularly
Clean the exhaust duct at least once a year, and twice a year if you do a lot of laundry, run the dryer on high heat often, or have pets that shed.
Unplug the dryer before you touch anything behind it. Pull it forward carefully, watching the power cord and the water line on vented models. Loosen the duct clamp at the dryer collar and pull the duct off.
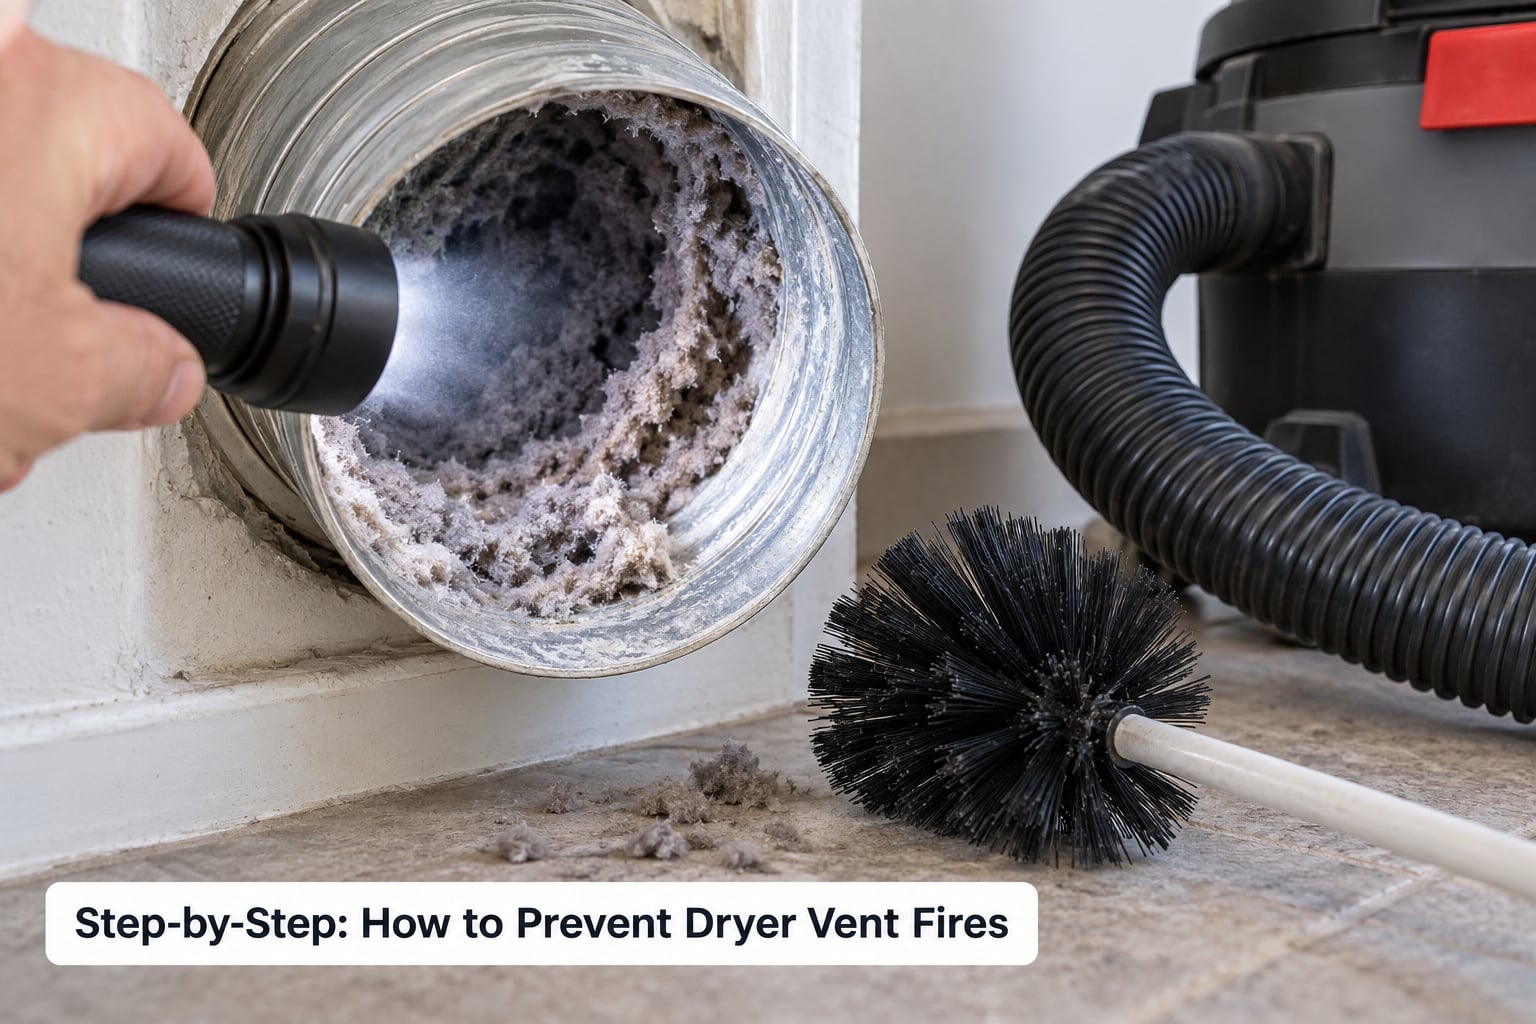
Feed the vent brush into the duct from the dryer end, and vacuum at the same time so the lint you scrape loose gets pulled out instead of pushed deeper. Work in short passes, rotating the brush as it goes. Do the same thing from the exterior hood end if you can reach it from the ground.
How you know it worked: you can see daylight through the duct, and the duct feels light in your hands rather than packed solid. One r/SatisfyingClean post showing a first cleaning after ten years makes the point better than any description: the plug came out as one dense cylinder.
Stop if you find something that is not lint. A homeowners thread turned up furniture stuffing jammed in a vent, which tells you the blockage is bigger than a cleaning job.
3. Make Sure the Exterior Vent Hood Opens and Clears
From the ground, look at the hood. You want a flap that swings freely and ducting that comes out of the wall without a sharp crease or a section flattened against the siding.
Check for lint bales around the opening, leaves and debris caught under the flap, a stuck or bent flap, and duct sections that have pulled apart or sagged away from the collar. Bird nests are common in this spot and block airflow completely.
How you know it worked: the flap lifts freely on its own weight, and no lint is packed around the opening.
Do not climb onto the roof to check the hood, and do not remove a stuck flap if it means working on a ladder at height. That is the point where a handyman earns their keep.
4. Confirm the Dryer Has Strong, Steady Airflow
Run the dryer on high heat with the door open and hold the back of your hand a few inches from the duct opening near the dryer. You should feel steady, obvious air pushed toward your palm for the whole cycle. Then repeat the test at the exterior hood if you can reach it from the ground.
Strong airflow at one end and weak at the other means a blockage in between. Weak at both ends means a blockage close to the dryer. No airflow at the hood while the dryer runs means the flap is stuck, the duct is disconnected, or the vent is capped off.
Cycles vary. A cool tumble cycle moves much less air than a hot cycle, so run the test on the hottest setting and compare it against how the machine used to feel. This test is the only real proof that a vent is clear, and it takes thirty seconds.
5. Avoid Overloading the Dryer
A drum packed tight with wet heavy items blocks airflow through the load itself, so the dryer runs longer and hotter to do the same work. More lint also comes off that load in a single cycle than several smaller ones.
Fill no more than about two-thirds to three-quarters of the drum. Clothes need room to tumble. Split a full washer load into two dryer loads, especially with towels, bedding, and jeans, which hold a lot of water and shed a lot of fiber.
How you know it worked: one load comes out dry and the drum is noticeably less full than the washer drum was. Cycles finish faster, which also means lower energy bills.
6. Install or Maintain the Correct Vent Connection
The duct connection has to be airtight and cannot be crushed. That means a secure metal or plastic clamp, not duct tape, and no screws drilled through the duct into the dryer collar.
Watch the number of bends too. Every tight bend chokes airflow, so a run that snakes through joists or climbs to a high loop will outlast the straight, short version. Rigid metal duct is the most resistant to crushing, and crushing is the most common way a vent fails.
Check that the duct is supported rather than hanging, that it is not pinched where it runs behind the dryer, and that pushing the dryer back against the wall has not flattened it. Pull the dryer out, reconnect it, and push it gently back into place without leaning on the duct.
How you know it worked: the clamp grips the duct all the way around with no gap, and the duct keeps its round shape where it leaves the dryer.
7. Call a Professional When the Vent Cannot Be Safely Reached
Some vents are genuinely out of reach. A dryer inside a closet, in a basement on an interior wall, or on an upper floor with a long concealed run needs someone with a proper agitation brush and a way to open a wall connection.
Call a dryer vent technician when the duct runs more than about ten feet with several bends, when you cannot reach the exterior hood from the ground, when lint is packed so tight a brush will not move it, when the duct is damaged or disconnected, when the dryer repeatedly overheats or trips its thermal fuse, when you notice lint in the drum on every load, or when there is a burning smell.
When you do hire someone, ask what they will actually do: a camera inspection of the run, an agitation brush on the duct walls, a vacuum that catches what comes loose, and an airflow reading at the hood. A quote that only covers the lint screen is not a duct cleaning.
Common Mistakes
Cleaning the lint screen and calling it done. The screen catches maybe a fraction of what the duct collects. A clean screen with a clogged duct is the single most common false sense of safety, and a lint trap that suddenly stops collecting anything is a strong signal that the blockage is downstream.
Ignoring the outside hood. Lint bales, leaves, and a flap stuck shut do the same job as a duct full of lint, and they cost nothing to check.
Overloading the drum. Tight loads run hotter and longer and shed more lint per cycle.
Bending or crushing the duct. A crease in accordion duct, or a dryer shoved back so the duct is pinched behind it, chokes airflow more than most people realize.
Using foil accordion or plastic vinyl duct. Both are prohibited by residential codes, both trap and hold heat, and both melt in a fire instead of containing it. Use rigid or semi-rigid metal duct, or listed flexible duct, with metal clamps.
Storing laundry, cardboard, or paper near the dryer. It does nothing for the vent, and it gives a fire somewhere to travel.
Skipping the airflow test. Cleaning without testing is how people miss a duct that never opened, was never connected, or was capped by a painter years ago.
Assuming someone else owns it. In rentals, condos, and HOAs, nobody cleans the upper-floor units’ vents. A r/CleaningTips commenter in a 12-unit complex said they were probably one of two people cleaning their own vent, and that pattern is common enough to assume in almost any multi-unit building.
Frequently Asked Questions
How often should I clean my dryer vent to help prevent fires?
Clean the lint screen after every load, the exhaust duct behind the dryer once a year, and the exterior hood twice a year. If you run heavy loads, dry lots of towels and bedding, or have pets that shed, clean the duct every six months instead. How long you can safely go depends on how much laundry the household does, so a large family on a shared machine generates lint faster than a couple does.
What are the warning signs that my dryer vent is clogged?
Clothes take far longer to dry than they used to, the dryer exterior gets hot enough to be uncomfortable, or the lint screen stops collecting lint. You may also notice a burnt or musty smell, lint appearing in the drum after every load, a loud running noise from the drum, visible lint packed around the exterior hood, or extra humidity in the laundry room. Weak airflow at the hood while the dryer runs confirms it.
Can I use a vacuum to clean a dryer vent duct?
Yes, and it is the best tool for the job. Run a shop vacuum or hose-equipped vacuum at the open end of the duct while you work a vent brush through it, so loosened lint gets extracted rather than pushed deeper into the run. Vacuum behind the dryer too, where lint settles on the floor and on the back of the machine. A bare upright vacuum struggles with dense lint and stalls quickly.
How do I know if the exterior dryer vent is blocked?
Look at the hood from the ground with the dryer running on high heat. Hold the back of your hand a few inches from the opening and check for steady, strong airflow. Then look for lint bales around the opening, leaves caught under the flap, a flap that will not swing freely, ducting pulled away from the wall, or a bird nest. No airflow at all usually means a stuck flap, a disconnected duct, or an opening that was capped off.
Should I hire a professional to clean a dryer vent?
Hire someone when the vent run is long, hidden, or has several bends, when the dryer is not on an exterior wall, when the exterior hood cannot be reached from the ground, or when lint is packed hard enough that a brush will not move it. Recurring overheating, burning smells, and damaged or disconnected ducting also warrant a technician. Ask whether the service includes a camera inspection and an airflow reading at the hood, not just a lint screen clean.
Can overloading the dryer cause a vent fire?
Overloading does not ignite anything on its own, but it contributes. A tightly packed load blocks airflow through the drum, so the machine runs longer and hotter to get clothes dry, and it sheds more lint in that cycle. That extra heat and extra lint both work against the dryer vent. Filling the drum only two-thirds to three-quarters of the way gives clothes room to tumble and reduces strain on the vent and the dryer.
What to Do First If You Smell Burning
If you smell burning near the dryer or see smoke coming from the vent, do not open the duct and look. Call 911 for anything more than a faint odor, tell them it is a dryer vent, and get everyone out of the building.
For a faint smell with no smoke: unplug the dryer or shut off its gas supply, and stop using it until it has been inspected. Do not run a load to see if the smell comes back. If a fire does start, do not try to fight it with a fire extinguisher beyond a small incipient fire, and never spray water into a duct.
Bottom Line
Start tonight. Pull the lint screen out, clean it, and put it back dry. That takes thirty seconds and it is the habit that prevents dryer vent fires more often than anything else on this page.
Then put a reminder in your calendar for the duct: unplug the dryer, brush and vacuum the run from both ends, check the hood from the ground, and confirm airflow with the machine running on high heat. If the run is hidden or the hood is out of reach, book a technician and ask for a camera inspection and an airflow reading.
Nobody thinks about a dryer vent until something smells wrong. Ten minutes a year is a cheap price for keeping the most under-thought-about fire risk in the house under control.