A home emergency kit is one container holding water, no-cook food, first aid supplies, lighting, a radio, tools, documents, and cash, built so your household can get by for at least 72 hours when power, water, and stores are all unavailable. Here is how to make a home emergency kit yourself: an afternoon to assemble, then two review dates a year to keep it usable.
Most people start this task intending to finish it. What derails them is not the shopping, it’s the storage decision, because a kit nobody can find at 2 a.m. is decoration. Pick the container first, pack by category, label the lid, and the rest is straightforward.
Table of Contents
- What You Need
- Step-by-Step: How to Make a Home Emergency Kit
- 1. Choose a Practical Storage Container for Your Home Emergency Kit
- 2. Pack Water, Food, and Daily Essentials
- 3. Add First-Aid and Health Supplies
- 4. Protect Important Documents and Money
- 5. Include Communication and Emergency Information
- 6. Customize the Kit for the Household
- 7. Label, Review, and Maintain the Kit
- Common Mistakes
- Frequently Asked Questions
- How much water and food should a home emergency kit hold?
- Where should I store my home emergency kit?
- How often should I check and replace emergency kit supplies?
- What should I include for babies, older adults, and pets?
- Should I build my own emergency kit or buy a pre-made one?
- What should I leave out of my emergency kit?
- Conclusion
What You Need
Gather supplies in four groups: daily essentials, health supplies, documents and money, and the tools that let you improvise. The quantities below follow the guidance published by Ready.gov, FEMA, and the American Red Cross, which is the standard most local emergency management offices point households toward.
Essentials. One gallon of drinking water per person per day, which stays good for 6 to 12 months sealed. At least three days of shelf-stable food per person, and most of it keeps 1 to 5 years. One manual can opener per household, because the cans are useless without it.
Light and power. One battery flashlight per person plus one spare, and note that batteries lose their charge in 3 to 5 years whether they are used or not. One charged power bank with a spare cable, recharged every three months.
Communication. One hand-crank or NOAA weather radio per household. These last practically forever, which makes them the best-value item in the whole bin.
Health. One first aid kit per household, with sterile items checked yearly. Prescription medications for 7 to 14 days per person, which lines up with a typical prescription refill window. One emergency blanket per person for shelter and warmth.
Tools. One pair of work gloves per adult. They last years and they are what let you open a jammed door or move debris without cutting your hands.
Documents and money. One sealed set of copies of key documents per household, refreshed annually. Enough cash in small bills to cover a few days of small purchases, which has no expiry but is worth confirming is still current.
How much you really need depends on the kind of emergency. For a short outage of a day or two, a gallon of water per person and a couple of days of shelf-stable food covers you. Severe weather and evacuation warnings call for the full three days, plus extra water for cooking and cleaning.
If someone in the house manages a prescription medication, insulin, oxygen, or a mobility aid, plan for seven to fourteen days of that specific need and keep the pharmacy name, address, and phone number on the emergency information sheet. For longer displacement, most local guidance points at two weeks of supplies, which is a separate reserve rather than something you cram into the same bin.
Step-by-Step: How to Make a Home Emergency Kit
1. Choose a Practical Storage Container for Your Home Emergency Kit
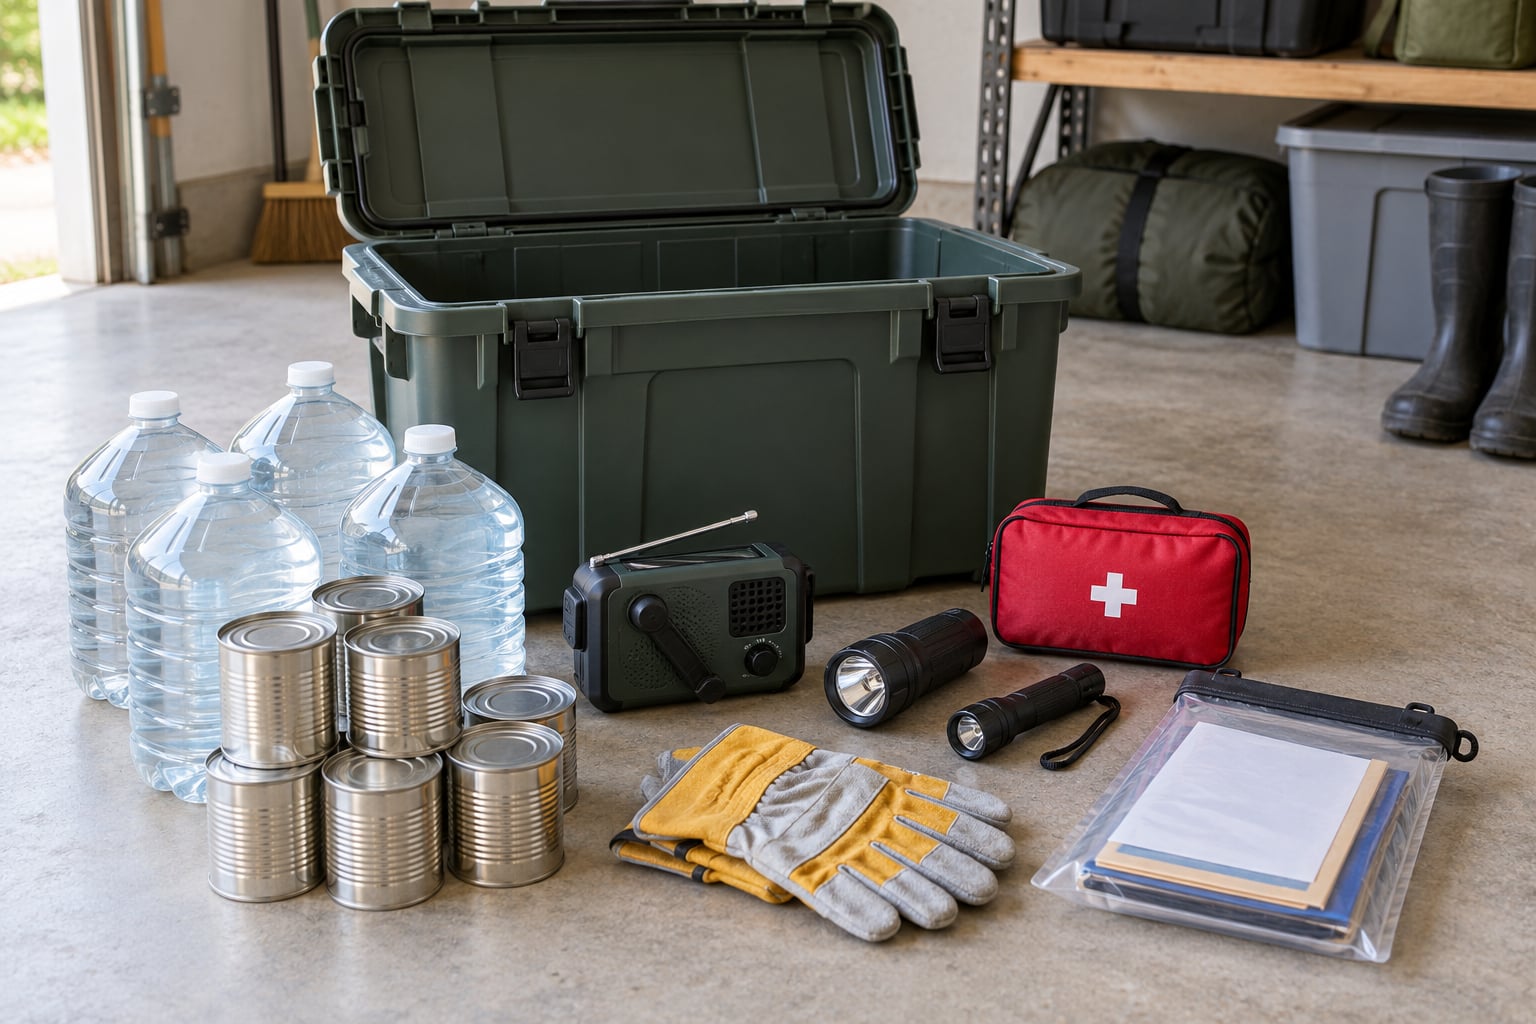
Choose based on where the kit will live. A lidded plastic bin with gasket seals is the workhorse: stackable, cheap to replace, and easy to label. A duffel bag suits a go-kit that lives by the front door, and a backpack fits a single-person evacuation kit. Skip anything that only works in one spot.
Size the container for your household and your floor space. A family of four needs more room than a two-person apartment allows, and a container you have to drag across the garage floor will not get used. Check where you are storing it before you buy, because water weighs about eight pounds per gallon and a full three-day kit for four people will be well over sixty pounds.
Set the finished kit somewhere dry, dark, and reachable by every adult in the house without moving furniture. An interior closet shelf near the front door beats a crawlspace or an overhead garage rack every time.
2. Pack Water, Food, and Daily Essentials
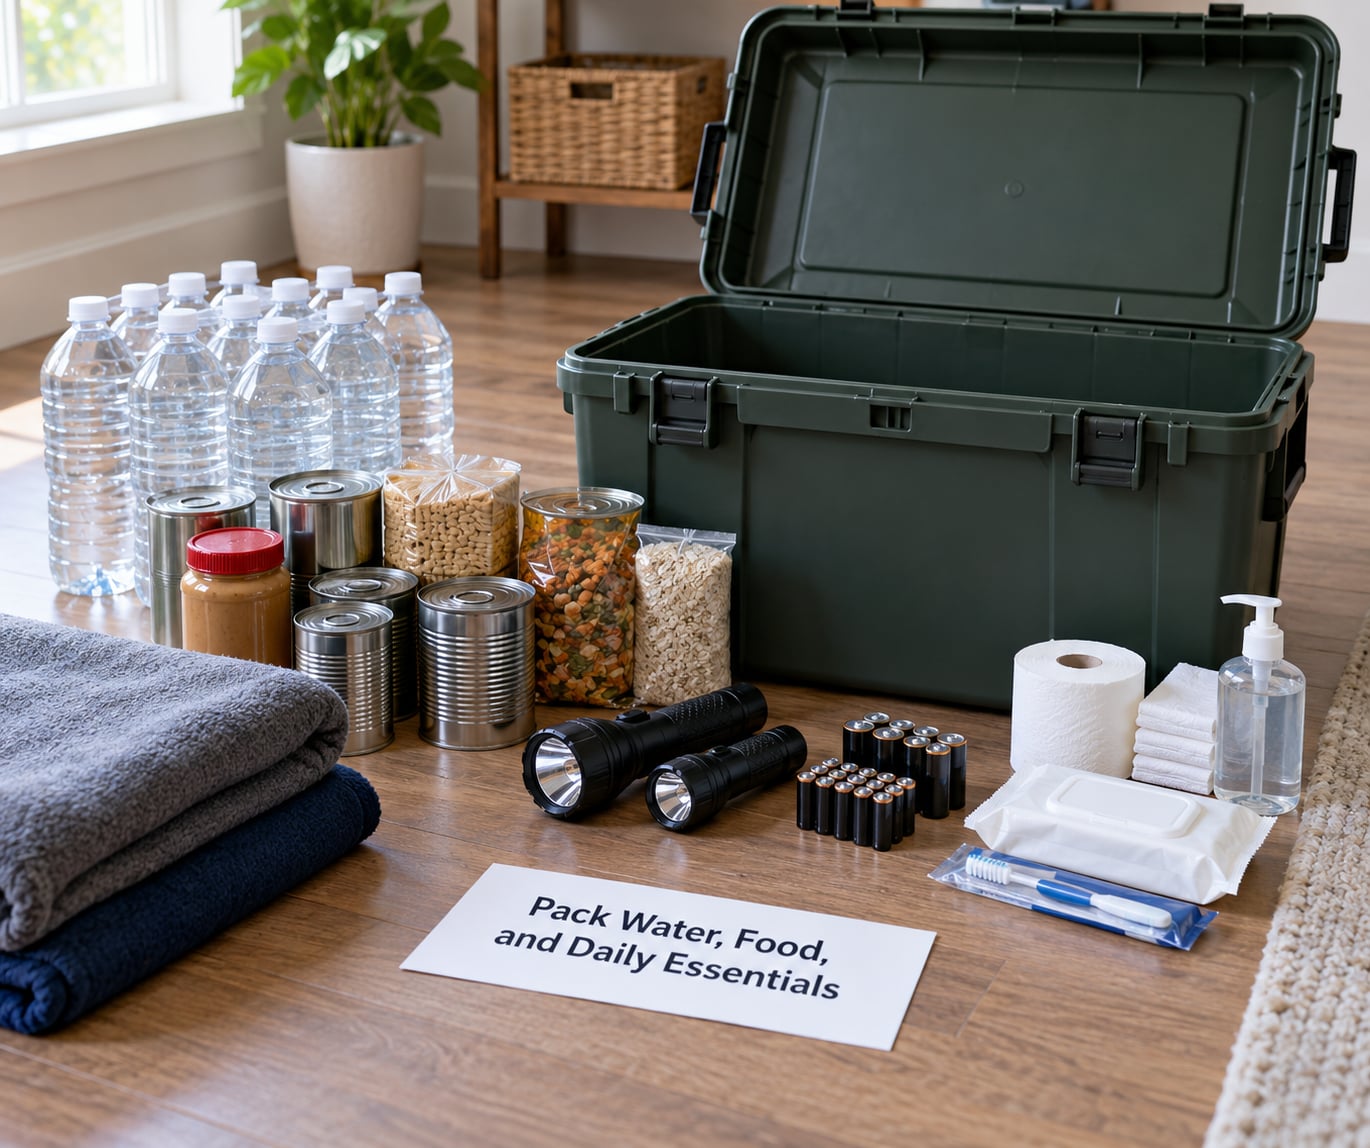
Water comes first because it is the heaviest item and the one that ages out fastest. One gallon per person per day for three days is the baseline, and buying jugs in bulk is cheaper per gallon than picking up single bottles later. Wash every container with hot soapy water and let it dry completely before filling, since a residue of detergent or a reused jug taints the water and people report noticing it immediately.
Fill the containers to the top, cap them tightly, and write the fill date on each one with a permanent marker or masking tape. Rotating water on a six-month schedule keeps it from becoming an afterthought, and swapping a jug costs nothing compared to discovering bad water during an outage.
For food, stick to items that need no cooking, no refrigeration, and no water to prepare. Canned goods with pop-top lids, energy bars, nut butter, dried fruit, crackers, instant coffee, and electrolyte packets are all fair game. Skip anything that needs a can opener unless the opener is in the kit, and pack more calories per pound than you think you need.
Also include the small daily items people forget: paper plates and cups, a manual can opener, plastic utensils, toilet paper, garbage bags with ties, hand sanitizer, toothbrush and toothpaste, soap, hygiene supplies, and garbage ties. For babies, add diapers, wipes, and formula. For pets, add a bowl, leash, waste bags, and their usual food.
3. Add First-Aid and Health Supplies
Build a first aid kit that matches how many people you are covering and the kinds of injuries your area produces. Include adhesive bandages in several sizes, sterile gauze pads, adhesive tape, scissors, tweezers, gloves, a CPR breathing barrier, a small hand-crank flashlight, and an up-to-date first aid manual. Anyone trained in bleeding control should add a tourniquet and hemostatic gauze.
Medication planning is where kits usually fail. Ask your pharmacist how long your prescriptions can reasonably last without a refill, then stock that supply. Keep medications in original labeled bottles, and list every name, dose, prescribing doctor, and pharmacy in the emergency information sheet rather than relying on memory under stress.
Never decide on your own to change a dose or substitute a medication. Talk to your doctor or pharmacist about what to store, how to store it, and what to do if a dose is missed.
4. Protect Important Documents and Money
Paper records matter most when the originals are lost. Put copies of your government ID, insurance policies, deed or lease, vehicle registration, mortgage or loan details, and recent tax returns into a waterproof document pouch or a zip bag sealed inside a plastic container. Include a page listing who to call and a spare key location.
Keep the same set scanned and uploaded to a secure cloud folder you can reach from a phone, and print one paper copy to leave in the kit. Have the paper set reviewed once a year, because insurance cards and policies change more often than people expect.
Add cash in small bills. Card readers and ATMs fail when the power is out, and vendors may not have network access to run a card transaction. A small stack of ones, fives, and tens covers vending, fuel, and a day of ordinary expenses.
5. Include Communication and Emergency Information
Write a single emergency information sheet and put it where it cannot go missing: inside the kit lid pocket, taped inside the document pouch, and photographed on your phone. It should list local emergency numbers and out-of-state contact names and numbers, your designated meeting point, your shelter-in-place plan, insurance and medical details, and the names of two neighbors who can check on you.
Communication gear matters as much as the paper. A hand-crank or battery-free radio keeps you on local broadcasts when cell towers are down or batteries are dead. Pair it with a NOAA weather radio if your area gets severe weather alerts, and a battery-powered flashlight per person plus one spare that nobody depends on for daily use.
Test the radio and the flashlights when you build the kit. Untested gear fails on first use, which is the single most common complaint from people who assembled a kit years ago and never opened it again.
6. Customize the Kit for the Household
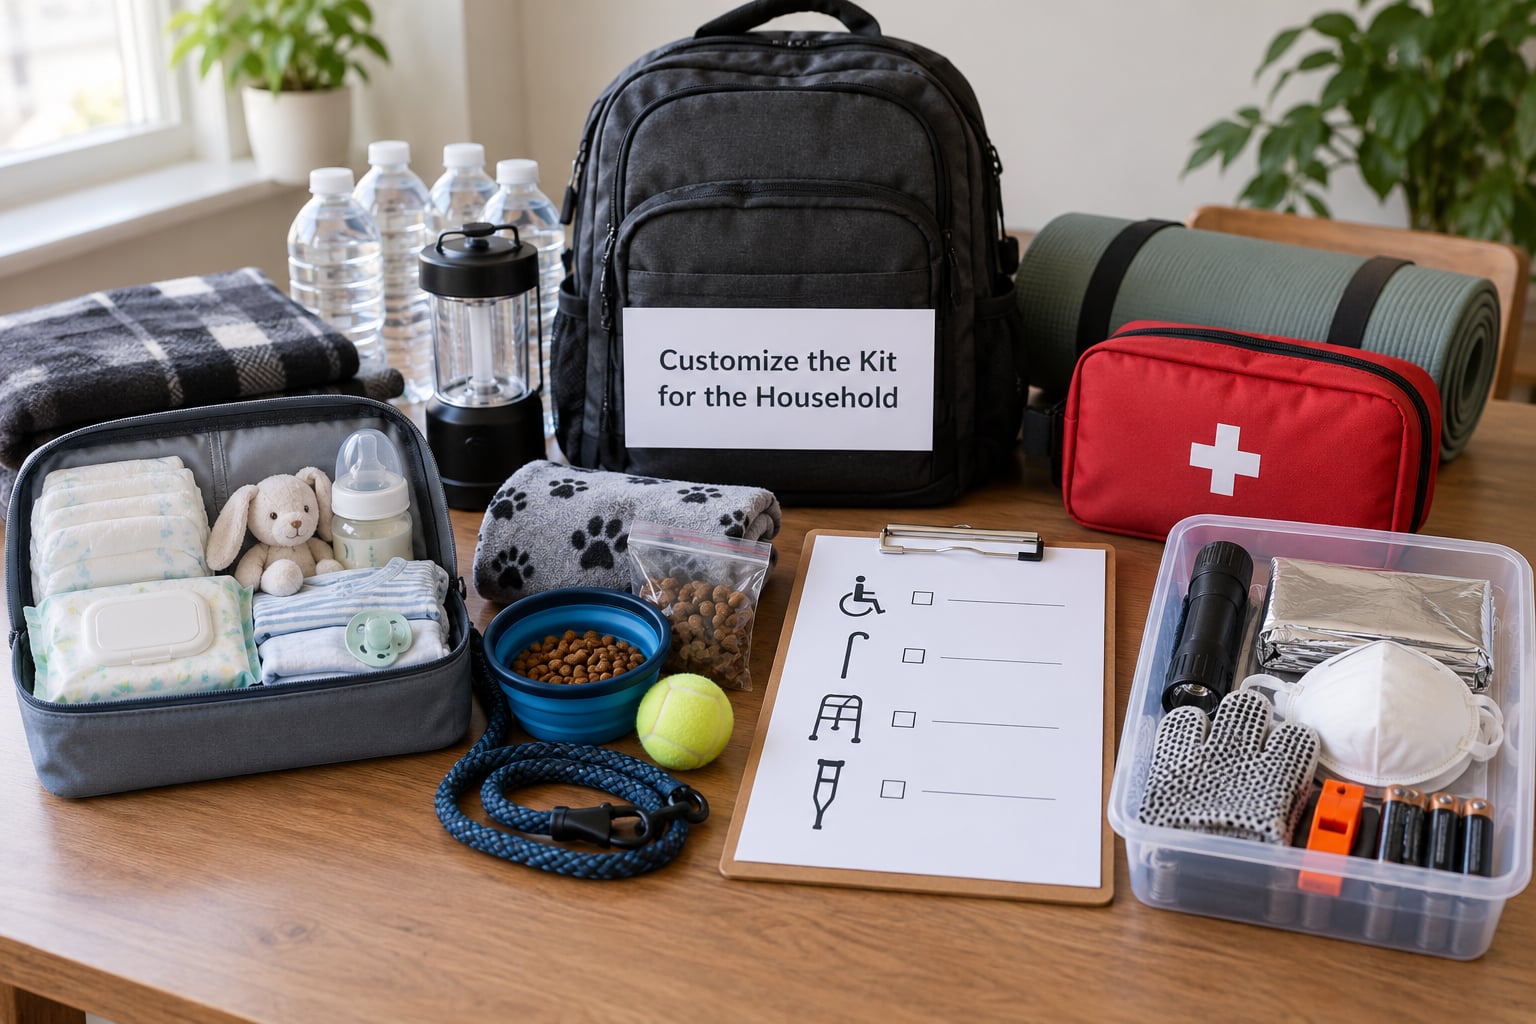
The standard list is a floor, not a ceiling. Infants need formula, bottles, diapers, wipes, and a familiar blanket. Older adults and anyone with mobility needs may need extra prescription supply, a backup cane or walker, charging cables for powered equipment, and written instructions for anyone assisting them.
Pet owners add a carrier, leash, food for the usual number of days, water, waste bags, and an updated vet contact. Renters should confirm the building’s evacuation route, whether their unit has a fire door and extinguisher, and whether the property has a designated shelter area, since a garage or storage closet may be locked when it matters.
Then match the hazards to where you live. Coastal and hurricane areas get N95 dust masks, tarps, plastic sheeting, duct tape, and a pry bar. Wildfire country adds respirators and extra eye protection. Northern states need hand warmers, chemical warm packs, heavy clothing, and a candle. Flood zones need waterproof pouches for documents and a foot pump. Earthquake areas benefit from a wrench or adjustable pliers for the water shutoff valve.
Keep weight discipline in mind for anything you might have to carry a long distance. A go-bag that a person cannot lift is a box of supplies, so build one that holds water, a first aid kit, a flashlight, spare batteries, cash, documents, a whistle, and a change of clothes, and keep it lighter than you think necessary.
7. Label, Review, and Maintain the Kit
Label the outside of the container with the date it was assembled, and label the water and perishable items individually. Include a short inventory card inside so someone under stress can see what exists without unpacking the whole bin.
Set two calendar reminders a year, ideally at the daylight saving time changes, because that is the habit most households keep. At each review, test the flashlights and radio, replace expired food, check the fill dates on water, confirm medications are still in date, and re-check documents and contact numbers.
Walk through the kit once with every member of the household, including anyone who needs help. Two short drills a year teach people where the kit lives and who is responsible for what, and families who have drilled report noticeably calmer behavior during a real outage.
Common Mistakes
Most kits fail for the same handful of reasons, and every one of them is fixable in an hour.
- Overpacking a go-bag. People load a bag that weighs fifty pounds and cannot move it down a staircase. Cut it down to the minimum and keep the bulk stock at home.
- Filling jugs without washing them. A reused jug that was not cleaned and dried taints the water and teaches people to distrust the whole kit.
- Buying gear and never testing it. Hand-crank radios, flashlights, and power banks fail when batteries corrode or cables go brittle. Test them at every review.
- Forgetting prescription medications. This is the item people most often wish they had packed. Include a written list of prescriptions so anyone else can request a refill.
- Packing perishables and items that need a stove. Fresh food, ice cream, and anything requiring cooking are useless without power. Replace them with shelf-stable, ready-to-eat items.
- Keeping only one kit in one hard-to-reach spot. A garage shelf or a locked storage bin costs you precious minutes. Keep a small go-bag by the door and a car kit in the trunk, and tell everyone where they are.
- Ignoring local hazards. A generic list misses the dust masks, extra warmth, or water shutoff tool your neighborhood actually needs.
Frequently Asked Questions
How much water and food should a home emergency kit hold?
Plan on one gallon of drinking water per person per day for at least three days, which is the baseline used by Ready.gov and the Red Cross. Add cooking and sanitation water on top if you plan to stay home. For food, pack at least three days of shelf-stable, no-cook items per person, and choose things that need no refrigeration, no water to prepare, and no can opener unless the opener is in the kit.
Where should I store my home emergency kit?
Store it somewhere dry, dark, and reachable by every adult in the household without moving furniture. An interior closet shelf near an exit usually works better than a garage, basement, or attic. Tell everyone where it lives, label the lid, and keep a smaller go-bag by the front door plus a car kit in the trunk so one bag is never the only copy.
How often should I check and replace emergency kit supplies?
Review the whole kit twice a year, and the daylight saving time changes are an easy pair of reminders to set. At each check, test the flashlight and radio, swap expired food, rotate water jugs, confirm medications are still in date, and re-read the document copies and contact list. Write the fill date on every water container so rotation never depends on memory.
What should I include for babies, older adults, and pets?
For babies, add formula, bottles, diapers, wipes, and a familiar blanket. For older adults or anyone with mobility needs, stock extra prescription supply, a backup cane or walker, charging cables for powered equipment, and written assistance instructions. For pets, pack a carrier, leash, food and water for several days, waste bags, and an updated vet contact.
Should I build my own emergency kit or buy a pre-made one?
Building your own is almost always better for a home kit, because you control the quantities and can include the prescription medications, pet supplies, and documents that off-the-shelf kits leave out. A pre-made kit is a reasonable starting point for a car trunk or a new apartment since it is complete on day one. Either way, open it, check every item, and add the family-specific pieces.
What should I leave out of my emergency kit?
Leave out perishables and frozen food, anything that needs a stove or a power outlet, oversized tools, and duplicate gear that bloats weight without adding capability. Skip candles near plastic containers, and keep the evacuation go-bag light enough that any adult in the house can carry it down a staircase. Heavy duplicate water and canned goods belong in the home stock, not the portable bag.
Conclusion
Start with the container. Decide where the kit will live, buy a bin that fits that spot, and write the date on the lid before you shop for anything else. Then fill it by category, water first, and label as you go.
Add one item each week for the first month, since a kit assembled in one sitting tends to leave gaps, and put two review dates in your calendar now rather than later. Refresh it 2026 and every six months after that.