Roof leaks around chimneys usually come from failed flashing at the point where the chimney passes through the roof, and the next most common culprits are crumbling mortar joints and a cracked or porous chimney crown. Water that gets past any of those points travels through the sheathing, along a wall cavity or a framing member, and finally drips through the ceiling drywall somewhere well away from the chimney itself. That travel path is exactly why the stain on your ceiling rarely sits where the failure actually is.
I have walked plenty of attics where the homeowner pointed at a stain and said the chimney, and the stain turned out to be three joists over from a cracked pipe boot. Diagnosis beats guesswork here, so this guide walks through the failure points in the order they actually fail, then the inspection steps you can take from the ground and from the attic before anyone climbs a ladder.
Table of Contents
- What Causes Roof Leaks Around Chimneys?
- What Causes Roof Leaks Around Chimneys When the Flashing Still Looks Fine?
- The Most Common Chimney Leak Causes at a Glance
- Failed or Damaged Chimney Flashing
- Cracked or Missing Mortar and Damaged Masonry
- Damaged or Improperly Installed Shingles Around the Chimney
- A Damaged Chimney Crown or Unsealed Chimney Top
- How to Inspect the Roof and Chimney After Rain
- Is It Really the Chimney? Leaks That Get Misdiagnosed
- How to Fix a Leak Around a Chimney
- Why Sealant-Only Repairs Keep Failing
- When to Call a Roofer or Chimney Specialist
- Will Homeowners Insurance Cover a Chimney Leak?
- A Short Prevention Checklist
- Frequently Asked Questions
- Does a leaking chimney mean the whole chimney has to be replaced?
- Is roof sealant enough to fix a leak around a chimney?
- Why does the leak show up somewhere other than the chimney?
- Can the roof rather than the chimney cause what looks like a chimney leak?
- How do I know whether a chimney leak is flashing or masonry?
- Conclusion
What Causes Roof Leaks Around Chimneys?
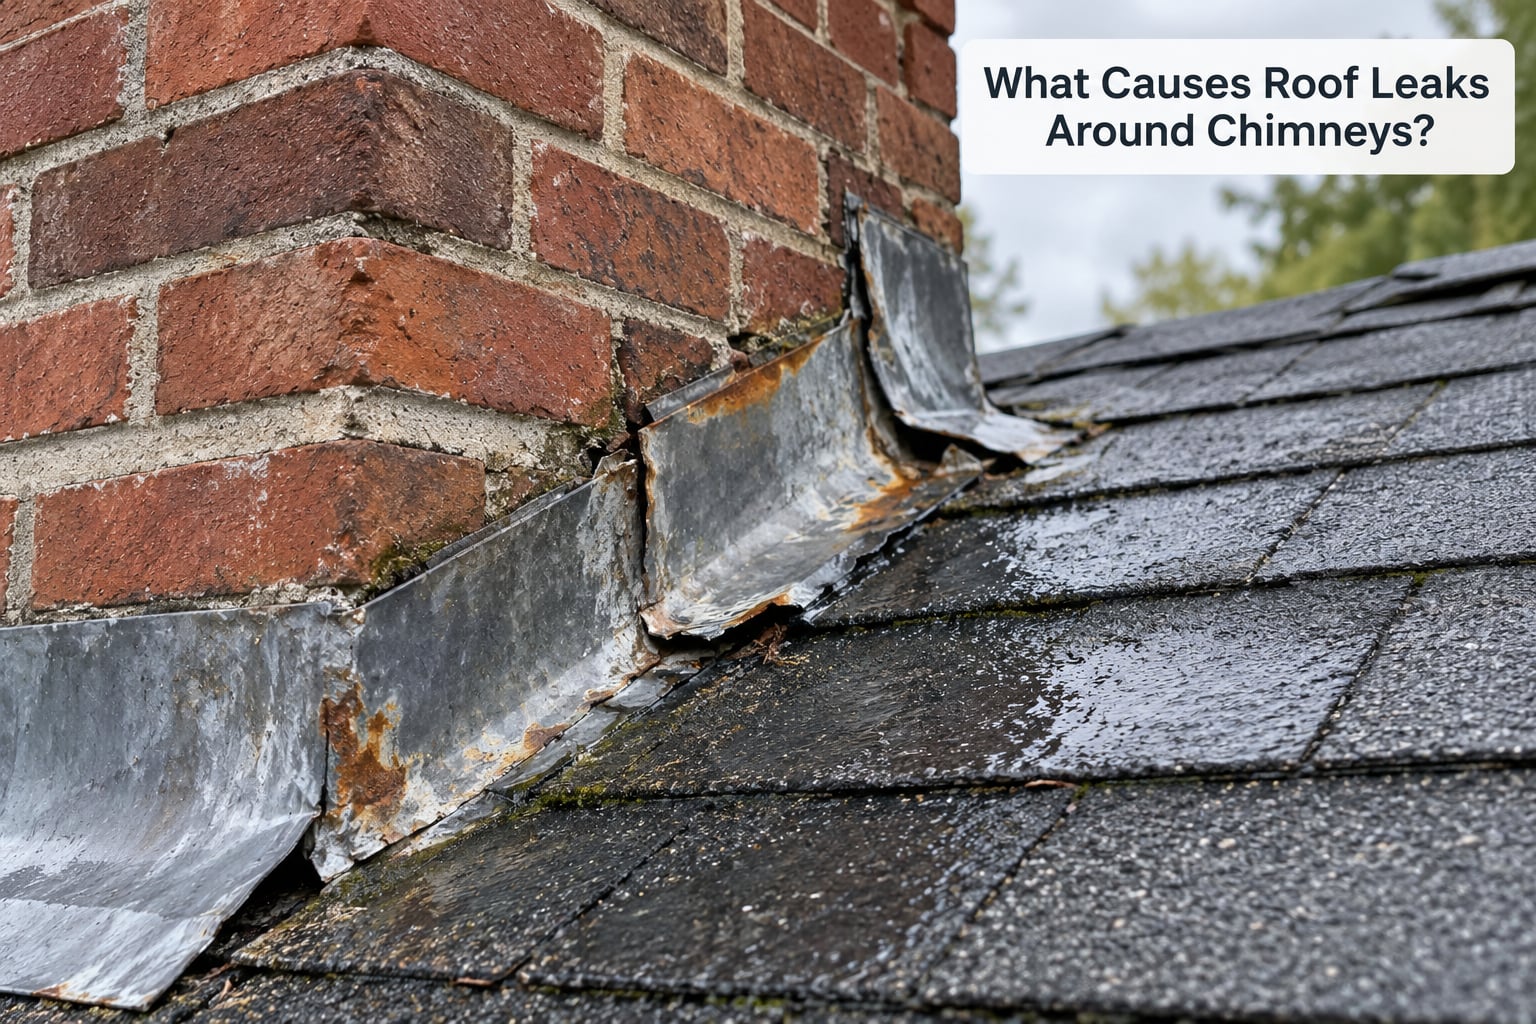
What causes roof leaks around chimneys, in plain terms: water enters at the roof-to-chimney junction because the flashing no longer seals it, because the masonry around it has opened up, or because the covering above it has lost its overlap. The chimney itself is rarely the problem. It is the transition between two materials that expand and contract at different rates, and that junction is the single most vulnerable point on a typical roof.
Seven causes account for the overwhelming majority of the calls I know about:
- Failed or corroded flashing. The metal or membrane assembly at the roof-to-chimney junction rusts, separates or lifts, and water that should have run down the roof deck now runs into the attic instead.
- Deteriorated sealant. The caulk or roofing sealant applied over a joint has hardened, cracked or washed out, leaving a channel that guides water straight to the sheathing.
- Cracked or missing mortar joints. Freeze-thaw cycles and general weathering open gaps between bricks, and counter-flashing that used to be buried in those joints is now exposed.
- A damaged or porous chimney crown. Cracks, a flat slope or spalled concrete let water soak into the masonry, which then carries it down toward the roof junction.
- A missing cap or inadequate chimney top. Without a cap, rain falls straight into the flue and onto the crown, keeping the masonry permanently damp.
- Damaged or missing shingles around the chimney. Lifted tabs, a bad cut at the intersection, or underlayment that was never turned up properly expose the roof deck.
- A missing cricket behind a wide chimney. Water pools behind the stack, backs up under the shingles, and finds its way indoors during heavy rain or snowmelt.
What Causes Roof Leaks Around Chimneys When the Flashing Still Looks Fine?
Plenty of flashing looks perfectly fine from the ground and is still the leak. Metal that has not visibly rusted can still be sitting loose, and the giveaway is often not the metal but the sealant bead around it. A hairline crack in a hardened sealant joint is a bigger opening than most people expect.
There is also the wind-driven rain factor. Rain driven horizontally into an upward-facing joint enters at pressures that a downward shower never produces, which is why some chimneys leak only in storms and stay dry through a week of ordinary drizzle. And on wide chimneys, water that pools behind the stack backs up under shingles that look perfect from the street.
The Most Common Chimney Leak Causes at a Glance
| Cause | Where the water shows up | Warning signs | Who fixes it |
|---|---|---|---|
| Failed base or step flashing | Ceiling or wall near the fireplace, often above the ceiling line on the room side | Visible rust, lifted metal edges, a widened gap at the roof junction | Roofer, sometimes with a mason to cut the counter-flashing joint |
| Deteriorated sealant | Same area as the flashing, appearing during or just after rain | Cracked, missing or hardened caulk along the joint | Roofer, as part of a proper flashing repair rather than a standalone fix |
| Cracked mortar or masonry | Damp brick face, water staining on the chimney face itself | Spalled bricks, washed-out joints, rust streaks below the flashing | Masonry contractor or a roofer with masonry skills |
| Damaged chimney crown | Downstream wall or ceiling, and damp patches on the masonry | Cracks in the concrete cap, spalled edges, water pooling on top | Mason, sometimes with a roofer for the flashing below |
| Missing cap or unsealed top | Damp masonry, sometimes a musty smell near the fireplace | Rain visible in the flue, debris and mortar droppings on the crown | Mason or a chimney specialist |
| Damaged shingles or underlayment | Stain lower on the wall or ceiling than the flashing failures cause | Missing or curled shingles at the intersection, exposed deck | Roofer |
| Missing cricket behind a wide chimney | Ceiling stain near the top of the stack, worse in heavy rain or snowmelt | Ponding water behind the chimney, staining on the rear flashing | Roofer with a metal flashing specialist |
| Ice dam backup | Water stain well downslope, sometimes the whole ceiling edge | Ice or water behind the chimney, repeated blockages at the same spot | Roofer for ventilation and ice-dam work |
Failed or Damaged Chimney Flashing
Flashing is the whole sealing system at the junction, not one strip of metal. Knowing the parts explains most failures, because each part fails in its own way.
- Base flashing (apron flashing). The L-shaped strip that runs up the roof deck and turns up the chimney face. It sits under the shingles so any water that gets past the shingles runs over the top of it.
- Step flashing. A small rectangular piece at each shingle course up the sides of the chimney. Step flashing is the part most often installed wrong.
- Counter-flashing. A metal piece set into a cut mortar joint above the step flashing, then caulked. It caps the top edge and sheds water over the steps below.
- Back pan or back flashing. The closure across the uphill face, which is the hardest detail to get right and the one most often skipped.
- Cricket or saddle. A peaked structure behind a chimney wider than about 30 inches, which splits water around the stack instead of letting it pool against it.
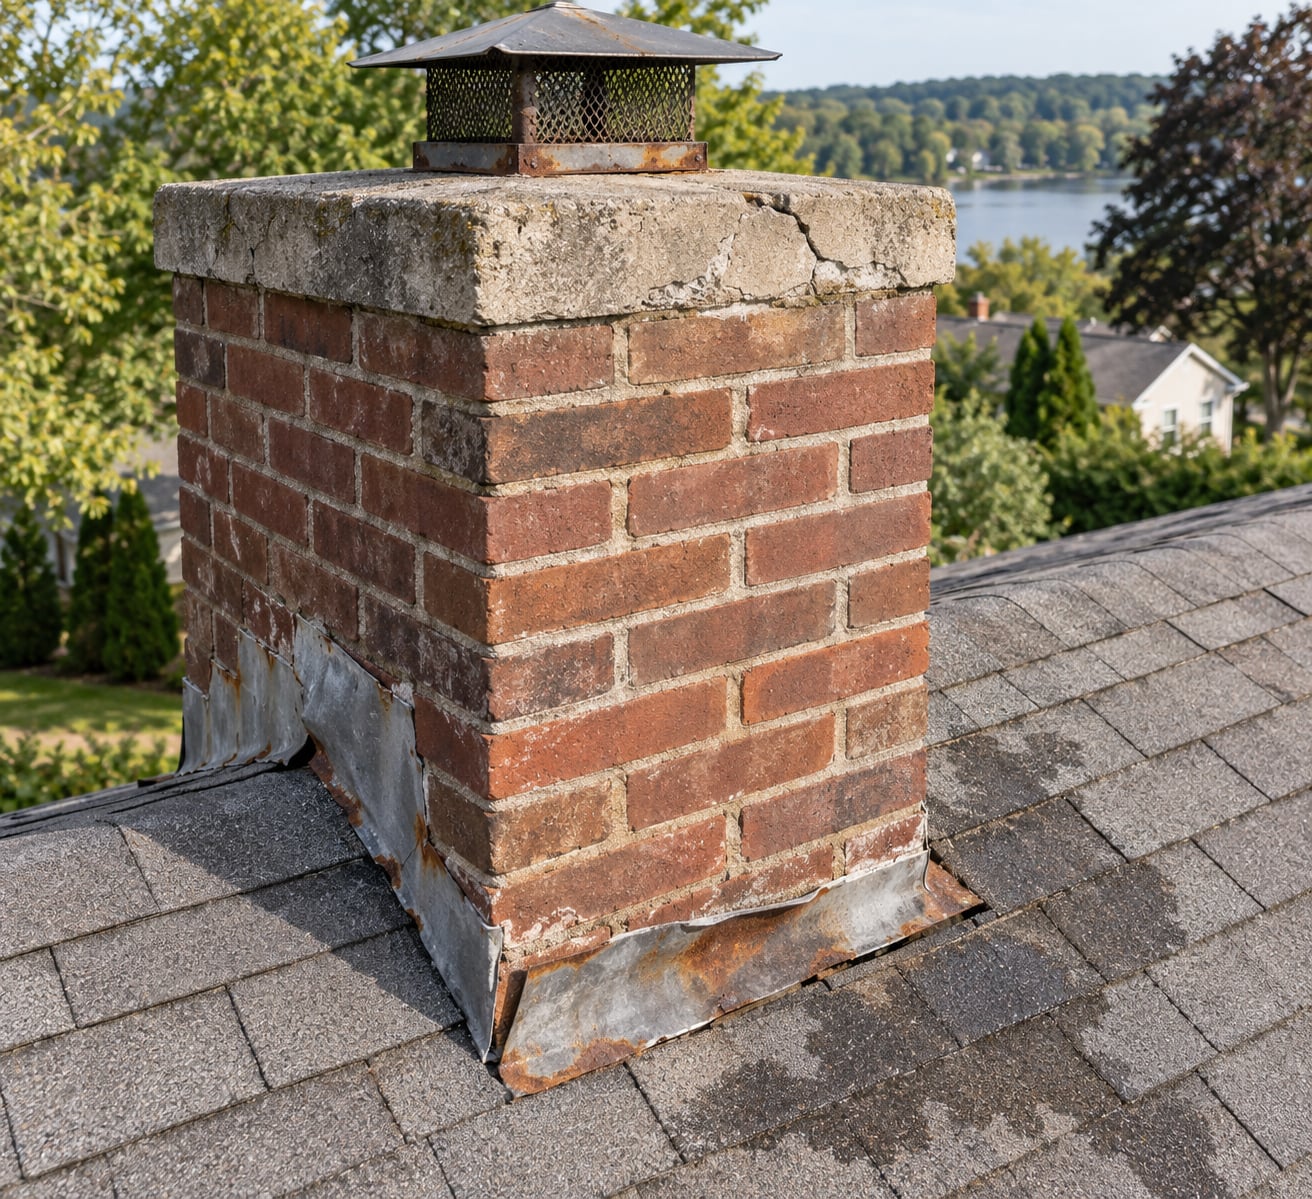
Failures show up in predictable ways. Galvanized steel flashing rusts through and looks like it flakes apart. Step flashing that was caulked into a single continuous strip instead of lapped one piece per shingle course lets water run along the underside of the strip and out into the attic. Counter-flashing that was never cut into the mortar joint, just surface-mounted and caulked, has a seam that opens the first time the joint moves.
| Flashing material | Typical service life | Common failure mode |
|---|---|---|
| Galvanized steel | Roughly 10 to 20 years | Rust-through, then a slow steady drip |
| Aluminum or tin | About 15 to 25 years | Pinholes, then corrosion creep along the joint |
| Modified bitumen membrane | About 20 to 30 years | Dried out and split, usually in exposed sunny faces |
| Lead | Over 50 years | Very rare, but the fix is specialised work |
| Copper | Over 50 years | Verdigris streaking; failure is almost unheard of |
Service lives are rough ranges rather than promises. Coastal salt air, snow and a south-facing chimney in a hot climate all shorten them.
Cracked or Missing Mortar and Damaged Masonry
Mortar is the sacrificial part of a brick chimney. It is designed to be softer than the brick so that when the structure moves, the joint gives way instead of the brick. That works right up until the joint washes out or crumbles, and then the chimney has a set of open channels running up its face.
Freeze-thaw is what opens them. Water gets into a joint, freezes, expands, and pushes the mortar out. Repeat that a few hundred times a season and the joint is gone. Salt-laden spray or simply old, powdery mortar accelerates the same process.
Water in those joints matters more than it looks. Counter-flashing is normally buried in a mortar joint, and once the joint fails, the flashing loses its support and its caulk seal. A masonry problem and a flashing problem are often the same problem in two places, which is why patching flashing alone on an old chimney can fail again within a season.
A second, subtler issue is single-wythe masonry. A chimney built as one brick skin has no cavity behind it, so in driving rain it simply absorbs water and passes it on. The face of the brick stays damp long after the rain stops, and that moisture eventually reaches the roof junction from the inside of the wall.
Damaged or Improperly Installed Shingles Around the Chimney
Shingle work around a chimney is cut work, and cut work is where workmanship shows. If the shingle courses are cut too short at the intersection, the base flashing is left exposed instead of tucked under the shingle edge, and water that should have gone over the flashing goes behind it instead.
Lifted or missing tabs let wind get under a shingle, which lifts the whole course. From the ground this looks cosmetic. From the roof it means the underlayment is doing the job of a shingle, and underlayment was never designed to shed water, only to give the roofer a dry working surface.
Underlayment that was not run up the chimney and behind the flashing is the quiet version of the same problem. Nobody sees it from the street, and it lets water reach the deck without ever appearing at the joint itself. This one shows up as a stain lower down than the flashing failures do, because the water is entering at deck level rather than at the junction.
A Damaged Chimney Crown or Unsealed Chimney Top
The crown is the sloped concrete cap on top of the masonry, and its only job is to shed water away from the chimney. It is usually the first thing a mason checks, because it is cheap to inspect and it explains a surprising number of leaks.
A crown fails in a few predictable ways. It cracks, usually along a joint where the flue passes through. It goes flat, so water sits on it rather than running off. Or the concrete spalls, leaving the masonry below porous. Once the crown is compromised, rain soaks into the brickwork, the joints hold moisture, and that moisture migrates down the chimney toward the roof.
The top of the stack also matters. A chimney with no cap catches rain directly, fills with debris, and keeps the crown wet all year. Some caps are also undersized or sit too low, which cuts off draft and traps moisture around the flue. On a chimney that is not in use, a small opening in the cap lets that trapped moisture escape instead.
How to Inspect the Roof and Chimney After Rain
A useful inspection runs indoors first and outside second. Do it while it is raining if you can, because a live leak tells you more than a dried-out stain.
- Mark the stain. Pencil a line around the damp mark and date it. Homeowners on roofing forums use this simple trick to track whether the leak is spreading, and it takes thirty seconds.
- Note the pattern. Constant staining points to a steady source. Staining only in wind-driven rain points at an open joint. Staining only during snowmelt points at an ice dam or a ponding cricket. Staining that moves each storm suggests water tracking along framing.
- Watch the weather side. Copper caps leave verdigris streaks that show which face of the chimney water runs down, which gives you the entry face to look at on the roof.
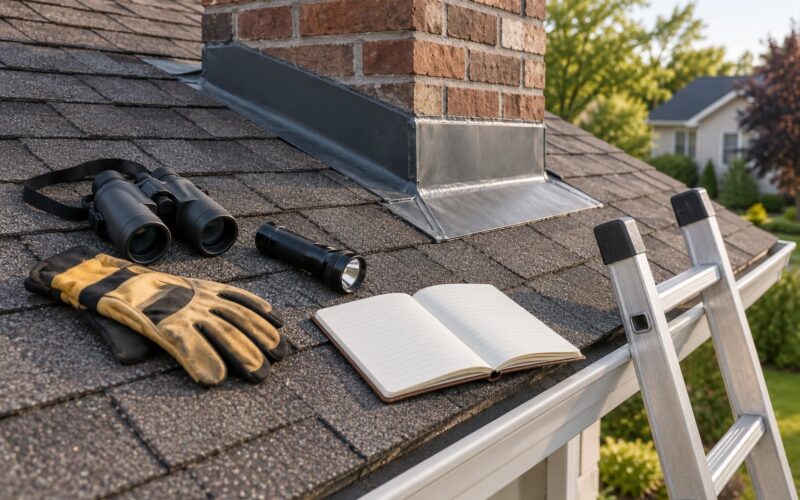
- Look up from the ground. Binoculars are enough to spot lifted shingles, a missing cricket, a rusted flashing edge or a stain on the top of the crown.
- Check the attic in the rain. With a flashlight and a headlamp, look at the sheathing around the chimney for dampness or staining. Cutting a small inspection opening in a homeowner forum thread has more than once revealed water entering several feet higher up the chimney than the interior stain suggested.
- Compare against the inside. If the attic framing around the chimney is dry but the ceiling is stained, the water is likely coming through the wall or the masonry above the roof line rather than through the deck.
- Photograph everything. Dated photos of the interior stain and the roof area before anyone works on it are the single most useful thing you can hand an insurer or a contractor.
Now set a hard safety limit. Anything past a one-story roof pitch, any roof that is wet, frosted or still damp, and any chimney needing roof-level access belongs to a roofer with proper equipment. The money you save doing it yourself is small compared to the cost of a fall or a damaged shingle field.
Is It Really the Chimney? Leaks That Get Misdiagnosed
Several things near a chimney produce a stain that looks like a chimney leak. A cracked pipe boot for a plumbing vent or a furnace flue, usually in a bathroom or utility wall that happens to be under the stack, is the classic example. A roof valley that terminates close to the chimney floods under driving rain and wets the same ceiling. A skylight or bathroom exhaust vent on the same roof plane does the same. Blocked gutters can push water back up over the shingles near the stack.
There is one rule of thumb worth keeping in mind before blaming the masonry: the 3-to-10 rule is a UK guideline about flue height, meaning a flue should be between three and ten times the appliance height in diameters. It has nothing to do with leaks, and if a contractor quotes it while explaining your stain, that is a sign to ask for a better diagnosis.
How to Fix a Leak Around a Chimney
The fix has to match the failure point. Each of these takes a different trade, and doing the wrong one is how a small repair turns into a recurring bill.
- Flashing failure. The roofer removes the old flashing, repairs or replaces any damaged sheathing and underlayment, cuts a fresh reglet into the mortar joint for counter-flashing, and installs new base and step flashing, one piece per shingle course, before the shingles go back down.
- Sealant failure with sound flashing. Old caulk is cut out, the surfaces are cleaned and dried, and new sealant is applied to properly prepared joints. This is a legitimate small repair only when the metal underneath is intact.
- Masonry failure. A mason rakes out the failed joints and repoints them with fresh mortar, then resets the counter-flashing into the new joint. Repointing without re-flashing leaves the weak link in place.
- Crown failure. The crown is chipped out, a new one is poured with a proper slope, and a new cap is fitted. This is the highest-value fix per dollar on the whole list.
- Shingle or underlayment failure. The roofer replaces the affected courses and properly integrates new underlayment with the flashing. Sealant smeared over a lifted tab is not a repair.
- Missing cricket. The roofer builds the saddle behind the stack and ties it into the existing step and back flashing. On a wide chimney this is the difference between a leak that stops and a leak that returns every hard rain.
A cricket should be there on any chimney wider than about 30 inches. If yours is wider than that and there is no saddle behind it, you have found the cause of a leak that has been blamed on the flashing twice.
Why Sealant-Only Repairs Keep Failing
Roof sealant and roofing cement are good at hiding a small, dry problem. They are not designed to be the waterproofing layer at a chimney junction. Used alone, they fail for three reasons: they harden and shrink, they never adhere well to a wet or dusty masonry surface, and they sit on top of a joint that is still moving.
Homeowners on roofing forums describe the pattern over and over: a contractor caulks the flashing, the leak stops for a season, and it is back. Two or three rounds of that later the flashing is a mess of hardened blobs and the underlying metal may be corroded as well. If you see more than a thin, even bead of sealant along the joint, you are looking at a band-aid.
A legitimate repair comes with a written scope and photos of the actual failure point before the work starts. If a contractor cannot tell you which part of the flashing is failing, they are guessing, and guessing is what produced the previous failed repair.
When to Call a Roofer or Chimney Specialist
Call a professional when any of these are true:
- Water is actively entering during rain, and the ceiling or drywall is swelling or sagging.
- The leak has been repaired before and returned, which means the diagnosis was wrong rather than the work.
- You see a large crack running through the masonry, or bricks that are visibly spalling or displaced.
- Water stains appear on the chimney face itself, which points into the masonry rather than the flashing.
- The chimney is wide enough to need a cricket and does not have one.
- The roof is anything beyond a low-slope one-story roof, or the roof surface is wet, frosted or fragile.
- The leak appeared within a few months of a new roof install, which is a workmanship question and a warranty question.
That last one deserves a note. If the chimney is older and the roof is new, the flashing at the junction is part of the roof contract, and a leak there should be raised with the roofer through their workmanship warranty rather than treated as a separate masonry job. Homeowners in this situation often report the roofer blaming the chimney, and the chimney mason blaming the roof, while the flashing sits unresolved between the two. Get the diagnosis in writing before you accept that framing.
Roofers and chimney sweeps handle most of this work, but masonry repair, crown rebuilding and repointing need a mason. A contractor who does both is worth keeping.
Will Homeowners Insurance Cover a Chimney Leak?
Call your insurer if the leak followed a specific event, a storm, a freeze, or a sudden failure. Coverage is more likely when damage is sudden and accidental rather than the result of years of neglect, which insurers routinely classify as deterioration and maintenance.
Before you file, document the trigger: the date of the storm, dated photos of the interior damage, and the written diagnosis of the failure point. Insurance discussions in homeowner forums follow a familiar pattern, where claims tied to a dated weather event get approved and claims framed as an old leak get denied.
Keep the emergency mitigation separate from the repair. Buckets under the drip and a dehumidifier running protect the home from further damage, and that is generally reimbursable. Do not delay the call while you wait to see if it happens again.
A Short Prevention Checklist
- Look at the flashing from the ground every spring and fall, and check for rust, lifting or a widening gap at the junction.
- Pencil around any interior stain so you can tell next season whether it grew.
- Confirm the chimney cap is in place, tight and sized correctly.
- Keep the crown clear of debris and note any new cracks in the concrete.
- Clear the valleys and gutters near the chimney before the wet season.
- Check the roof line for missing or lifted shingles on the uphill side of the stack.
Frequently Asked Questions
Does a leaking chimney mean the whole chimney has to be replaced?
Almost never. Most chimney-side leaks come from the flashing at the roof junction, from failed mortar joints, or from a cracked or porous crown, and all three can be repaired without rebuilding the structure. A full rebuild only makes sense when the masonry itself is failing, such as a large vertical crack, displaced bricks, or a crown that cannot be poured soundly. If a contractor proposes rebuilding a chimney for what sounds like a flashing problem, ask for the failure point in writing before agreeing to anything.
Is roof sealant enough to fix a leak around a chimney?
Sealant is a temporary measure, not a repair. It works as a stopgap for a small dry joint when the metal underneath is intact, but it hardens, shrinks and peels away from dusty masonry within a couple of seasons. If the flashing is corroded, the counter-flashing joint is open, or the mortar has washed out, caulk sits on top of the problem and the leak returns. A durable fix means replacing the flashing or the mortar and then sealing the joints properly.
Why does the leak show up somewhere other than the chimney?
Because water travels. Once it gets past the flashing or into the masonry, it runs down the back of the sheathing, along a top plate or wall stud, and around framing until it finds a nail, a junction box or the back of the ceiling drywall. The stain is where the water stopped, not where it entered. This is why the failure point is often several feet higher up the chimney than the interior mark suggests, and why an attic look during rain is worth more than guessing from the ceiling.
Can the roof rather than the chimney cause what looks like a chimney leak?
Yes, and it happens more often than most homeowners expect. A cracked pipe boot for a plumbing or furnace vent, a roof valley that floods during driving rain, a nearby skylight or exhaust vent, or blocked gutters that back water up over the shingles can all produce a stain in the same room as the fireplace. A roofer worth keeping will inspect the whole roof plane and the attic before naming the chimney as the source, and will show you the failure point rather than just pointing at the stack.
How do I know whether a chimney leak is flashing or masonry?
Look at the masonry face first. Damp or stained brick, rust streaks running down from the flashing, spalled bricks and washed-out mortar joints point to a masonry failure that needs repointing and a crown check. A stain that appears with no visible damage to the brick, especially during wind-driven rain only, usually points to the flashing joint. Attic staining right at the sheathing around the chimney also points to flashing. When the two are present together, treat the masonry first, because new flashing set into a failed joint will not hold.
Conclusion
Most leaks around a chimney come down to four things you can actually look at: the flashing joint where the roof meets the stack, the mortar joints and brickwork, the shingles and underlayment at the intersection, and the crown and cap on top. Start on the ground with binoculars, mark the interior stain with a pencil so you can track it, and check the attic during rain before anyone starts cutting.
Then stop at the roof edge. Steep, wet or high roofs are not a DIY job, and neither is a leak that has already been repaired once without success. A roofer or chimney specialist who can point at the actual failure point, in writing, will fix it faster than anyone who arrives with a caulk gun.