A wet crawl space gets fixed in one order: take out the standing water, find and shut off whatever is putting it there, dry the whole space out, throw out anything that cannot be dried, then block ground moisture and humid outside air from coming back. Knowing how to fix a wet crawl space means following that order. Most homeowners can do the first five steps in a weekend with a wet/dry vacuum, a dehumidifier and a roll of 20 mil polyethylene. The work gets complicated the moment the water is sewage, the framing is soft, or the source is a groundwater table that will not drop.
It is worth doing quickly. Standing water in a crawl space feeds wood-rot fungi in the joists and subfloor, gives mold a dark damp place to colonize, and pulls termites and other wood-boring insects straight into the framing above. You will also notice it from the house, because the musty smell that seems to come from the floorboards is almost always the crawl space talking. Our team has walked enough of them to say that the smell is not a flooring problem.
Here is the process we work through, in the order that matters.
Table of Contents
- What You Need
- Safety gear
- Inspection and cleanup tools
- Materials for the permanent fix
- How to Fix a Wet Crawl Space Step by Step
- 1. Inspect the Crawl Space Safely
- 2. Find and Stop the Moisture Source
- 3. Remove Standing Water
- 4. Improve Drainage and Water Flow
- 5. Dry the Crawl Space Completely
- 6. Remove Mold-Prone Debris and Replace Damaged Material
- 7. Seal the Crawl Space and Prevent Moisture Return
- Common Mistakes
- How to Keep a Crawl Space Dry After the Repair
- Frequently Asked Questions
- Why is my crawl space wet after heavy rain?
- Can I fix a wet crawl space after removing the water myself?
- Should I replace insulation that got wet in my crawl space?
- Do I need a vapor barrier in my crawl space?
- When should I hire a professional for a wet crawl space?
- Conclusion
What You Need
Gather everything before you open the access door. Half of a crawl space job is being stuck in a 4-foot-high space with the wrong tool in your hand.
Safety gear
- Headlamp with a strap, plus a backup light that does not depend on the first one working.
- Coveralls, nitrile gloves, knee pads, and boots with good grip for wet soil.
- A P100 or N95 respirator if there is any visible mold, and a half-face cartridge respirator for handling debris that has been soaked.
- Someone else awake at the house while you are underneath it.
Inspection and cleanup tools
- Bright flashlight, a phone with a camera, and a hygrometer you can read from the floor.
- Wet/dry vacuum rated for the water depth you expect. Household shop vacuums die quickly in crawl space conditions.
- Submersible utility pump with a garden hose, plus an outdoor-rated extension cord on a ground fault circuit protected device. Running a pump on a cord that is not rated for the environment is how people get hurt.
- Flat shovel, bucket, and pry bar for moving stored debris and checking grade.
Materials for the permanent fix
- 20 mil cross-laminated polyethylene vapor barrier. 6 mil sheeting sold as a vapor barrier is a drop cloth and tears under a shovel.
- Foundation stakes or fasteners rated to hold the membrane flat under foot traffic, plus polyethylene tape for seams and pipe penetrations.
- Rigid foam board and weatherstripping for vent and access door covers, if you decide to seal rather than vent.
- Insulation rated for the job, and drywall repair materials if the subfloor was removed.
Stop and call a qualified contractor instead of borrowing or renting equipment if you find sewage-contaminated water, framing that flexes or sounds hollow when you press it, a foundation crack you can see through, exposed or energized wiring, or a floor that feels spongy under your boots. Encapsulation and interior drain work also cross into trades territory. Your municipality may require a permit and a licensed contractor for excavation, and nothing in this guide replaces a structural or electrical opinion.
How to Fix a Wet Crawl Space Step by Step
1. Inspect the Crawl Space Safely
Before you go in, look through the access opening with a light and take a phone photo. You are looking for four things: how deep the water is, whether anything structural is moving, whether there is water you would not want to touch, and whether mold is already established.
Standing water under six inches deep with clear footing is a weekend job. Deeper than that, and especially water covering a footing or a support pier, means you should evaluate the situation with a professional before wading in. Sagging joists, a rim joist that has gone soft at its ends, or visible mold colonies larger than a dinner plate are all reasons to stop.
Do not enter a crawl space while it is being used for storage. Crawl spaces packed with cardboard boxes and stored furniture hold moisture against every surface and give pests a highway. Clear the space out before you start, from outside if you can.
Success at this step looks simple: you know the depth of the water at its worst, the direction it comes from, and the condition of the framing. Knowing how to fix a wet crawl space starts with those three facts, not with a shopping list.
2. Find and Stop the Moisture Source
Water in a crawl space arrives one of five ways: rain running off the roof and the ground toward the foundation, plumbing that leaks under the house, groundwater pushing through the soil or a foundation crack, moist outside air condensing on cool surfaces, or a broken gutter dumping straight at the foundation wall. Find which one it is before you do anything else, because drying a space that is still being filled is wasted work.
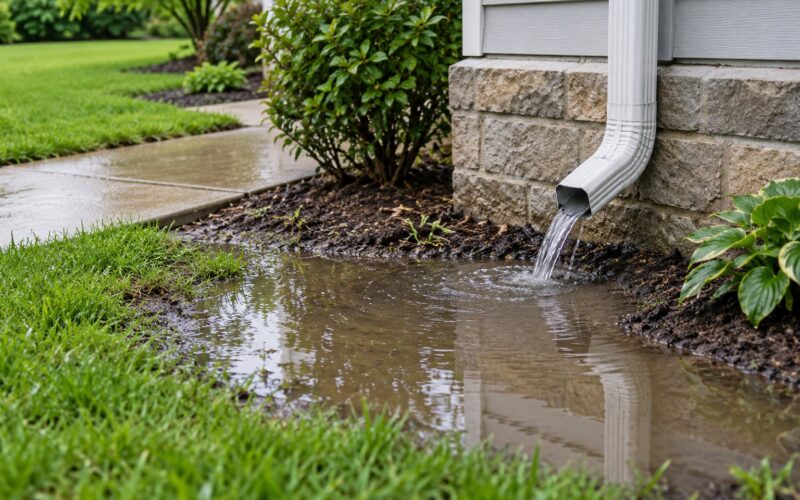
Start outside during or right after rain. Walk the perimeter during a shower and watch where water moves. Note which foundation wall gets damp first. Check that downspouts discharge at least 6 to 10 feet away from the foundation and that gutters are not overflowing at the seams or the corners. Look for soil that has been regraded toward the house, a planter bed raised above the foundation line, or a hose bib left dripping on the crawl space side of the wall.
Inside, trace any plumbing you can see and look for damp insulation, mineral deposits on a foundation wall, or a wet patch that darkens the soil. Condensation looks different from infiltration: it beads on the underside of cold surfaces in warm weather and disappears in winter.
For temporary control while you work, a hose bib or a small pump on a timer can keep a plumbing drip from becoming a flood. You will know the active source has stopped when you have a dry period after a storm, the soil no longer darkens within a day, and the hygrometer reading falls instead of climbing.
3. Remove Standing Water
The cleanest first move is to work from outside. Run the hose through the access opening and pull the water out with a wet/dry vacuum, in shallow passes, until the soil is firm enough to walk on.
For deeper water, use a submersible pump. The discharge hose goes to a spot where the water can leave the property without running back at the foundation: a storm drain, a dry well, or a garden area far from the house. Never discharge crawl space water into a basement floor drain, because that just moves the problem indoors.
Check the water before you touch it. If it is grey, smells sharp, or has a visible sheen, treat it as contaminated: gloves, a respirator, no bare skin contact, and no entry until it is pumped. That water is a sewage backup and it needs a licensed remediation company.
You are done with this step when you can walk the crawl space in dry boots without water pushing up between your toes. Empty any sump basin or low spot too, because water that sits under the membrane keeps feeding mold even when the surface looks dry.
4. Improve Drainage and Water Flow
Most wet crawl spaces get their water from the yard. The fix is usually a slope away from the foundation: about 6 inches of fall per 10 feet, with the highest ground right at the foundation wall, not the lowest.
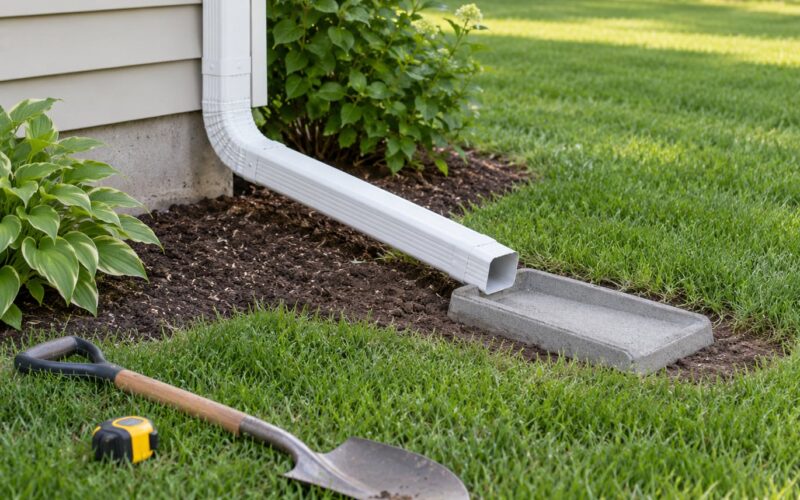
Clear leaves and silt out of the gutters and downspouts, then extend the downspouts to a splash block or a buried pipe that carries water 6 to 10 feet out. Fill the low spot behind the foundation with compacted fill rather than loose sand, since loose sand washes out and leaves a hollow that holds water. Keep mulch, gravel beds and raised planters below the top of the foundation.
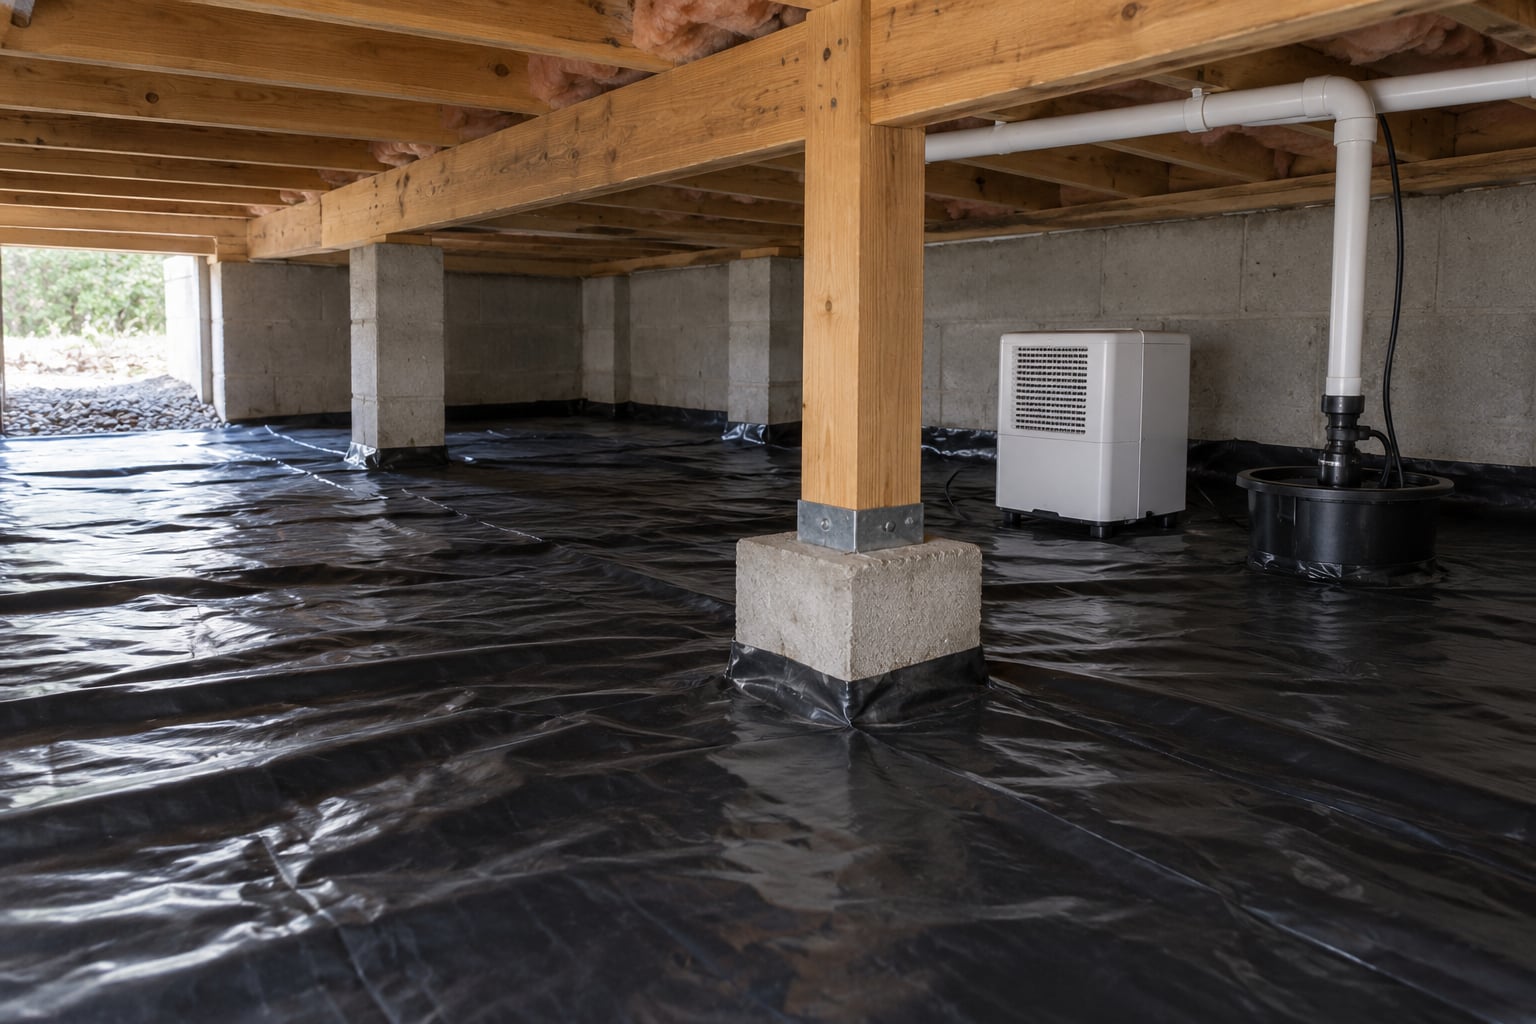
Simple exterior correction and structural work are not the same category. Adding an interior perimeter drain with a sump pump, cutting a hole in a foundation wall for a drain line, or parging a foundation wall are jobs for a licensed contractor. If you are weighing an interior drain against an exterior drain line that daylights somewhere downhill, note that an interior system stops working when the power goes out during a storm, and that risk is exactly when you need it.
You will know the drainage work worked when a heavy rain leaves the soil dry the next morning, and the same pattern holds the second time it rains.
5. Dry the Crawl Space Completely
Drying has an order: remove the source, remove the water, move the air, pull the moisture out, then monitor. Skipping straight to fans leaves you with damp insulation and a mold problem that grows for weeks.
Set up airflow first. A box fan at the access opening pulling air in and another at a vent or farthest point pushing air out moves air across the space, and a second fan angled upward at the underside of the floor joists dries the subfloor where moisture collects. A fan will never do the whole job alone, because moving air in a cool crawl space does not remove moisture, it just spreads it around.
Then run a dehumidifier rated for the square footage, with its intake clear and its drain line or bucket monitored. Residential units built for living space are often too small for a crawl space with a dirt floor and no conditioned air.
Watch a hygrometer rather than guessing. Aim for relative humidity between 45 and 60 percent, and hold it there for several days, not for one afternoon. Higher than that and mold grows on wood and paper; lower is not the goal either, since overdrying can raise the wood moisture content of the framing.
Avoid the temptation to close every opening and let the sun bake it. On a humid day that traps warm, damp air against cool surfaces and creates condensation you did not have before. Dry first, then decide how the space will be managed.
Success means the hygrometer reads in range, insulation is dry to the touch through its full depth, and the reading holds there for a week.
6. Remove Mold-Prone Debris and Replace Damaged Material
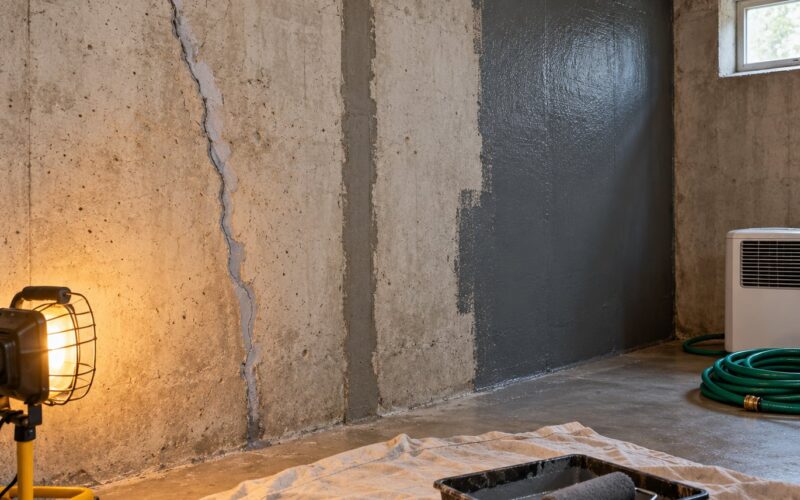
Some things cannot be recovered. Fiberglass insulation that has been soaked and squeezed releases mold spores for as long as it stays wet, and porous materials such as cardboard, fabric-backed insulation, and some ceiling tiles hold contamination rather than releasing it. Dry them out and they still smell, and the smell tells you spores survived.
Remove them dry where possible. Wet vacuuming mold stirs spores into the air instead of capturing them, so pull debris out in bags, close the bag outside, and run the dehumidifier with the door propped to exhaust air while you work. Wear the respirator. Do not sweep.
Replace rotten rim joist ends and any subfloor or joist that has lost its strength. Check sill plates and the bottom of wall studs near the water line, since they usually go first. When a joist is more than a few inches of softness deep, or ends are crumbling away from the wall, that is structural repair, not a weekend fix.
Here is a useful rule for deciding between drying and remediation. Small patches on a non-porous surface in a space you have fully dried usually respond to cleaning. Mold on porous material, mold returning after two weeks of dry conditions, or blackened insulation across a wide area means the space needs professional remediation with an air scrubber and containment.
7. Seal the Crawl Space and Prevent Moisture Return
Once everything is dry and replaced, you lay the ground cover. This is the step that decides whether the work lasts, because bare soil gives off moisture continuously through evaporation, and that moisture has nowhere to go but into your joists.
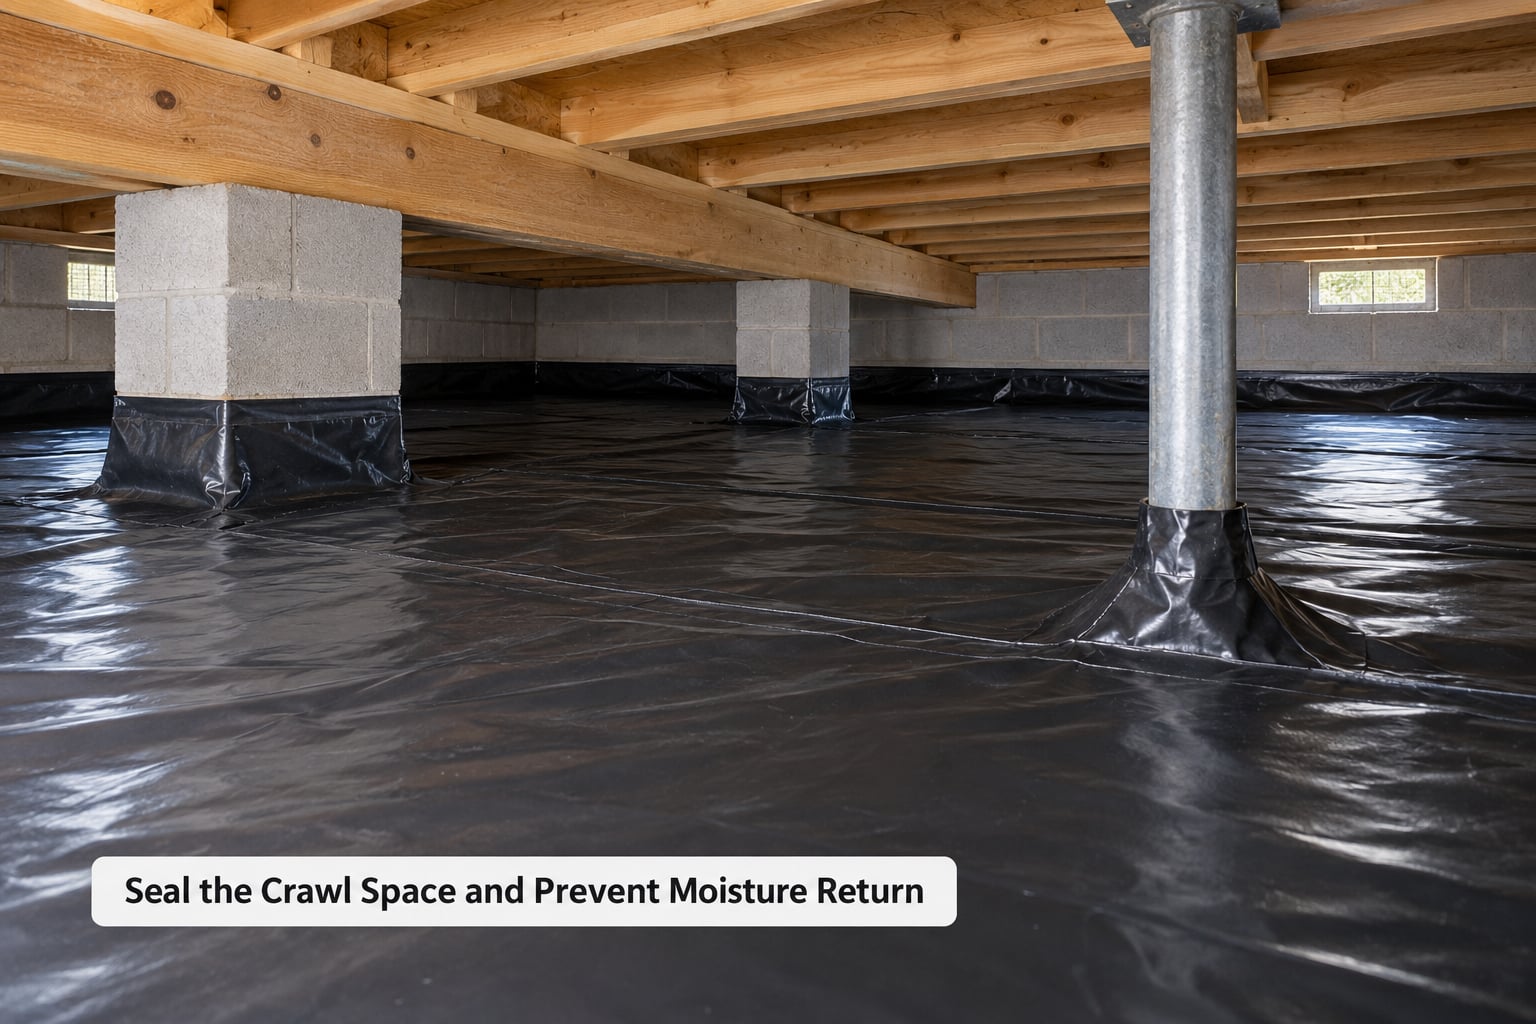
Lay 20 mil cross-laminated polyethylene across the entire floor. Run it in the direction that lets you keep seams tight, overlap every seam by 12 inches, and pull the edges 6 to 12 inches up the foundation walls, piers and columns. Hold the film to the soil with foundation stakes or the fasteners sold for this, spaced so the sheet cannot lift or wrinkle under foot traffic. Tape seams and cut around pipes, and seal the cuts around each penetration rather than leaving a slit.
The rule about 6 mil is simple: ordinary 6 mil sheeting punctures, tears and lets vapor through, so a layer of it under a crawl space eventually behaves like a loose sheet of plastic in a puddle. It also flattens under its own weight and lets water find its way underneath, which is why homeowners find a puddle sitting under the barrier and assume the repair failed.
Decide what happens at the vents, and this is genuinely climate-dependent. In humid regions, sealing the vents and conditioning the space with a dehumidifier stops the warm moist air that was driving the problem. In drier regions with good seasonal airflow, venting may keep the space below the dew point without the running cost of a dehumidifier. In cold climates, venting warm moist air into a freezing crawl space is how you get frost and condensation on the underside of the floor. Before you close a vent, check your local code, because some jurisdictions require venting for radon or for combustion appliances nearby.
Cover the vent openings with rigid foam board sized to the opening and sealed with construction adhesive and weatherstripping, and give the access door a tight gasket so it closes like a cooler door. Do not seal the space airtight until the moisture is gone, and never spray foam the crawl space to stop drafts. Foam in a crawl space traps moisture against the sheathing and blocks termite inspections, which are more valuable than the insulation.
The space is sealed correctly when you can run a dehumidifier on a timer and the hygrometer stays in range for a month without anyone thinking about it.
Common Mistakes
Most failed crawl space repairs share a short list of causes.
- Cleaning mold before drying. You will clean it again in three weeks. Dry the space first, then clean, then dry it again.
- Sealing moisture in. Laying a barrier over wet soil traps the water under it and drives vapor up into the joists. Dry first, always.
- Leaving saturated insulation in place. Wet fiberglass loses roughly half its R-value and can stay a mold reservoir for years. Pull it out and replace it.
- Running a household fan near standing water. Fan motors and extension cords are not for wet environments. Pump the water out first, or use gear rated for it.
- Grading soil toward the house. New landscaping and fresh fill are the most common cause of a crawl space that was fine five years ago. Six inches of fall over 10 feet, away from the wall.
- Closing the vents without thinking. In a humid climate sealing without a plan for conditioning just locks in the damp air. Decide first, then seal.
- Spreading sand and running fans. Sand plus a fan does not remove moisture, it just hides the puddles and dries the surface while the ground below stays wet.
How to Keep a Crawl Space Dry After the Repair
Maintenance is a short list and it works. Extend or clean downspouts twice a year, before the wet season. Walk the perimeter after every heavy storm and look for a new wet wall, a downspout that has been knocked loose, or soil that has washed toward the foundation. Keep mulch and plantings below the foundation line and 12 to 18 inches away from the wall.
Check the vent covers or the dehumidifier drain line a few times a year, and keep a spare gasket for the access door. Read the hygrometer monthly, or set it to record, so you catch a slow rise before you see mold. Lift a corner of the barrier once a year and look at the soil underneath. Water sitting under the membrane means the grade or the drainage needs another look, not that the barrier needs replacing.
Frequently Asked Questions
Why is my crawl space wet after heavy rain?
Almost always surface water running toward the house rather than a failure inside it. Gutters overflowing at corners, downspouts discharging at the foundation, and soil graded toward the wall all put water where it does not belong. Watch the foundation walls during a storm to identify the entry point, then correct grading and extend downspouts 6 to 10 feet out. Groundwater through a foundation crack is the other common cause and needs a professional look.
Can I fix a wet crawl space after removing the water myself?
Often yes, if the water was clean groundwater and the framing is sound. Once the source is stopped and the space is fully dry, replacing saturated insulation and laying a new 20 mil vapor barrier with sealed seams is straightforward work. Knowing how to fix a wet crawl space yourself stops there, though. Sewage, structural damage, wide mold colonies or groundwater that returns every storm belong to a licensed contractor or a remediation company.
Should I replace insulation that got wet in my crawl space?
Yes, if it was soaked. Wet fiberglass loses roughly half of its R-value and trapped moisture in the batts gives mold something to feed on long after the space feels dry. Remove it in bags, dry and clean the cavity, and let the space read below 60 percent relative humidity before new insulation goes in. Foam board on the rim joist is often a better long-term choice than batts in a crawl space.
Do I need a vapor barrier in my crawl space?
If your crawl space has a bare soil floor, yes. Soil gives off moisture continuously, and a 20 mil polyethylene barrier is what keeps that moisture out of the joists above. Overlap seams 12 inches, run the edges 6 to 12 inches up the foundation walls and piers, and fasten the membrane so it cannot lift under foot traffic. Ordinary 6 mil sheeting tears and punctures and is not an adequate barrier.
When should I hire a professional for a wet crawl space?
Call one when the water is contaminated, the framing is soft or sagging, mold covers a wide area or sits on porous material, or groundwater returns after every storm. Interior perimeter drains, sump pumps, foundation crack repair and full encapsulation also fall under permits and licensed trades in many areas. A professional is not needed to pump standing water or replace a vapor barrier, and doing those yourself saves the bulk of the cost.
Conclusion
Here is how to fix a wet crawl space in order: make it safe to enter, find and stop the water at its source, remove the standing water, dry the space to 45 to 60 percent relative humidity, replace anything that will not dry, then lay a 20 mil vapor barrier and fix the yard so it stops coming back.
Most of that is a weekend. Hold the line for a professional when you find sewage, structural softness, mold on porous material across a wide area, or groundwater that returns with every storm. Fix the exterior first, no matter what, because a new barrier over a foundation that is still taking water will not solve the problem you were trying to solve.