An hour is plenty, and most of that hour belongs to the top of the page rather than the bottom. How to read a contractor estimate line by line comes down to a fixed order: read the written scope, verify the quantity and unit price on every line, put hard questions to the allowances, exclusions and overhead line, and only then look at the total.
The total is the least informative line on the document. Two estimates can carry the same number and describe two different projects, and the difference lives in the lines above it.
Table of Contents
- What You Need
- How to Read a Contractor Estimate Line by Line
- Start With the Project Scope and Drawings
- How to Read Every Labor Line on the Estimate
- Verify Materials, Quantities, and Unit Prices
- Understand Allowances, Fees, and Hidden Extra Costs
- Compare the Total and Payment Schedule
- Common Mistakes
- Frequently Asked Questions
- What should a contractor’s estimate look like?
- What are the three types of estimates?
- How much markup and overhead should a contractor charge?
- Why is my estimate higher than another bid?
- When should I request a second estimate?
- Should I pay a deposit before signing a contractor contract?
- Conclusion
What You Need
Gather this before you start marking anything up. The goal is to compare the estimate against something of your own, not against your memory of a conversation.
- The complete estimate, every page. Emails usually carry a summary page only.
- Your own short written scope: the rooms, the finishes, what stays and what goes.
- Plans, drawings or a product sheet for anything with a material choice attached.
- A tape measure, for the quantities you can check yourself.
- A calculator, for the multiplication on each line.
- A blank page for a four-column sheet: included, excluded, allowance, question.
- The contractor’s license number and proof of insurance, not just a promise that both exist.
- Any competing estimates, if you have them.
Pull the scope and the competing bids first. Reviewing a single estimate tells you whether it is complete; comparing two tells you whether it is fair.
How to Read a Contractor Estimate Line by Line
Work in five passes rather than top to bottom in one go. Scope first, then labor, then materials and quantities, then allowances and fees, then the total and payment schedule. Each pass answers one question, and the answer to pass one decides whether the rest is even worth reviewing.
Start With the Project Scope and Drawings
The scope block tells you what the price is based on. Look for the address, the date of the site visit, whether the price came from field measurements or from drawings, and how the contractor assumes you will get access to the space.
Then read your own requirements against it line by line. Is it the whole bathroom or just the shower area? Are all three walls being opened, or only two? Does the description mention patching and painting the hallway you will have to walk through, or is that silence?
Exclusions are the fastest way to see the true scope. A list of what the contractor will not do is more useful than a paragraph of what they will, because every exclusion is money you will either spend elsewhere or absorb yourself. Exclusions with a stated next step, such as “patch and paint the ceiling above the shower once the access is open”, are a good sign. Silence is not.
Look for permits in the scope, not just in the fees. If no line mentions a permit and no line names who pulls it, that is the first question to send back.
How to Read Every Labor Line on the Estimate
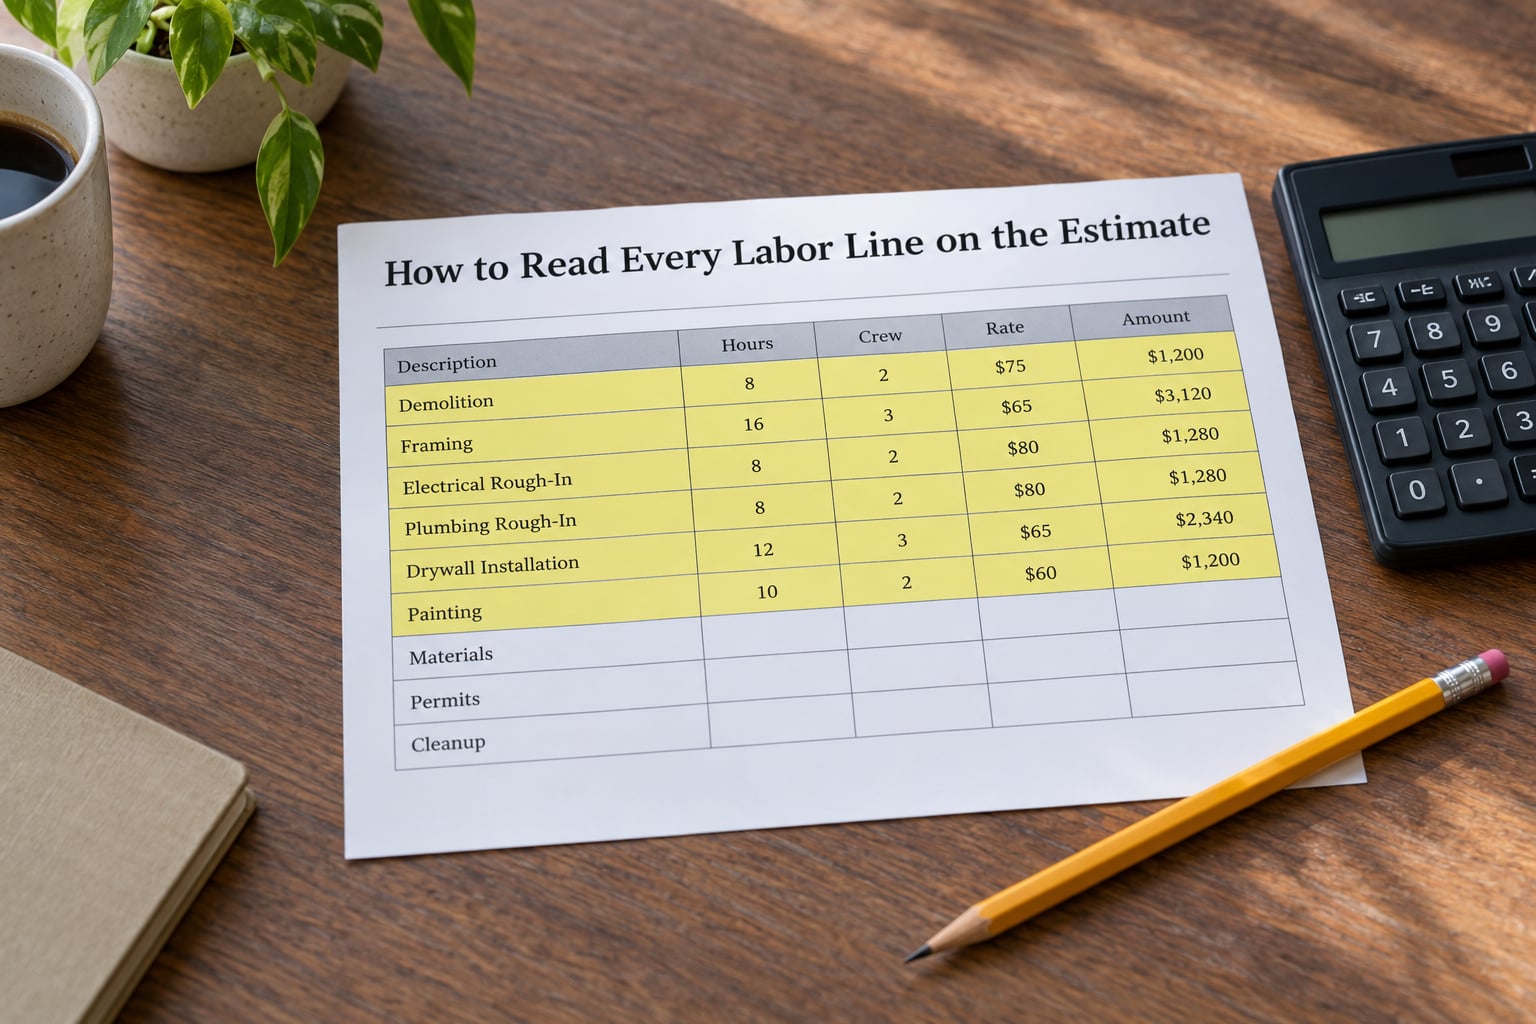
A labor line should tell you how many hours, who is doing them, and at what rate. Hours times rate times crew size is the check. If the line reads “framing labor: 3,200” with no hours and no rate, you have nothing to verify, and that is the first thing to ask about.
Break the labor down into the pieces that get argued about. Framing and demolition are usually priced per hour or per linear foot of wall. Plumbing and electrical rough-in are commonly priced per fixture or per device. Drywall, tape, texture and paint often show up as labor plus a separate material line, which is the format you want, because you can see the paint labor and the paint material independently.
Watch for supervision charged as its own line, and for travel, equipment rental and disposal folded into labor. All three are real costs, but they should be visible rather than buried in a rate.
Large lump-sum labor lines get special attention on forums. A homeowner on r/HomeImprovement described a labor-only quote for a full bathroom gut in a small room and, reading it line by line, found the scope limited to the shower area rather than the whole room. The dollar figure was not the problem; the work behind the figure was narrower than the words “gut remodel” implied.
Sanity-check the hours against the work described rather than against other contractors. Framing a wall at roughly a labor hour per linear foot is a reasonable reference, and a three-person crew finishing in half the calendar time is normal even though the hours barely move. What is not normal is a rate that quietly absorbs hours nobody can see.
Verify Materials, Quantities, and Unit Prices
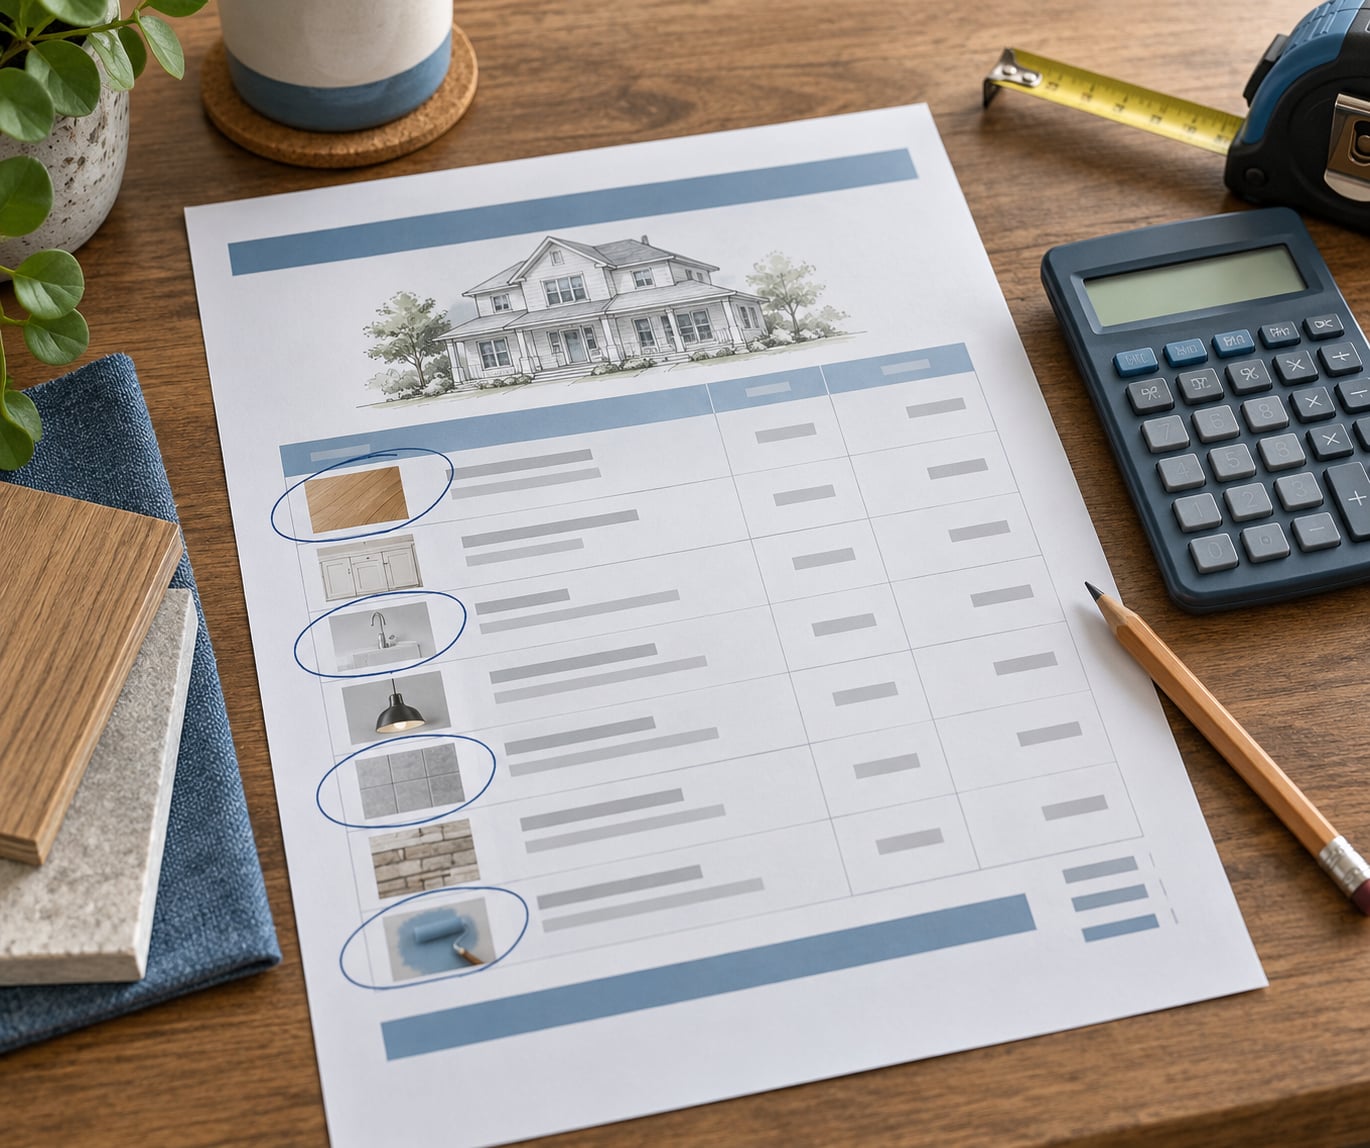
Every line should carry six things: a description, a quantity, a unit, a unit price, an extended total, and often an item or price list code. A line with a description and a total but no quantity and no unit is a guess written in invoice clothing.
Do the arithmetic. Quantity times unit price should equal the line total on every single line, and the line totals should add to the subtotal. Errors here are usually rounding rather than theft, but they are still your money, and a document that fails basic multiplication is a document to slow down on.
Then check the quantities against reality. Measure the wall. Count the outlets. For tile, divide the floor area by the coverage of one box and add a waste factor, which for a straightforward room is usually around ten percent and climbs for diagonal layouts or tight corners. For flooring sold by the box, confirm the box coverage divides into the room with a sensible remainder.
Cut-outs add dollars quietly. Opening a wall for a doorway, drilling for plumbing or patching a chase is often priced as an add-on per opening. On a small room with several of them, those add-ons can be a meaningful share of the line.
Read the material description for a specification, not a color. “Mid-range laminate” tells you nothing you can compare. “Waterproofing membrane system with a bonded flange at the tub edge” tells you whether two bids describe the same job. Where you are supplying the fixture or finish yourself, the line should say so, and the labor line should still include the installation.
Understand Allowances, Fees, and Hidden Extra Costs
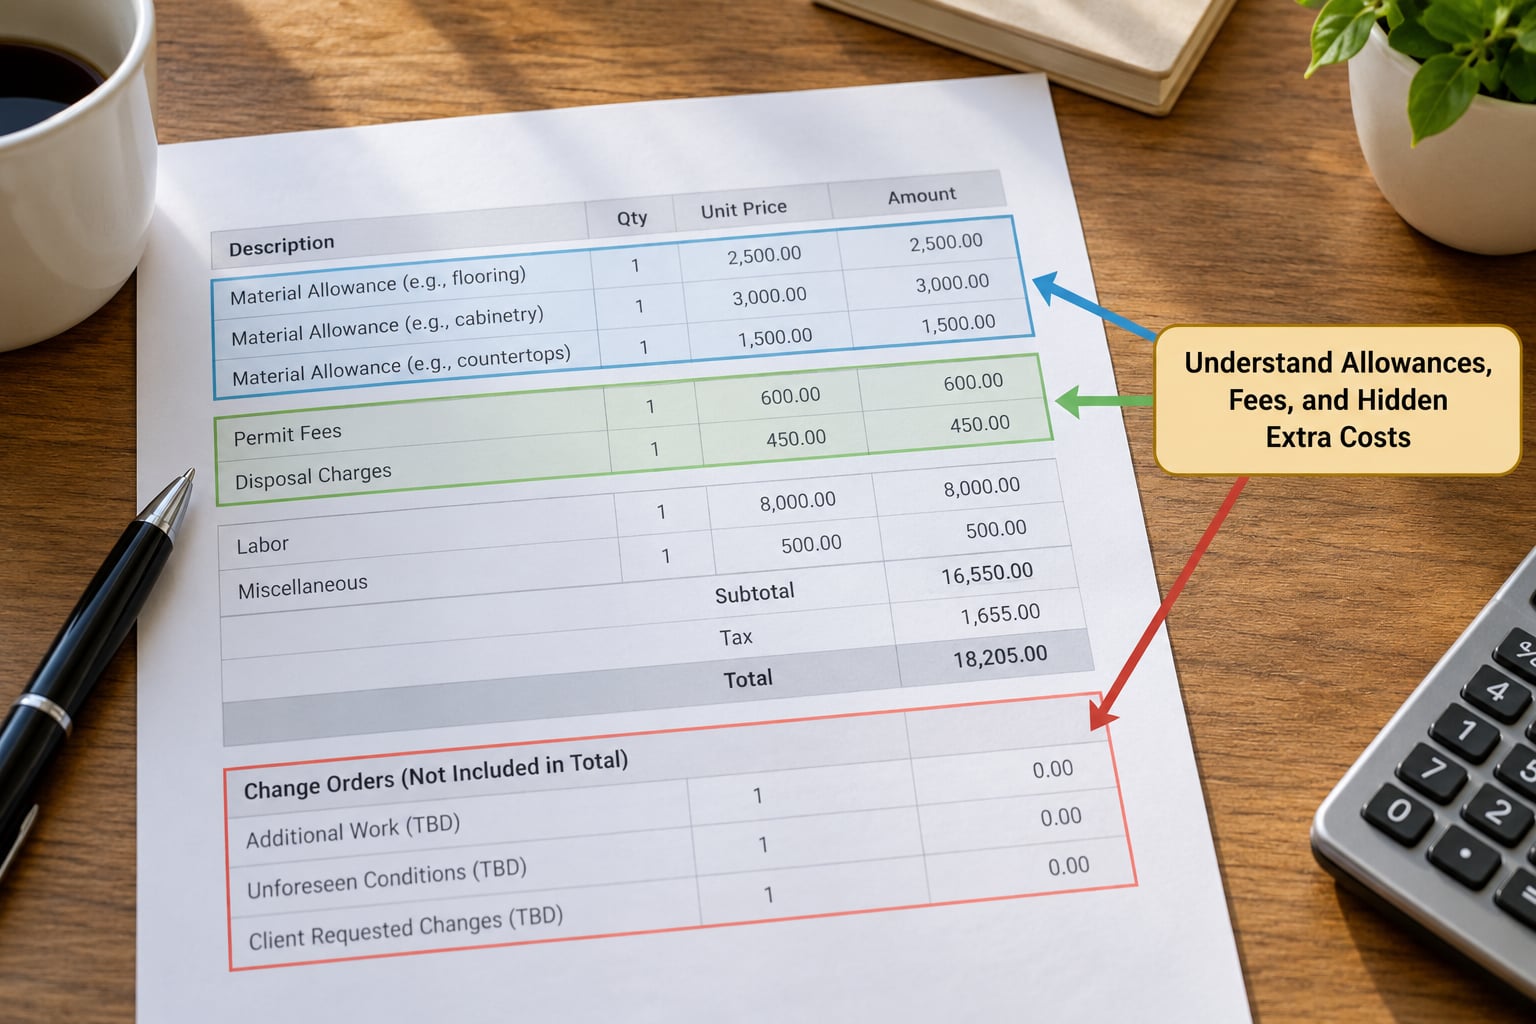
An allowance is a placeholder for a choice you have not made yet, priced at a stated tier. That is legitimate. The trouble is an allowance with no tier attached, or one the contractor plans to bill at their cost plus markup when you finally choose.
For each allowance, ask three things. What specific product or price tier is this based on? What happens when the real price lands above it, and is that difference a change order? Does the allowance figure include labor and installation, or material only?
A contingency line works differently from an allowance. Contingency is money held back for what nobody could see yet, such as rot behind drywall or an out-of-level floor. Ten to fifteen percent on a remodel with concealed conditions is a normal conversation. What matters is whether the contractor says how it is used and returned.
Then scan the fee lines. Permit fees, protection and floor covering, equipment rental, disposal and haul-off, plan review, and sales tax all belong on the document. Subcontractor work is often marked up again to cover coordination and supervision, which is normal but should be visible rather than hidden inside the plumbing or electrical unit price.
Finally, read the change-order paragraph. You want language that says changes are documented in writing with a scope and a price, approved before work begins, and that time and materials beyond the approved amount stop until you sign. A contractor who will not put that in writing is telling you how the project will be run.
Compare the Total and Payment Schedule
Now do the bottom-of-the-page math. Subtotal plus overhead and profit plus tax should equal the total. If discounts or allowances-came-in-under credits appear, they should reduce the total rather than sit somewhere else in the document.
Overhead and profit is the line homeowners skip and should not. Most general contractors add roughly ten to twenty percent of direct cost to cover office overhead, supervision and profit, and subcontractor work frequently carries its own markup on top. Ask for the percentage and the amount. If it is missing entirely, the margin is simply buried in the unit prices, where you cannot check it.
The payment schedule tells you who carries the risk. Deposits in the range of ten to thirty percent are common once a contract is signed, with the remainder tied to milestones such as framing complete, rough-in complete, and final walkthrough. Ask for lien waivers with each payment, and check the expiration date, because an estimate with no validity date can be renegotiated on you.
Common Mistakes
Almost every expensive misunderstanding on a project traces back to one of these six errors.
- Comparing totals first. The last page tells you the least. Fix: line the scopes up side by side before you compare a single number.
- Accepting one lump sum for labor and materials. A single figure for the whole job gives you nothing to verify and nothing to argue with. Fix: ask for the same work split into labor, material and equipment lines.
- Skipping the exclusions page. This is where your real cost hides. Fix: read it last but read it fully.
- Treating an allowance as a fixed price. It is not a quote. Fix: get the tier and the overage rule in writing.
- Ignoring the overhead and profit line. You cannot sanity-check a number you cannot see. Fix: ask for the percentage and the amount.
- Signing before the written revision arrives. Verbal clarifications evaporate the first time something goes wrong. Fix: no signature until the revised estimate is in your hands.
One habit covers most of the rest: write your questions as line references, such as “line 14, tile allowance, what tier?” A line reference gets a written answer. A general complaint gets a phone call.
Frequently Asked Questions
What should a contractor’s estimate look like?
A complete estimate opens with a header block giving the project address, scope summary, date, and an expiration date. The body itemizes the work, with each line showing a description, quantity, unit, unit price, and extended total. It closes with subtotal, overhead and profit, tax, total, plus a payment schedule, warranty statement, and change-order process. If any of those are missing, ask for them in writing before signing.
What are the three types of estimates?
The three pricing models are fixed price, cost-plus, and time and materials. A fixed price locks a total for a defined scope of work. Cost-plus adds a markup to actual costs plus overhead and profit. Time and materials bills labor hours and materials as they are used, so it should carry a not-to-exceed cap. Most homeowner remodel bids are fixed price, while restoration and small repair work often uses the other two.
How much markup and overhead should a contractor charge?
Most general contractors land somewhere around ten to twenty percent of direct cost to cover office overhead, supervision, and profit, and subcontractor work is often marked up again to cover coordination. On a sound estimate that number appears as its own line with both a percentage and an amount. If it is folded into every unit price instead, ask the contractor to show it as a separate line so you can check it.
Why is my estimate higher than another bid?
Usually because the two documents describe different projects. The higher bid may include demolition, haul-off, permits, protection, and final cleanup that the lower one excludes, or it may price a higher product tier than the one you had in mind. The cheapest total is often the one with the most exclusions. Line the scopes up, list every allowance and exclusion for each, and the gap usually explains itself.
When should I request a second estimate?
Get two or three bids for any job above a few thousand dollars, and always for work touching electrical, gas, structural members, or load-bearing walls. Three bids is normal on a full remodel because it turns a sales conversation into a comparison. If a contractor resists written, itemized competing bids, treat that as information about how they prefer to work rather than a reason to move faster.
Should I pay a deposit before signing a contractor contract?
Pay a deposit only after the estimate has become a signed contract with an itemized scope, schedule, and payment terms. Deposits in the ten to thirty percent range are common, with the balance tied to completed milestones such as rough-in and final walkthrough. A large deposit demanded before any paperwork exists is worth walking away from, and you should ask for lien waivers with every payment.
Conclusion
Verify in this order: the written scope against your own list, then the quantity and unit price on every line, then the allowances, exclusions and overhead percentage, then the total and the payment schedule. When something does not add up, send the question back as a written line reference and ask for a revised estimate before you sign anything.