A water heater is going bad when the water takes longer to heat, runs out faster, starts sounding different, smells off, or leaves moisture where nothing used to. You can check most of that yourself in about 30 to 45 minutes with a flashlight and a thermometer. The three things that actually wear out are the tank lining, the sacrificial anode rod buried inside it, and the heating element or burner that does the work.
That matters because a heater rarely dies all at once. It gives you months of hints, and the hints are usually cheap to read and expensive to ignore. A slow drip under a fitting is a ten-minute tightening job. The same drip two years later, with rust bleeding down the jacket, is a water-damage claim.
This guide walks through the seven checks in the order they matter, what each result means, and where your DIY boundary sits. Nothing here involves opening a tank cover, touching a gas control valve, or handling a live electrical connection. If a step would require any of those, stop and call a licensed plumber or gas technician.
The numbers in here come from what people report on plumbing forums and from manufacturer guidance: a healthy heating element reads between 5 and 25 ohms, a tank lasts roughly 8 to 12 years, an anode rod lasts 3 to 5 years, and a thermostat is usually set near 120°F. Those four numbers anchor most of the diagnosis that follows.
Table of Contents
- What You Need
- Step-by-Step: How to Tell If Your Water Heater Is Going Bad
- 1. Check how quickly the water recovers and stays hot
- 2. Look for leaks, moisture, and dripping
- 3. Listen for warning sounds
- 4. Watch for cloudy, discolored, or foul-smelling water
- 5. Inspect visible rust, corrosion, and tank damage
- 6. Check temperature and hot-water consistency
- 7. Review warning lights, error codes, and pilot behavior
- Common Mistakes
- Frequently Asked Questions
- Is it normal for a water heater to make popping and rumbling noises?
- Can a leaking water heater be repaired or does it always need replacing?
- How often should a tank water heater be flushed?
- What are the warning signs that a water heater needs immediate shutoff?
- How long does a residential water heater usually last?
- Conclusion
What You Need
You are gathering information and access, not tools. Almost nothing on this list costs money, and none of it requires opening the heater.
- Model number and warranty paperwork. Look on the rating plate on the jacket of the tank, or on the front of a tankless cabinet. The plate usually carries the manufacturer, model, serial number, and date of manufacture. The date tells you whether you are in the 8-to-12-year window where failure becomes common.
- A flashlight. A headlamp is better than a hand light because both hands stay free. You will be looking upward into a dim closet with a tank looming over you.
- A bath or kitchen thermometer. A cheap stick thermometer that reads up to 200°F is enough. An infrared thermometer aimed at the vent pipe or the hot water outlet works too, though it reads surface temperature, not water temperature.
- Clean towels and a dry rag. For wiping the fitting joints after you feel them for dampness, and for catching drips when you open a hot faucet to relieve pressure.
- A timer or your phone. You need to time recovery. That measurement catches most component failures before anything else does.
- Access to the breaker panel and, on a gas heater, the control area. Knowing how to switch the heater off at the breaker is safe and useful. Opening a gas valve, the burner, or a sealed cover is not.
- A drip pan or small container. Useful when you open a faucet, because relief-valve discharge and a small tank leak both put water on the floor.
Leave the multimeter in the drawer. Testing a heating element for resistance requires putting probes on live conductors, and that is a licensed-electrician-level task on a water heater with a 240-volt element. If you own one and know how to use it safely, a technician can check the element for you in minutes and bill you for the check rather than the repair.
Step-by-Step: How to Tell If Your Water Heater Is Going Bad
Work top to bottom and outside in. Start with what the water does, then what the tank does, then what you can see and hear. If you only have time for three of these, do numbers one, two, and seven: recovery time, leaks, and codes or pilot behavior catch the majority of real failures.
1. Check how quickly the water recovers and stays hot
Recovery time is the most reliable single test a homeowner can run, and it is the one plumbers rely on. Start a hot tap at a steady flow, run it until the water goes cold, then time how long it takes before that same tap turns hot again. Write the number down and run the test again a month later.
On a healthy gas tank of 40 to 50 gallons, recovery from fully cold typically happens somewhere around an hour or two depending on household demand. An electric tank of that size often takes noticeably longer, closer to two to three hours, because it heats with lower-wattage elements. The absolute number matters less than the trend.
A sudden change is the signal, not a slow one. If recovery went from 75 minutes to three hours in six months, something changed inside the tank. The usual causes, in order of likelihood: heavy sediment on the tank bottom insulating the element from the water, one of two heating elements failed on an electric unit, or a gas heater losing burner capacity to scale.
Then time how long hot water lasts at your normal household flow. Two showers back to back with no other hot water use is a reasonable expectation for a mid-size tank. Going from that to one short shower and a lukewarm trickle points to a failed dip tube, a heavy sediment layer stealing capacity, or a tank that has simply lost heat retention to internal scale.
Tankless units need a different version of this same check, because they have no tank to recover. They heat on demand, so the useful test is whether the first flow at a tap is already at temperature and whether it stays there for the whole draw. If a tankless unit produces a burst of hot water and then drifts cooler mid-shower, the usual causes are a heat exchanger scaled with hard-water minerals, a failed flow sensor, or a gas supply or ignition problem on a gas-fired model. Tankless units also commonly show error codes that name the problem outright, so read the code before you start guessing.
On a gas heater, low output with no error light and no visible leak is a licensed gas technician call. On an electric heater, low output with a tripped breaker or a reset breaker that trips again is also a technician call. Do not open the element housing yourself.
Record your recovery time and your household size together, because they mean different things in different homes. A family of five running the dishwasher and a laundry cycle at the same time will exhaust a healthy 40-gallon tank quickly, and that is capacity, not failure. The signal that something is actually wrong is a change against your own baseline, measured in the same conditions, month to month.
2. Look for leaks, moisture, and dripping
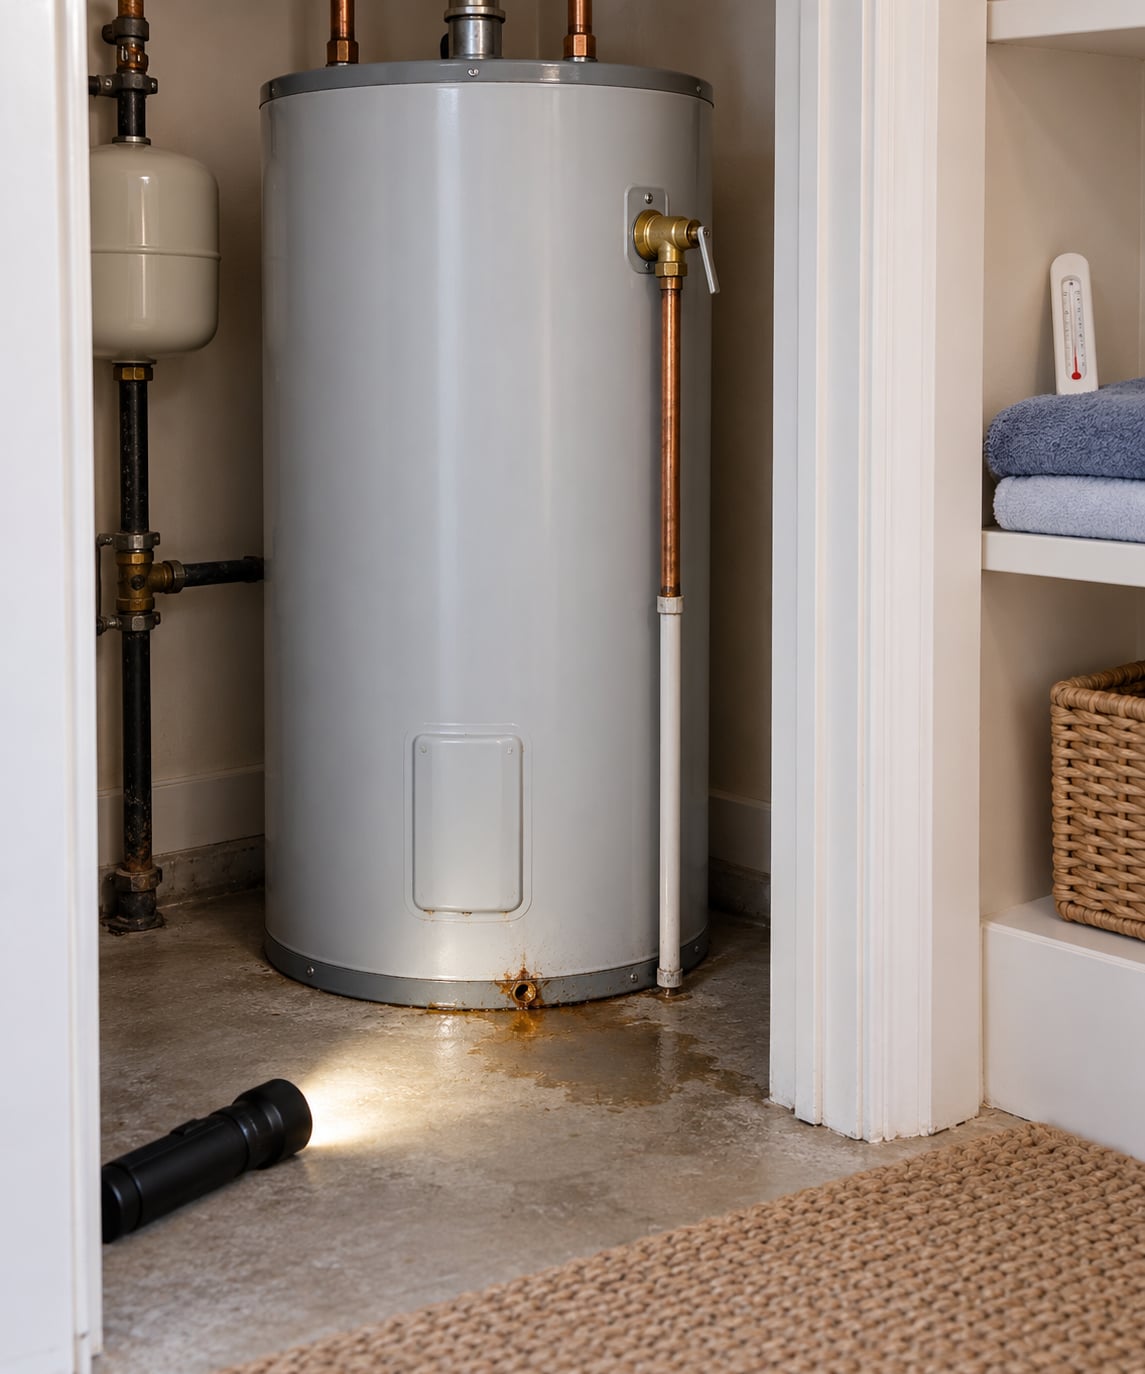
Put the flashlight in your mouth, or prop it on the drain valve, and look at the whole installation before you touch anything. Most leaks are at a joint, and the joints are at the top of the tank where the cold inlet and hot outlet pipes screw in. Someone on r/askaplumber described this exact split in a thread about a damp closet ceiling: water at the top fittings is one problem, water weeping from the jacket is another.
Run your hand along each of those connections. Then check the pressure-relief valve, which is the small brass or plastic valve near the top of the tank with a lever on it, and the drain valve at the bottom. Feel the floor around the base, especially along the wall behind the tank and the side nearest the drain valve.
Here is the distinction that matters. A drip that forms and stops is a fitting or valve weep, and it is repairable. Dampness that never dries, discoloration of the insulation, a wet patch on the floor at the start of every heating cycle, or moisture running down the jacket points to the tank itself, and a tank that is wet on the outside is a terminal failure with no repair.
Watch for corrosion at those joints specifically. Green-white or chalky buildup around a fitting, or rust-colored staining that runs down from the connection, means the metal has been in contact with water for a long time. That is the leak you fix this month rather than the one you plan for.
If you find active pooling, stop reading and start shutting down. Switch the heater off at the breaker for an electric unit. Close the cold water supply valve feeding the tank. Open a hot faucet somewhere in the house to relieve pressure and let the tank drain toward the empty side. That takes the pressure off the leak and stops the water damage while you make calls.
The order matters. Breaker first, then water, then pressure relief. Reversing it means you drain a tank that is still energized, and on a gas unit it means pulling cold water through a burner that is running.
After the water stops, leave the area dry and ventilated. Wet insulation and wet subfloor do not dry on their own behind a tank in a closet, and that is how a small leak becomes a mold problem. Pull the insulation, dry the wall, and get the leak identified before you put anything back.
3. Listen for warning sounds
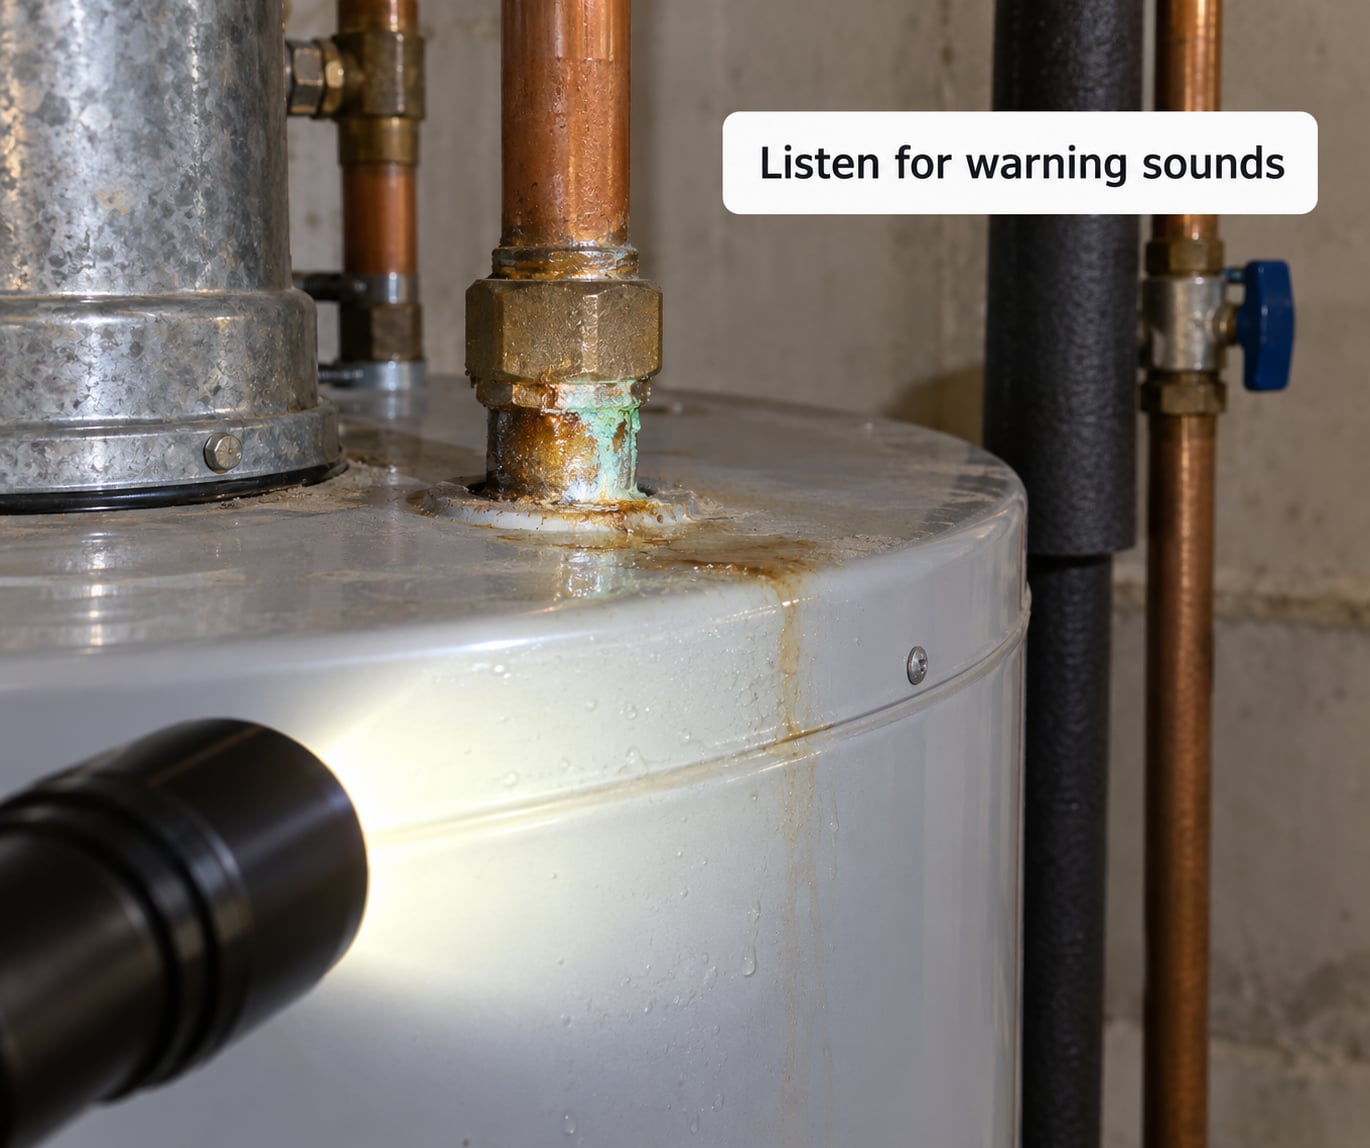
Water heaters are supposed to make some noise. The question people keep asking on r/HomeMaintenance and r/DIY is where the line sits between normal and dying, so here is the line as I understand it.
Popping, crackling, and rumbling are usually sediment. Water boils against a hot element or burner flame, and trapped mineral pockets make noise as they collapse. A light rumble that has been there for years, on a tank with no other symptoms, is not an emergency. Constant loud popping that has been getting louder over months is sediment that has built up enough to matter, and it is the cheapest problem on this list to fix while it is still cheap.
Banging and clanging are different. Those come from hard water scale on the tank walls, or from a burner assembly that is loose enough to rattle, and on gas heaters they are often resolved by cleaning the burner tray or fixing a combustion-air problem. Loud clanging plus a burner that cycles constantly usually means the burner is struggling, not that the tank is done.
Whistling and screaming point to the pressure-relief valve venting. That valve is supposed to stay quiet. If it is discharging, either the pressure in the system is too high, often from a failed expansion tank, or the valve itself is defective. Screaming from a relief valve means act now, not monitor.
So what does a failing water heater sound like, specifically? Prolonged rumbling that turns into popping, a rattling burner tray, or a relief valve that hisses continuously while nothing is being used. A steady hiss you can hear from the next room with the burner off is a gas supply or combustion problem, and that is a call to your gas utility or a licensed gas technician, not a DIY project.
Timing gives you the rest of the diagnosis. Note when the noise happens: during the heating cycle only points at sediment and scale on the tank bottom, while a noise that starts the moment a hot tap opens points at the dip tube or the hot outlet. A rattle that only appears on an electric model and only after the water has fully heated is almost always sediment boiling, because that is when the element has been at temperature long enough to make it audible.
There is one more sound worth naming, and it is not the heater. Water hammer, a sharp bang that travels through the pipes when a faucet closes fast, has nothing to do with tank condition and stops people from chasing a problem that is not there. If the bang follows the fixture rather than the burner, you are looking at loose support straps or a high-pressure line, not a dying heater.
If the noise keeps you up at night and you cannot pin it to a component, that is a legitimate reason to have the heater looked at even when nothing else is wrong. Persistent loud noise on a tank that also runs the burner or element continuously is a heater working far harder than it should, and that costs money every month whether or not it fails this year.
4. Watch for cloudy, discolored, or foul-smelling water
Run a hot tap for a full minute into a clear glass, then a cold tap into a second glass, and compare. Sudden discoloration from a clear-water home is worth taking seriously. Occasional discoloration that rinses out over a few minutes is far more often the mobile rust film inside old galvanized supply lines getting stirred up than it is the tank.
To sort that out, the three-bucket method works: fill a bucket from a hot tap, one from a cold tap, and let both sit. If the hot bucket rusts faster than the cold one, the heater is the source; if both rust evenly, the pipes are. Several people in r/PlumbingRepair report their rusty water clearing up entirely after a drain and flush, because the dislodged rust was sitting on the tank bottom.
Cloudy water that clears after sitting is suspended sediment, usually with a smell attached. If your water is cloudy and the cloudiness does not clear, that is bacteria.
On smell: a rotten egg odor on hot water only is most often sulfate-reducing bacteria, which live more happily in warm water and feed on the anode rod’s magnesium. Both the smell and the bacteria come from the inside of the tank. A rotten egg smell on cold water too means the problem is in your supply plumbing, not the heater.
Do not drink the water from a heater that smells like rotten eggs. Boiling concentrates it, and repeated ingestion of sulfur bacteria is not something to gamble on. Do not treat it with bleach, either, if the tank has an anode rod, because it can accelerate corrosion of that rod and the tank lining.
Two questions narrow this down further, and both are safe. Where does the smell show up first: the hot side only, or hot and cold together? Hot only points inside the heater. Both means your supply lines or the municipal water. And does the odor fade after the tank has been heated for a while? A smell that burns off after a long shower cycle is more consistent with bacteria and sediment; a smell that stays at full strength regardless of use is more likely to be a plumbing issue you would chase elsewhere.
Do not wait this one out. Cloudy water that persists for days, water that has visible particles in it, or a shower that has started to smell all by itself are all reasons to stop using the hot side and get it looked at. Water damage from a shower ceiling stain traced back to a failing heater is one of the more expensive repairs a homeowner deals with, and it is almost always avoidable by reading the water itself.
5. Inspect visible rust, corrosion, and tank damage
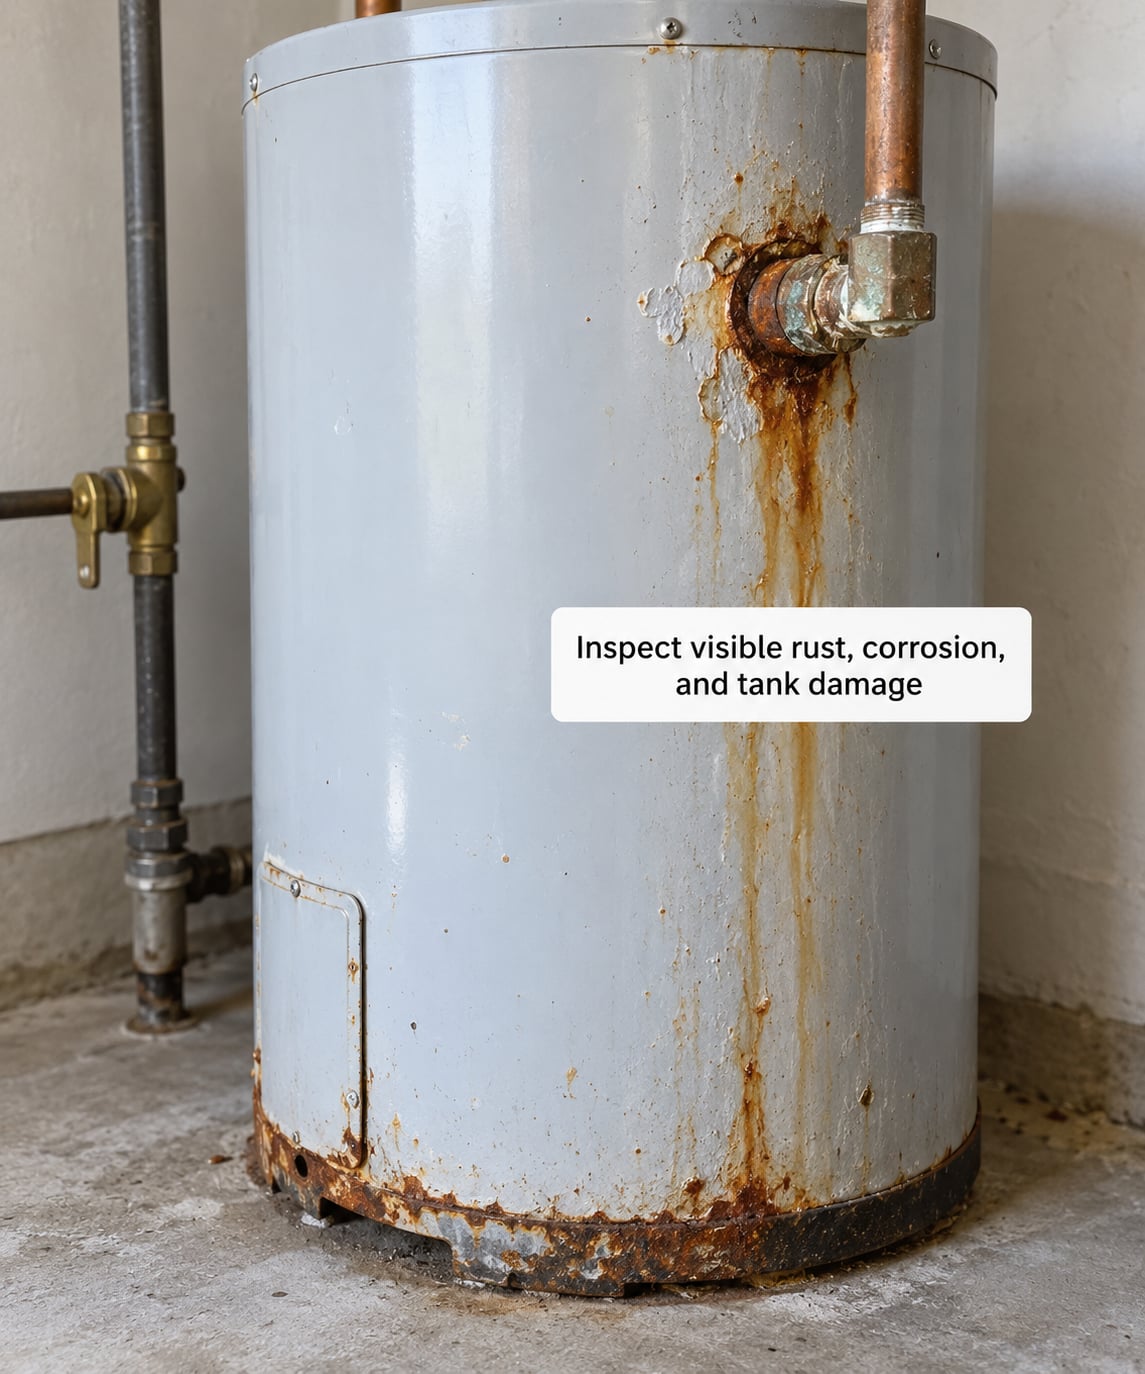
Run the flashlight along the jacket from top to bottom. What you are looking for is metal telling you it has been wet. Rust streaks running downward from a fitting, a patch of insulation with a rust-colored bloom, a dent or bulge in a steel jacket, and cracked or split insulation are the visible set.
Bulging panels deserve their own note. On a tank heater, a bulge means internal steam pressure pushing against a compromised shell, and that is serious: get clear of the tank and shut it down. On a tankless unit, a bulging casing is rare but can mean heat-exchanger damage, so no more use until a technician has looked at it.
Insulation that looks ragged or has a wet, dark stain near the bottom of the tank is worth a second look. Insulation gets wet from a slow leak or from a spill from an open relief valve, and wet insulation stops doing its job, which means the tank loses heat faster and burns more fuel or electricity to hold temperature.
Here is the honest limit of this check. Internal corrosion is invisible from outside: the anode rod corroding away and the tank lining thinning both happen inside a sealed tank, and no amount of looking tells you how much steel is left.
A 40-gallon tank at full temperature holds pressure that a visibly sound jacket cannot predict. Only a drained inspection or a professional assessment shows the internal condition, and if the jacket already looks bad, assume the inside is worse.
The anode rod is the piece homeowners can plan around, and it deserves a specific mention. It is a magnesium or aluminum rod suspended inside the tank that corrodes on purpose, so it eats the electrochemical attack that would otherwise reach the tank lining. When it is spent, corrosion moves to the tank wall, and that is the stage where rust-colored water and pinhole leaks start appearing. Rods commonly last 3 to 5 years, and in soft-water areas they last longer. Replacing a spent rod while the tank lining is still sound is a cheap way to add years, and skipping it is the single most repeated regret in the maintenance discussions on r/HomeMaintenance.
Tankless units have no tank lining and no anode rod, so this whole check looks different. What corrodes there is the heat exchanger, and the visible warning is usually a puddle or white mineral bloom on the cabinet or floor beneath it, plus error codes related to flow and freeze protection. Watch the floor under a tankless unit even if the rest of the installation looks perfect, because there is no visible tank to leak from anywhere else.
That is also why the age on the data plate is not a formality. Past 8 years, a tank heater has lost most of its sacrificial protection, and past 12 years failure stops being surprising and becomes a matter of when.
Use that number to set the pace of your checks rather than as a countdown. Under 8 years with no symptoms, a yearly look is plenty. Between 8 and 12 years, inspect annually and flush more attentively if you are on hard water. Past 12 years on a tank unit, start thinking about replacement timing and budget while the heater is still working, because the alternative is choosing a replacement during an emergency with water on the floor.
6. Check temperature and hot-water consistency
Measure real output temperature with the thermometer at a hot tap, not at the tank. Run the tap until steady, put the thermometer in the stream, and read it. Household hot water should land somewhere in the 120 to 140°F range, which is hot enough for comfortable use and cool enough to avoid scalding, especially with children in the house.
Three readings tell you different things. Consistently cool output in the 100 to 115°F range usually means the thermostat is drifting or a heating element has partly failed. Output that swings wildly between one use and the next points to a thermostat no longer holding set point, and output far above 140°F points to a thermostat stuck closed or a failed limit device, which is a scald hazard rather than a comfort feature.
Watch for one failure mode people overlook: lukewarm but never cold. Lukewarm water that never fully cools at the tap, combined with hot water running out unusually fast, is the classic signature of a failed dip tube, the internal pipe that delivers cold water to the bottom of the tank. When it cracks or comes loose, cold water short-circuits to the outlet and you get a tank full of lukewarm water that depletes in minutes.
A word on the temptation to fix temperature yourself. Do not adjust the thermostat above the manufacturer’s set point to chase hot water, do not open an electric heater’s element housing, and do not touch a gas control valve’s temperature dial. All three are how people burn themselves or release gas.
Check pressure at the same time, since it separates two causes that feel identical from the shower. Run a cold tap, then a hot tap, and compare the flow. If cold is strong at every fixture while the hot side feels like it has no pressure behind it, you are looking at a dip tube or sediment rather than the supply. Both sides weak at the same time is a supply-side issue, and no amount of heater maintenance will change it.
If only the hot side is weak and slow, note whether a plumber installed an expansion tank on the cold inlet. When it is missing or has lost its air charge, thermal expansion pushes back through the plumbing, reduces hot-side flow, and can make a relief valve discharge.
7. Review warning lights, error codes, and pilot behavior
Modern heaters tell you more than old ones did. On an electric unit, look for a status light or fault code on the control box near the bottom of the tank, and treat a blinking light, a steady red light, or a code that reappears after a reset as a service call. Tankless units show an error code for ignition failure, freeze protection, overheat, or a scale-lock condition, and there the code is the diagnosis.
Gas heaters are different. An older gas unit has a pilot light you should see through the sight glass when the burner is on, and a pilot that keeps going out usually points to a dirty thermocouple, a clogged pilot orifice, a draft problem, or a failing gas control valve. Repeated ignition attempts that click without the burner catching, or a burner that cycles far more often than once per cycle, point the same direction.
Here is the cutoff. Observing the pilot, reading an error code, and noting whether the light is on are all observation, and they are safe. Lighting a pilot manually, cleaning an orifice, replacing a thermocouple, or replacing a gas control valve is gas work that belongs to a licensed technician.
If the burner will not stay lit at all, the first safe step is to know where your gas shutoff is, not to touch the heater. If you smell gas anywhere in the house, leave the building, call the gas utility or 911 from outside, and do not operate switches or flames on the way out.
Electric units have their own version of this check, and it is the easier one. Look at the breaker labeled for the water heater. If it is tripped, reset it once with everything else in the house off. A breaker that trips again immediately, or a heater that trips it a second time within a few days, is drawing current it should not be, and that is a service call rather than something to keep resetting until it sticks.
Write down what you see before anyone gets there. The exact code, the color and pattern of the light, whether the pilot holds for a minute or five seconds, and how many times the burner cycles in ten minutes are all useful, and they cost a technician very little to act on. Vague reports slow diagnosis down; specifics do not.
Common Mistakes
The most common mistake is not skipping a check. It is misreading one, and the same six misreadings come up over and over.
Ignoring a slow drip because it is small. A weeping fitting or a weeping relief valve is genuinely repairable today. The same seep left for two seasons has wetted insulation, corroded the connection, and put water where a failed flooring slab can amplify the damage enormously. Cheap now, expensive later, and the fix gets harder every month you wait.
Assuming any noise means the tank is dying. This is the reverse error, and it sends people to replace heaters that needed a flush. Rumbling from sediment, a rattle from a burner tray, and whistling from a relief valve are three different problems with three different fixes. Identify the sound before you decide what it means.
Testing an electric heater with wiring exposed. The thing people most want to check is the heating element, and it is the one thing that genuinely needs a professional. Elements sit behind a screwed-on plastic or metal cover on a 240-volt circuit with both legs present. Skip the element test at home unless you have done it on this appliance before and confirmed the circuit is de-energized with a tester, not a breaker label.
Attempting gas repairs yourself. Gas control valves, thermocouples, burner assemblies, and vent connections are licensed work, and the exposure is not the only concern: in some jurisdictions an improper service can complicate an insurance claim on the rest of the policy.
Never flushing the tank. Hard water leaves mineral scale on the tank bottom. That layer insulates the heating surface, so the burner or element works harder, heats less of the water, and eventually runs constantly. Homeowners on r/HomeMaintenance and Quora repeat the same regret over and over: annual flushing plus anode rod checks would have bought years.
Accepting a replacement quote before a diagnosis. This is a fair concern and a documented one; skepticism about a “you need a new one” recommendation is one of the recurring complaints in plumbing forums. Before you agree to replace anything, get the model number, the failure symptom, and the evidence for the diagnosis. A technician who can tell you a fitting is weeping versus a tank shell being split has earned the call. A technician who cannot tell you which one it is has asked you for money before doing the work.
Also worth avoiding: skipping the warranty check. Many tank heaters carry 3 to 5 year warranties on the tank and parts, and extended plans exist, so two minutes with the paperwork can change the decision entirely. Do not replace a unit before confirming what you actually have: fuel type, vent type, capacity, required venting, permit requirements, and whether the existing unit is gas or electric all change the decision materially.
One last habit worth building in: a written baseline. The day you run this inspection, write down the recovery time, the measured output temperature, what the water looks like in a glass, and the date and model number from the data plate. Keep it somewhere you will find it again. Next year’s check takes ten minutes when you have last year’s numbers and takes an hour of guesswork when you do not, and the whole method rests on being able to spot a change.
If you do end up comparing repair against replacement, the arithmetic is simpler than it sounds. A failed heating element or a failed dip tube is a component with a serviceable life on its own and is usually worth repairing. A tank past 12 years with interior corrosion, scale so thick you can see it through a drain, or a shell leak is not, because you would be paying to repair a system whose remaining life is short. Anything in between is a judgment call, and a technician who has drained the tank can often tell you which side of the line you are on in a few minutes.
Frequently Asked Questions
Is it normal for a water heater to make popping and rumbling noises?
Some noise is normal, and so is some sediment. Popping, crackling, and rumbling usually mean water boiling against hot surfaces with mineral pockets collapsing, which is common in tank heaters and is not itself a failure. What matters is a change: a rumble that is new, that is getting louder, or that comes with slower recovery and popping that will not stop. Loud banging or clanging points to scale or a loose burner assembly. Continuous whistling from the relief valve means act now.
Can a leaking water heater be repaired or does it always need replacing?
It depends entirely on where the water is coming from. Leaks at the top inlet or outlet fittings, at the drain valve, or at the temperature and pressure relief valve are component problems, and those are repairable. Moisture running down the jacket, a wet patch on the floor that appears with every heating cycle, or visible bulges in the shell mean the tank itself is leaking, and a split tank shell has no repair. If you cannot tell which you have, that is the first question to put to a plumber.
How often should a tank water heater be flushed?
Annually for most homes, and more often on hard water. Sediment and scale build up faster where calcium and magnesium are high, which is why households on well water or in hard-water areas often flush twice a year. Flushing means opening the drain valve with the water supply and power or gas shut off, letting sediment out, briefly opening a hot tap to clear the line, then refilling before restoring energy. If the water runs cloudy or smells off afterward, or you see no sediment at all after a year, that is worth mentioning to a technician.
What are the warning signs that a water heater needs immediate shutoff?
Shut off the energy and call someone when you see active pooling around the tank, water running down the jacket, a relief valve that is discharging or whistling continuously, a bulging tank panel, a burner that will not stay lit, or a smell of gas anywhere in the home. Any one of those changes from a slow problem into a damage problem fast. Until help arrives, switch the heater off at the breaker or the gas shutoff, close the cold water supply valve feeding the tank, and open a hot tap to relieve pressure.
How long does a residential water heater usually last?
A tank heater typically lasts 8 to 12 years, and a tankless unit commonly runs 15 to 20 years. The pieces inside fail on their own clocks: an anode rod usually gives 3 to 5 years before it is spent, a heating element often lasts 8 to 15 years, and the temperature and pressure relief valve should be tested every year. Hard water shortens tank life noticeably. Units kept past 12 years still work often, but they lose the sacrificial corrosion protection that buys time when something starts to go.
Conclusion
Start with the three checks that take ten minutes and answer the most: time how long your hot water takes to recover, look for moisture at the top fittings and around the base of the tank, and note any error code, status light, or pilot behavior. Then add measured output temperature, a listen for new sounds, and a glass test on the hot water to check for cloudiness and smell.
What you are really trying to sort is repairable versus terminal, and it comes down to one question: is the water coming out of a component, or out of the tank shell? Fittings, the drain valve, the relief valve, a heating element, a thermostat, a dip tube, and an anode rod are all repairable. A split or badly corroded tank is not, and no amount of flushing or rod replacement brings that back.
Shut off the energy and pick up the phone when you find active pooling, water running down the jacket, a discharging relief valve, a bulging panel, a burner that will not stay lit, or any smell of gas. In every other case, note what you found, when you found it, and get a licensed plumber or gas technician to look before you buy anything. If you want to keep ahead of the next failure, the maintenance that pays for itself is an annual flush and an anode rod inspection. That work is cheap compared with a water heater replacement, and it is the step most people skip until they have no choice.