The short answer is no, not usually. The U.S. Environmental Protection Agency is blunt about it: you generally do not need to get your air ducts cleaned unless there is a specific problem, like visible mold, a pest infestation, or ducts so clogged with dirt and dust that debris blows out of the registers. The confusing part is that you will hear something different from every other source. The National Air Duct Cleaners Association points to a schedule. Contractors quote a number of years. A technician at the kitchen table tells you it is closer to never.
This guide settles that. It covers when cleaning air ducts is genuinely worth doing, a step-by-step process you can safely handle yourself with a shop vacuum and a soft brush, the point where homeowner work stops being sensible, and how to spot a company that is selling you work you do not need. It takes about an hour to read and could save you a very expensive afternoon.
Table of Contents
- What You Need
- Step-by-Step: How to Clean Air Ducts and Should You Do It Yourself?
- 1. Confirm Whether Cleaning Is Necessary
- 2. Turn Off and Protect the HVAC System
- 3. Inspect the Ducts and Air Registers
- 4. Vacuum Accessible Duct Surfaces and Registers
- 5. Wipe Cleanable Surfaces
- 6. Replace the Filter and Check Airflow
- When Is Professional Air-Duct Cleaning Worth It?
- Common Mistakes to Avoid
- Frequently Asked Questions
- Should air ducts be cleaned in a typical home?
- How often should air ducts be professionally cleaned?
- Can cleaning air ducts improve indoor air quality?
- What is the difference between DIY duct cleaning and professional service?
- How can I tell if my air ducts have mold or another serious problem?
- Is it safe to use a household vacuum to clean air ducts?
- Conclusion
What You Need
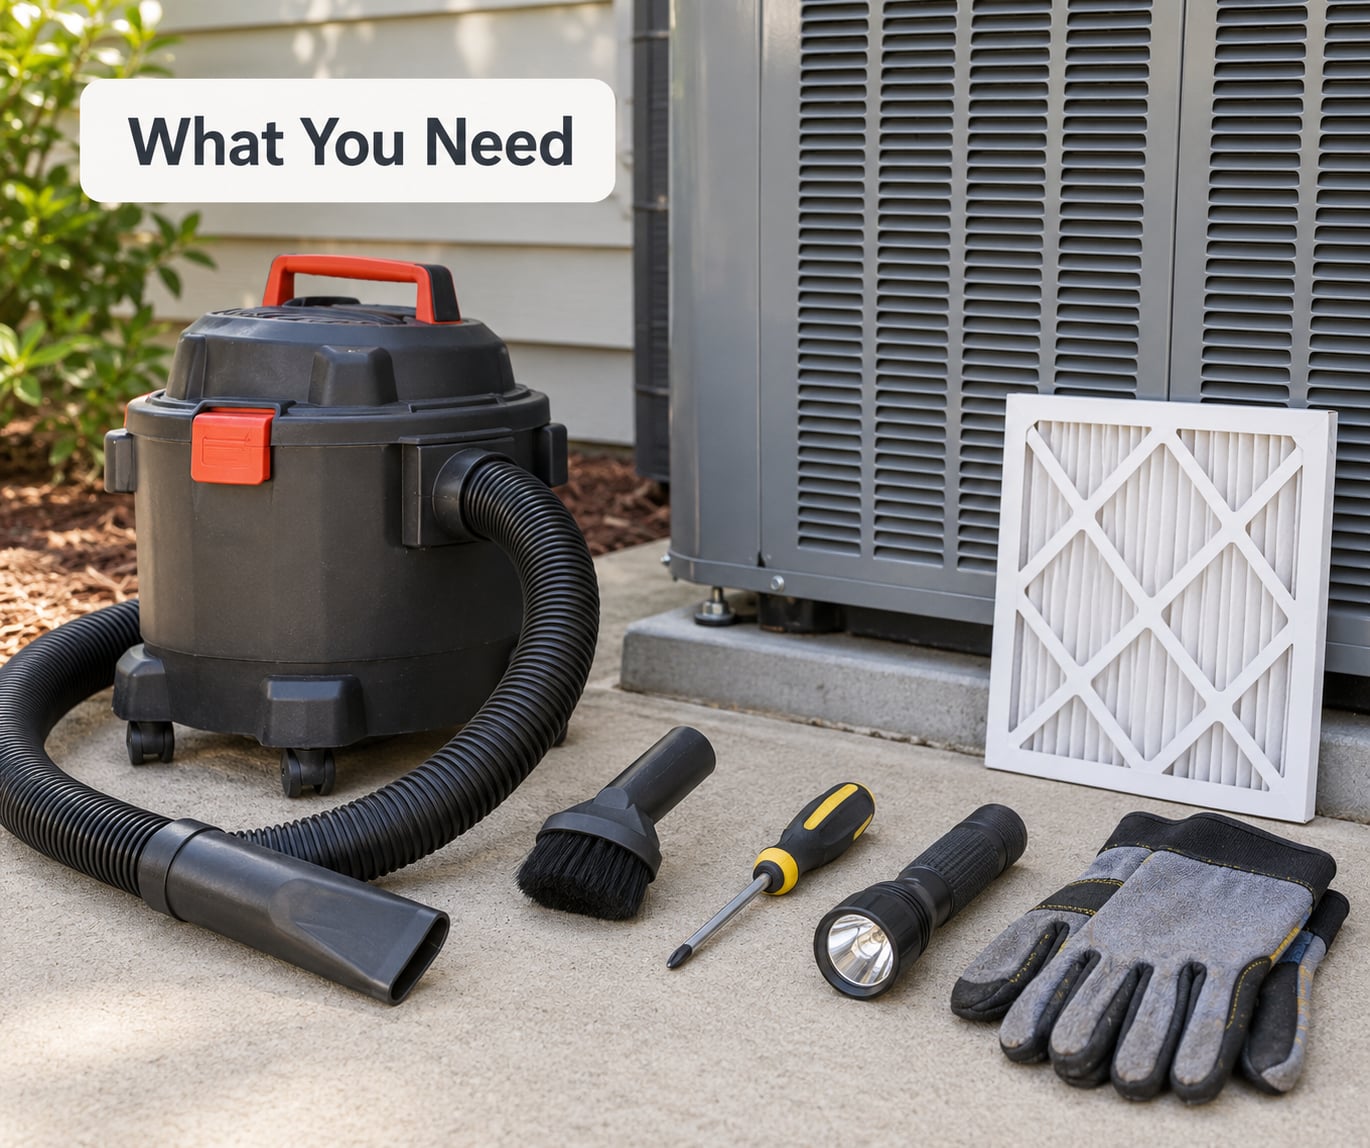
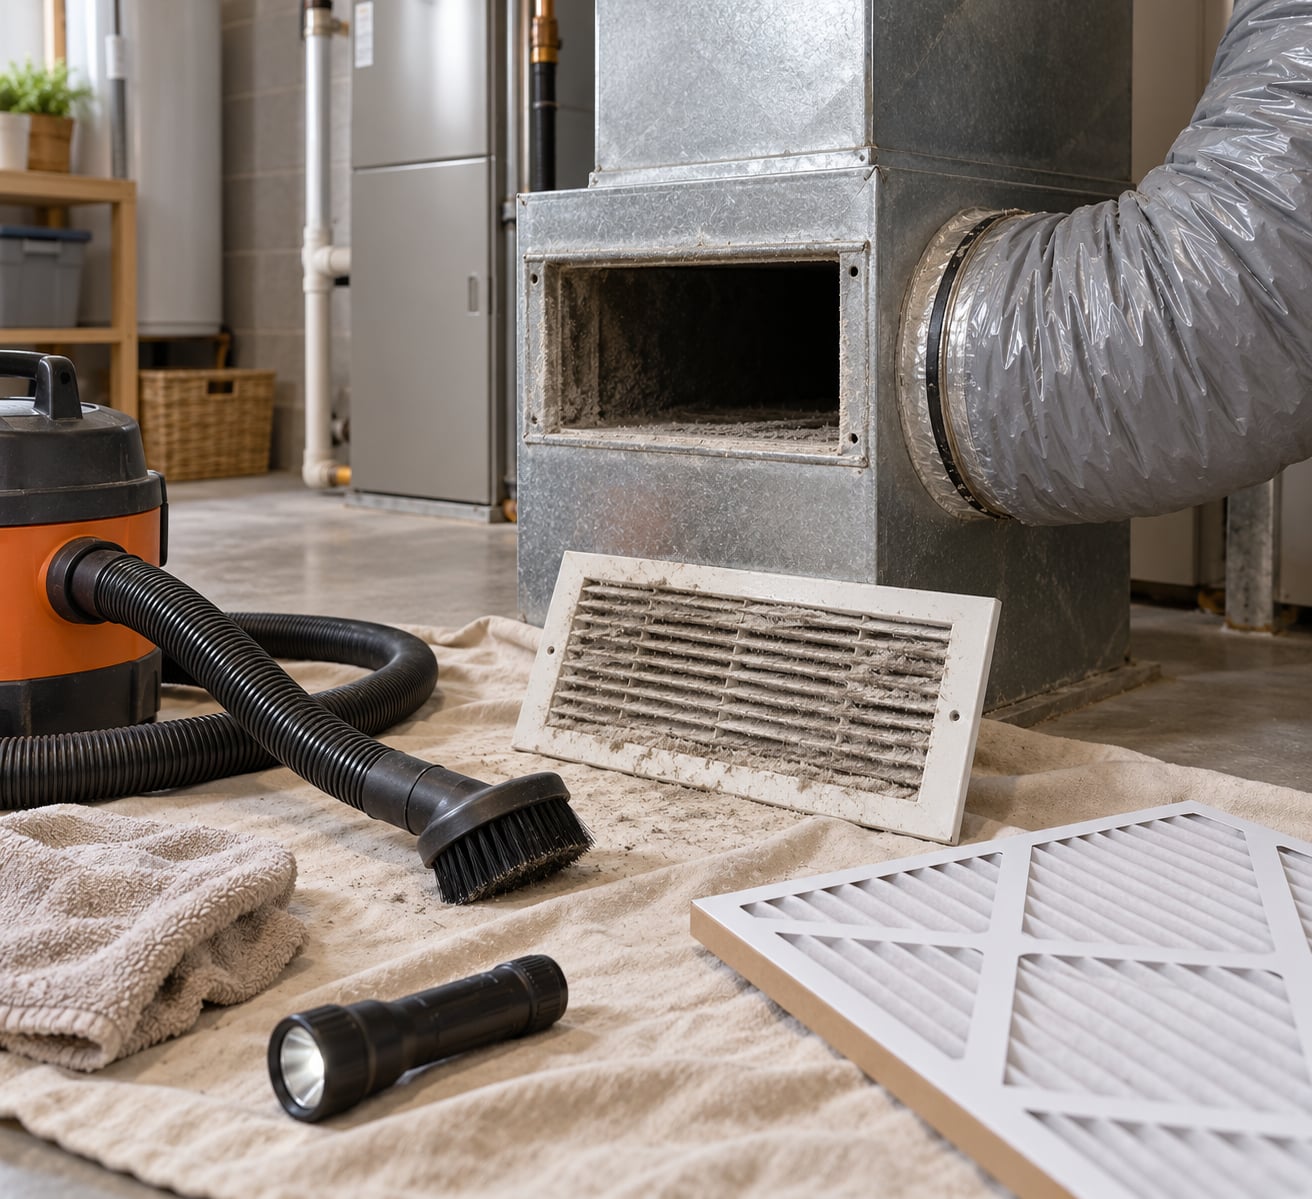
Homeowner duct cleaning is a modest job in terms of equipment. It is essentially a careful vacuum of the parts of your system you can physically reach, plus a wipe-down of the vent covers. If your plan involves opening a wall, pulling apart a sealed plenum, or climbing into an attic with the blower running, stop and read the professional section first.
Tools and supplies:
- A shop vacuum or household vacuum with a hose attachment, ideally with a HEPA filter bag. A wet/dry vacuum works and handles the odd damp debris without complaint.
- A soft round brush attachment, or a long-handled duct brush with a bristle head a few inches wide. Stiff wire brushes scratch metal and can knock loose duct mastic.
- A long flat-head and a Phillips screwdriver for removing vent covers and filter access panels.
- A flashlight, plus a phone camera for crouching shots inside dark return plenums.
- Work gloves and a dust mask. A N95 is worth the money if your system has not been cleaned in years.
- A damp microfiber cloth and a mild all-purpose cleaner diluted in water.
- A replacement furnace or HVAC filter in the correct size and MERV rating for your system.
- A drop cloth or plastic sheeting for floors and furniture, since dust falls straight down when you pull a register.
Two things worth adding if you will do this more than once. A borescope camera attachment for your phone, which costs very little, lets you look down a branch duct without tearing anything open. And a cheap infrared thermometer, so you can compare the temperature at a supply register before and after and see whether airflow is actually restricted.
What you cannot buy for your garage is the equipment a professional brings: a truck-mounted vacuum rated for far more airflow than a household machine, HEPA filtration, agitating brushes or compressed-air whips that knock debris loose from the full length of a run, and negative air machines that seal the system and pull contaminants out without letting any of it into your house. That difference is why professionals clean hidden trunk lines and homeowners clean registers, and it is worth weighing before you spend money on equipment you will use twice.
Step-by-Step: How to Clean Air Ducts and Should You Do It Yourself?
You can clean the accessible parts of a residential duct system in an afternoon, and the process below covers the whole job from decision to final test. Work slowly. Most of the damage reported in homeowner forums comes from rushing this.
1. Confirm Whether Cleaning Is Necessary
Open two or three return air grilles and a few supply registers with a flashlight before you touch anything. Look for a visible layer of dust, grey film on the vanes, cobwebs, hair, or a gritty dark smear on the return side. That is real buildup and it is worth addressing.
Then check for the four conditions that move this from housekeeping into a real problem:
- Mold growth you can actually see on duct surfaces or in the plenum.
- Pest or vermin infestation, evidenced by droppings, nesting material, or a dead animal somewhere in the system.
- Ducts so clogged with dirt and dust that debris is blowing out of the supply registers into your rooms.
- A major renovation or construction project in the last year, with drywall dust and sawdust in the air.
If none of those apply and your registers look reasonably clean, the honest answer is that you can skip the whole process. Ducts are not a wastebasket for the household; they are mostly sealed metal, and a filter does most of the particle work. The American Lung Association has long advised against chasing air quality improvements through duct cleaning alone, and the EPA agrees the evidence does not support routine service.
2. Turn Off and Protect the HVAC System
Set the thermostat to cool mode and fan mode only, then switch it off. Go to the breaker panel and turn off the air handler or furnace breaker. Confirm the power is actually dead by listening for the blower spin-down before you open any panel.
Cover anything underneath. Register covers drop dust directly, and a ceiling register over a dining table will leave a memorable mark. Lay down a drop cloth, move breakables, and put furniture covers on anything you cannot move.
Write down or photograph how every cover, panel and filter door was oriented before removal. Duct systems rely on sealed connections and directional blades, and getting a register back in upside down can push air against the ceiling instead of into the room.
3. Inspect the Ducts and Air Registers
Start at the returns, since that is where the air handler pulls from and where debris collects fastest. Remove each return grille and look into the opening. Shine your flashlight along the duct run as far as you can see. With a phone camera on an extension you can often get a view of 10 to 15 feet down a branch.
What you are looking for, and what each finding means:
- Thick dust with a matted fibre layer. Normal for an old system, worth cleaning, and safe to handle with a vacuum and brush.
- Dark spotting or fuzzy growth on a metal surface. Could be mold. Stop, take a clear photo, and read the mold section in the professional heading below before you wipe it with a damp cloth.
- Droppings, grease trails, torn insulation. Pest activity. This is a professional job, and often a remediation job as well.
- Visible flex duct kinked, crushed, or sagging. Cleaning will not fix it, and a shop vacuum hose can make a weak section worse. Look at repair instead.
- Drips, standing water, or a soaked insulation patch. A drainage or pan problem. Cleaning before that is fixed is wasted.
- Loose or separated joints where two sections meet. Do not tug on them. Note the location and let a professional reseal them.
If your inspection finds clear mould, pest evidence, or heavy contamination inside the trunk line where you cannot reach, that is the decision point. Stop the DIY job here.
4. Vacuum Accessible Duct Surfaces and Registers
Put your vacuum nozzle a few inches inside the return opening, keep the hose sealed to the duct wall so you do not pull in unfiltered hallway air, and work slowly from the register inward. Sweep the walls and the top and bottom of the run with the soft brush in short strokes, vacuuming as you go.
The mistake almost everyone makes is pushing debris deeper. Debris that goes an inch past your brush attachment will sit there until the system is opened. Work from the far end back toward the register so the material travels the short distance to the vacuum, and keep the vacuum running the whole time.
Take the grille itself to a sink or outside, or hold it over the vacuum intake while brushing between the vanes. Bend the vanes gently with your fingers to release packed dust. On removable plastic covers, a plastic-bag-and-rubber-band static trick can pull a surprising amount out of the slats without any water at all.
Give the return plenums extra attention, since that is where the blower motor lives and where debris can restrict airflow. Never reach into a plenum past your flashlight beam. There may be wiring, a sharp sheet-metal edge, or a spinning blower you cannot see.
5. Wipe Cleanable Surfaces
For metal or plastic vent covers, a lightly damp microfiber cloth and a little diluted mild cleaner is plenty. Wipe, do not soak, and let the cover air dry fully before you reinstall it. Water pushed into a duct will either drip into your ceiling or sit inside the insulation and grow something worse than dust.
Stay away from three things entirely: duct insulation, any electrical component including the blower and the condensate pan, and any duct that is not specifically designed to be wet cleaned. Never spray a cleaning solution into a return grille. Sprayed chemicals get carried straight onto the coil and into the blower housing, and products that were never registered for use in air ducts can end up in the air your family breathes.
Full-system duct sanitizing is a separate service built on those chemical treatments, and the same caution applies. It is not part of homeowner work, and it is usually an upsell rather than a requirement.
6. Replace the Filter and Check Airflow
Put the system back together, following your photos. Replace the furnace filter with the correct size and the MERV rating your system is rated for; going higher can restrict airflow and force the blower to work harder, which is the opposite of the point. Write the install date on the filter edge or the housing with a marker so you can count months later.
Restore the breaker and power, set the thermostat to cooling with the fan on, and let the system run for fifteen minutes. Listen for anything new. Old systems that were quietly compensating for a partial blockage often get noticeably quieter once airflow improves.
Compare your infrared thermometer readings at two supply registers before and after. A few degrees of difference between rooms on the same floor usually means a balancing issue, not a cleaning issue. Then check back over the next few days for dust on surfaces near the registers. If the dust returns quickly, something upstream is still dirty and a filter change will not fix it.
When Is Professional Air-Duct Cleaning Worth It?
Professional cleaning earns its keep when the contamination is somewhere a homeowner cannot reach, or when there is a health reason to treat it as more than housekeeping. If you looked at your checklist in step one and one of the first three items was present, that is your answer.
The specific cases worth paying for:
- Visible mold anywhere in the duct system. Cleaning without remediation leaves the spores in place and often spreads them into every room when the vacuum starts. Professionals contain the area first.
- Pest or rodent infestation. Droppings decompose, contaminate porous insulation, and carry pathogens. Droppings in ducts usually means sealed-off inspection openings, a cleaning protocol, and often duct replacement for the affected runs.
- Construction dust after a major renovation. Drywall and joint compound dust is fine enough to coat everything downstream, including the evaporator coil. It is one of the clearest cases for professional work.
- Debris blowing out of registers into living space. If dust lands on your furniture, no amount of register wiping will solve it. The source is inside the system.
- Repeated airflow problems. When a technician keeps finding the system needs more static pressure to move air, or the blower trips, the restriction is often deep in the ductwork and cleaning can genuinely restore performance. On severely clogged systems, homeowners report energy use dropping noticeably once flow improves.
- Never-cleaned ductwork in a home you just bought. Older homes sometimes open up genuine debris, including construction leftovers from a prior renovation.
On frequency, the conflicting advice you have heard is real, and here is how it stacks up:
- The EPA: clean only when there is a specific indication of a problem. No schedule.
- NADCA: cleaning is generally recommended every two to three years, with the frequency adjusted for pets, allergies, smokers, and renovation.
- Most contractors selling the service: every three to five years.
- Many working technicians: a sealed metal system in a home with a maintained filter rarely needs attention on any fixed schedule at all.
The difference is not ignorance, it is incentives. An association that certifies professionals has a reason to see routine cleaning as normal, and a company that sells cleaning has a reason to see a date on the calendar. The EPA position is the one built on health evidence, and it is the most useful default: clean when something is actually wrong, not because a schedule says so.
If you do hire someone, get three written estimates, check that the company holds state licensing where your state requires it, and ask whether the technician holds current NADCA certification. Ask for before and after photos of a real duct run rather than a close-up of one register. A company with a local physical address and itemised written scope is telling you it expects to be held to something.
Common Mistakes to Avoid
Cleaning without fixing the cause. If the buildup is coming back in months, the filter is undersized, the duct is leaking and drawing in attic dust, or humidity is too high, cleaning is treating a symptom. Filter replacement, sealing, and humidity control between about 30 and 50 percent indoor relative humidity fix more of these problems than any cleaning.
Using too much water. Over-wetting insulation lowers its insulating value, promotes microbial growth, and can drip through a ceiling. Damp cloth, no spray bottles, no wet vacs going up into the ducts.
Grabbing flex duct and pulling. Flex duct is thin and easy to tear or crush, and a torn section dumps your conditioned air into the attic. Treat it as hands-off, and remember that technicians often cite 20 to 30 years as a typical service life for flex duct, so replacement is a real option to price against cleaning.
Loosening connections to get at debris. Duct mastic seals the joints. Pop a connection and you have created a leak that raises your energy use and pulls in unfiltered air. If a seam needs opening, that is technician work.
Forgetting the blower and coil. A lot of the dirt in a system is packed into the evaporator coil and blower housing. Neither is a homeowner task, and a dirty coil reduces airflow no matter how clean the ducts are.
Believing the cold calls. Repeated door-to-door and phone solicitations are the most common way homeowners end up with work they did not decide they needed. House-canvassing offers are the classic bait: a low headline number that becomes several times larger after the technician points out additional problems. None of this makes the industry illegitimate, but it makes it one where you should never let a salesperson decide the scope.
Red flags worth walking away from: pressure to decide on the spot, health scare tactics about mould you have never seen, no itemised written estimate, a company unwilling to show you equipment or certification, and an add-on list that keeps growing after the cleaning is finished.
Sanitizing as an upsell. Antimicrobial and biocide treatments get sprayed inside the duct system on the theory that they kill what the vacuum missed. Products that were not registered for use in air ducts can end up circulating through your air supply, and an EPA registration for one purpose is not registration for duct spraying. Ask what the product is and what its registration covers. If the answer is vague, that is your answer.
Finally, the maintenance habits that keep this from coming up again. Change or clean your filter every 60 to 90 days, more often with pets or allergies. Seal any visible duct runs in unconditioned spaces with mastic. Run the system after a renovation without the fan on for a day to push dust out. Check the filter slot at the start of every heating and cooling season and note the date. Most duct cleaning services would rather you spent that effort here than on a truck-mounted vacuum.
Frequently Asked Questions
Should air ducts be cleaned in a typical home?
Usually not. The EPA states that you generally do not need to get your air ducts cleaned unless there is a specific problem such as visible mold, pest or vermin infestation, or ducts clogged with dirt and dust blowing out of supply registers. If your filters are changed on schedule and your registers look clean, there is usually nothing worth paying for.
How often should air ducts be professionally cleaned?
There is no single correct answer, and the disagreement is worth understanding. The EPA advises cleaning only when there is a specific indication of a problem. NADCA generally recommends every two to three years. Many contractors suggest three to five years. Working technicians often say a sealed system with a maintained filter needs no fixed schedule at all.
Can cleaning air ducts improve indoor air quality?
It can when there is a genuine contaminant source, such as mould, pest residue, or heavy construction dust circulating through the system. On a clean system, cleaning does very little for air quality, and most of your air quality is determined by ventilation, filtration, humidity, and cleaning habits inside the home rather than by what is inside the ductwork.
What is the difference between DIY duct cleaning and professional service?
DIY work covers registers, return grilles, filter housing, and the few feet of duct you can physically reach with a shop vacuum and brush. A professional brings a high-airflow vacuum, HEPA filtration, agitating brushes, and negative air containment, which is what makes deep trunk-line cleaning and safe mould or pest handling possible.
How can I tell if my air ducts have mold or another serious problem?
Look for dark spotting, fuzzy growth on metal surfaces, a musty or damp smell that appears when the system starts, water stains, or pooling moisture in a drip pan. If you see any of that, take a clear photo, stop cleaning with a damp cloth, and get the system assessed. Mould inside ducts usually needs containment and remediation rather than a quick wipe.
Is it safe to use a household vacuum to clean air ducts?
Yes, for accessible returns and short branch runs, as long as you use a soft brush, keep the hose sealed to the duct wall, and work from the far end toward the register so you never push debris deeper. Avoid wet vacs going up into the ducts, avoid stiff wire brushes that can scratch metal, and keep your hands out of any plenum past your light beam.
Conclusion
Start with the filter, then look at your returns with a flashlight. If what you see is a modest dust layer, an hour with a shop vacuum and a soft brush will handle it. If you see mould, pest evidence, debris blowing into rooms, or construction dust, stop and hire a certified professional who can contain the work and document it.
Between those two outcomes sits most of the advice on this page, and it comes down to one question: is there a specific problem, or is someone on my porch? If you cannot point to a specific problem, spend your effort on a filter you change every two to three months and leave the ductwork alone. Updated for 2026.