Digging footings below the local frost line, pouring concrete piers, setting posts to a level beam line, and bolting the frame down takes most people two weekends. This guide walks through how to build a deck foundation in the order the work actually happens, so nothing gets buried that you need to see later. Getting the four numbers right up front — how many footings, how deep, how wide, and how far the posts sit apart — is what separates a foundation that ages quietly from one that starts rocking in its second winter.
One thing to say plainly before we start: this is a general framework, not a set of dimensions to copy. Footing size and depth in this article are typical residential figures for reference and comparison. Your local building department and, where one is required, an engineer’s stamped drawing control the numbers that matter on your site.
Table of Contents
- What You Need
- Step-by-Step: How to Build a Deck Foundation
- Step 1: Confirm the Design, Permits, and Loads
- Step 2: Mark the Deck Layout and Locate Utilities
- Step 3: Dig and Form Deck Foundation Footings
- Step 4: Install Anchors or Embed the Posts
- Step 5: Pour and Level the Concrete
- Step 6: Cut, Plumb, and Brace the Posts
- Step 7: Install Beams, Joists, or the Ledger
- Step 8: Check Alignment, Drainage, and Connections
- Common Mistakes
- Frequently Asked Questions
- How deep should deck footings be?
- Do I need rebar in my deck footings?
- How long before I can build on concrete footings?
- Can I build a floating deck without footings or concrete?
- How do I attach a deck to the house?
- When should I hire an engineer instead of building it myself?
What You Need
Start with documents, because the paperwork shapes everything else.
- Plans. A dimensioned deck layout showing post locations, beam spans, joist direction, and attachment to the house. Manufacturer plans for precast concrete pads and hardware are free downloads.
- A permit application and approved drawings from your building department, if one is required.
- Frost depth for your address from your building department or the state extension service. This is the number your footing depth is measured from.
- A soil assessment for anything built on fill, clay, or a slope.
Then the tools. A post-hole digger or auger handles most residential soil, and a mattock or small excavator is worth renting if you hit more than a dozen holes or rocky ground.
- Framing square, straightedge, torpedo level, string line or chalk line
- Wheelbarrow or buckets, plus a mixing hoe and a low-pressure garden hose
- Concrete form tubes (sonotubes), post base anchors, and structural screws
- Pressure-treated posts rated for ground contact, or steel posts with adjustable bases
- Galvanized or stainless fasteners rated for pressure-treated lumber
- Work gloves, eye protection, knee pads, and a dust mask for mixing
- Shovel, tamper or plate compactor, level, and a speed square
Protective gear is not optional on this job. Concrete splash burns skin fast and quietly, and a spade handle does not warn you before it lands on a foot.
Step-by-Step: How to Build a Deck Foundation
Step 1: Confirm the Design, Permits, and Loads
4 numbers decide what your foundation needs: the deck’s height above grade, whether it attaches to the house, the total square footage, and the heaviest single load it carries. A 200 square foot freestanding platform six inches off the ground is a different job from a 400 square foot elevated deck bolted to a two-story house, and a deck carrying a hot tub is a third job again.
Local building codes govern the answer. In the United States the residential rules sit in Chapter 5 of the International Residential Code, where Section R507 covers decks specifically. Many jurisdictions adopt a local amendment, and a handful of states exclude low detached decks from the permit requirement entirely.
Draw a permit when the deck is attached to the house, rises more than 30 inches off the ground, or carries a roof. Call a structural engineer when the deck is more than about 10 feet above grade, spans more than 20 feet without intermediate support, sits on fill or soft clay, or holds anything heavy such as a hot tub, a roof, or a second-story platform.
Step 2: Mark the Deck Layout and Locate Utilities
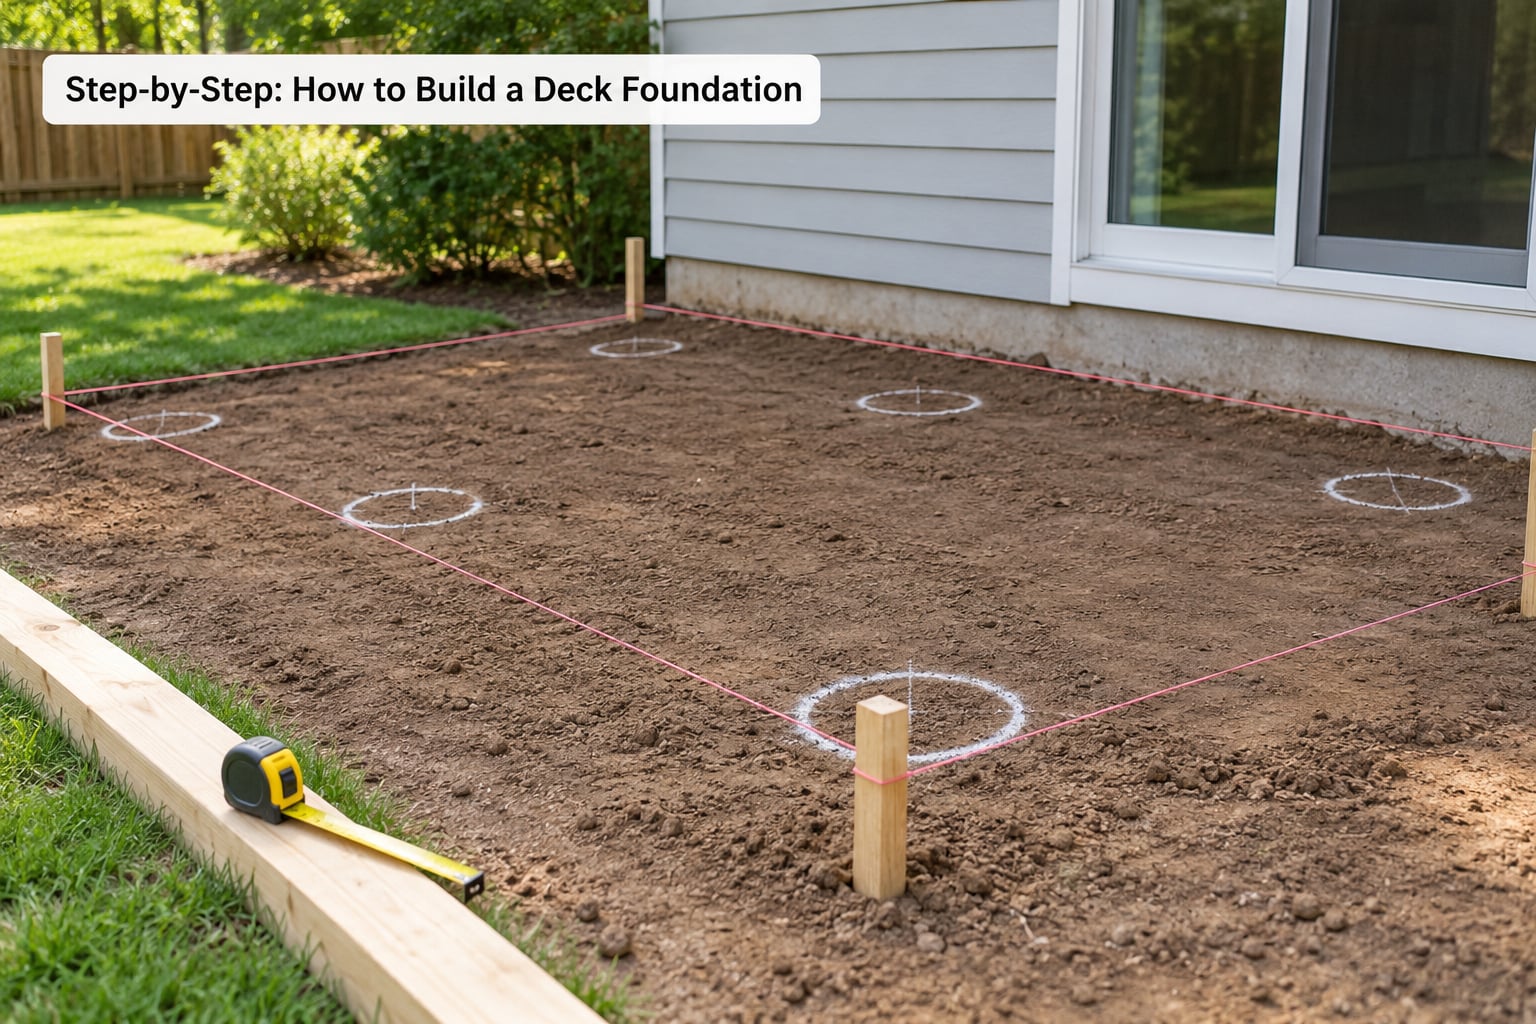
Set batter boards about 2 feet beyond the deck corners, drive a stake at each, and stretch reference strings between them to mark the footprint. The strings stay put while you dig, unlike marks on the ground.
Square the layout with the 3-4-5 method: measure 3 feet along one string from a corner and 4 feet along the next, then check that the diagonal between those two points is exactly 5 feet. Adjust the second string until it is. Long diagonals catch small errors that a short one hides.
Count your footings from the beam layout, not the deck size. A 20 by 20 foot freestanding deck on a double 2×8 beam typically needs 9 footings — three posts carrying a centre beam at 7 feet on center, with outer beams picking up the rim joists.
| Deck size | Typical layout | Footings | Spacing |
|---|---|---|---|
| 12 x 12 ft | One beam, posts in a row | 4 | 6-7 ft |
| 16 x 16 ft | Rim on three sides | 7 | 6-8 ft |
| 20 x 20 ft | Centre beam plus rim beams | 9 | 7-9 ft |
| 16 x 32 ft | Two beams, mid-span posts | 12-15 | 6-8 ft |
| 20 x 40 ft, two storeys | Engineered layout | Per drawing | Per drawing |
Keep freestanding decks at least 6 inches off the house so drainage can get behind the framing. Call 811 before you pick up a shovel, and wait for the locate to clear or expire. The free service marks public utilities but says nothing about private lines you ran yourself, irrigation, landscape lighting, or low-voltage runs, so mark those by hand.
Step 3: Dig and Form Deck Foundation Footings
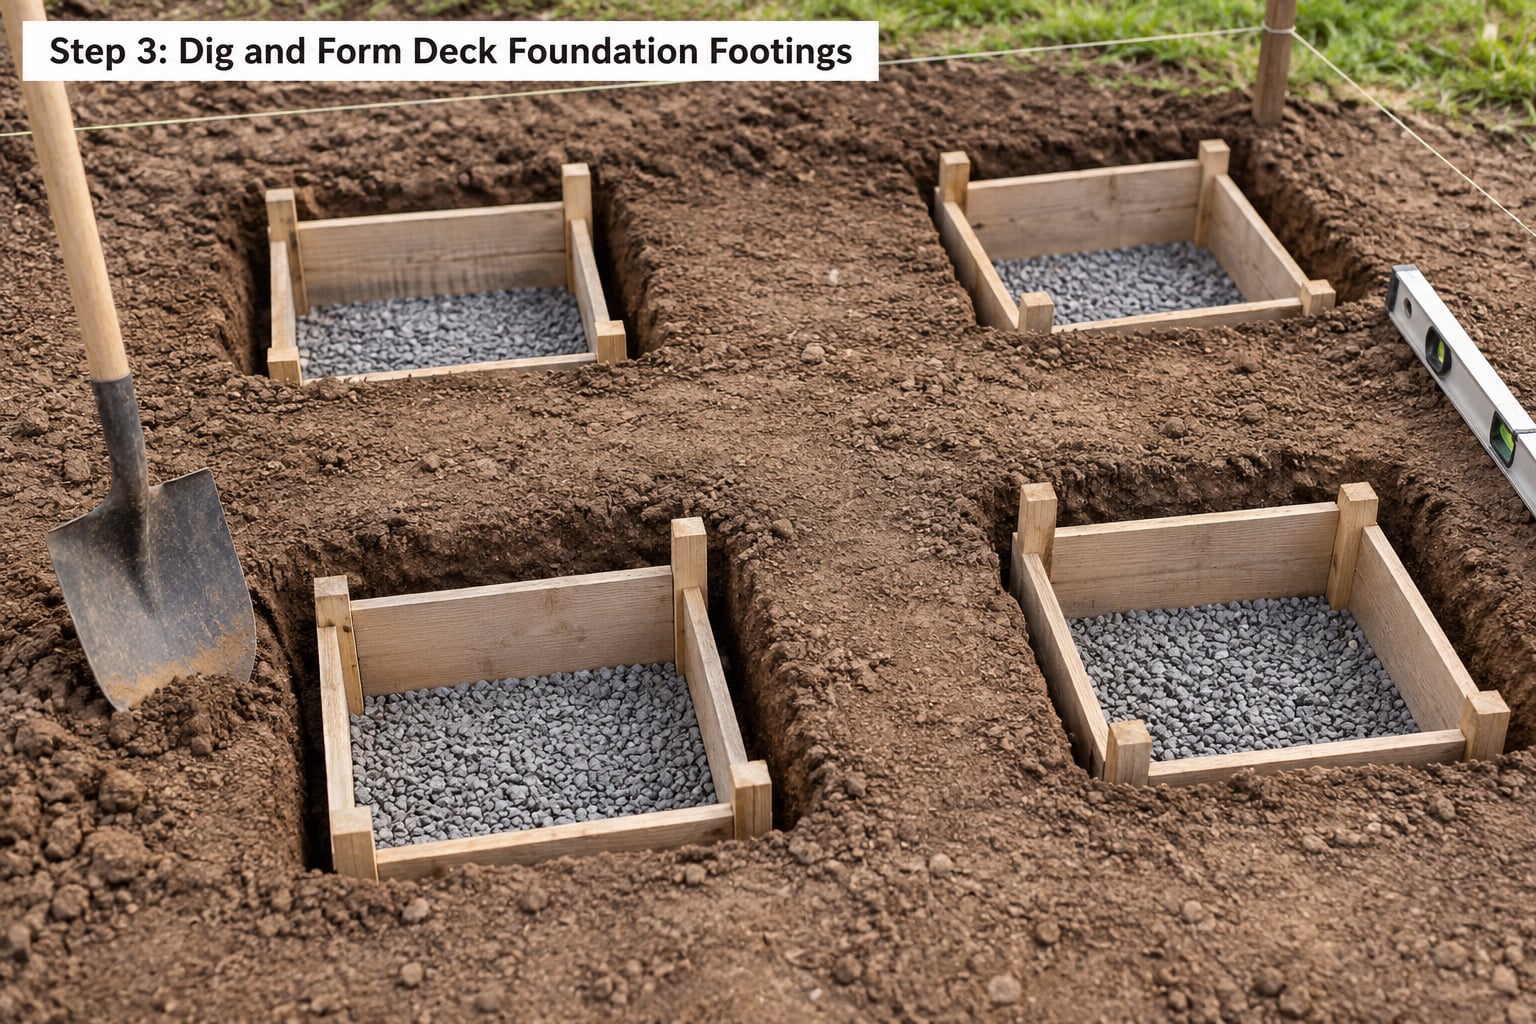
Below the local frost line, never less than 12 inches, and always well below the depth where soil in your area freezes. The International Residential Code sets the depth at 12 inches below the frost line, and inspectors in cold states push back hard on anything shallower.
| Local frost depth | Minimum footing depth below grade | Common minimum diameter |
|---|---|---|
| No frost / frost depth under 12 in. | 12 in. | 8 in. |
| 12-24 in. | 30 in. | 10-12 in. |
| 30 in. | 42 in. | 12 in. |
| 36-48 in. | 48-60 in. | 12-16 in. |
Diameter follows load and soil. An 8 inch pier suits a light platform; 10 to 12 inches covers most residential decks; a post near the house, at a stair landing, or under a heavy object usually steps up to 12 inches or more.
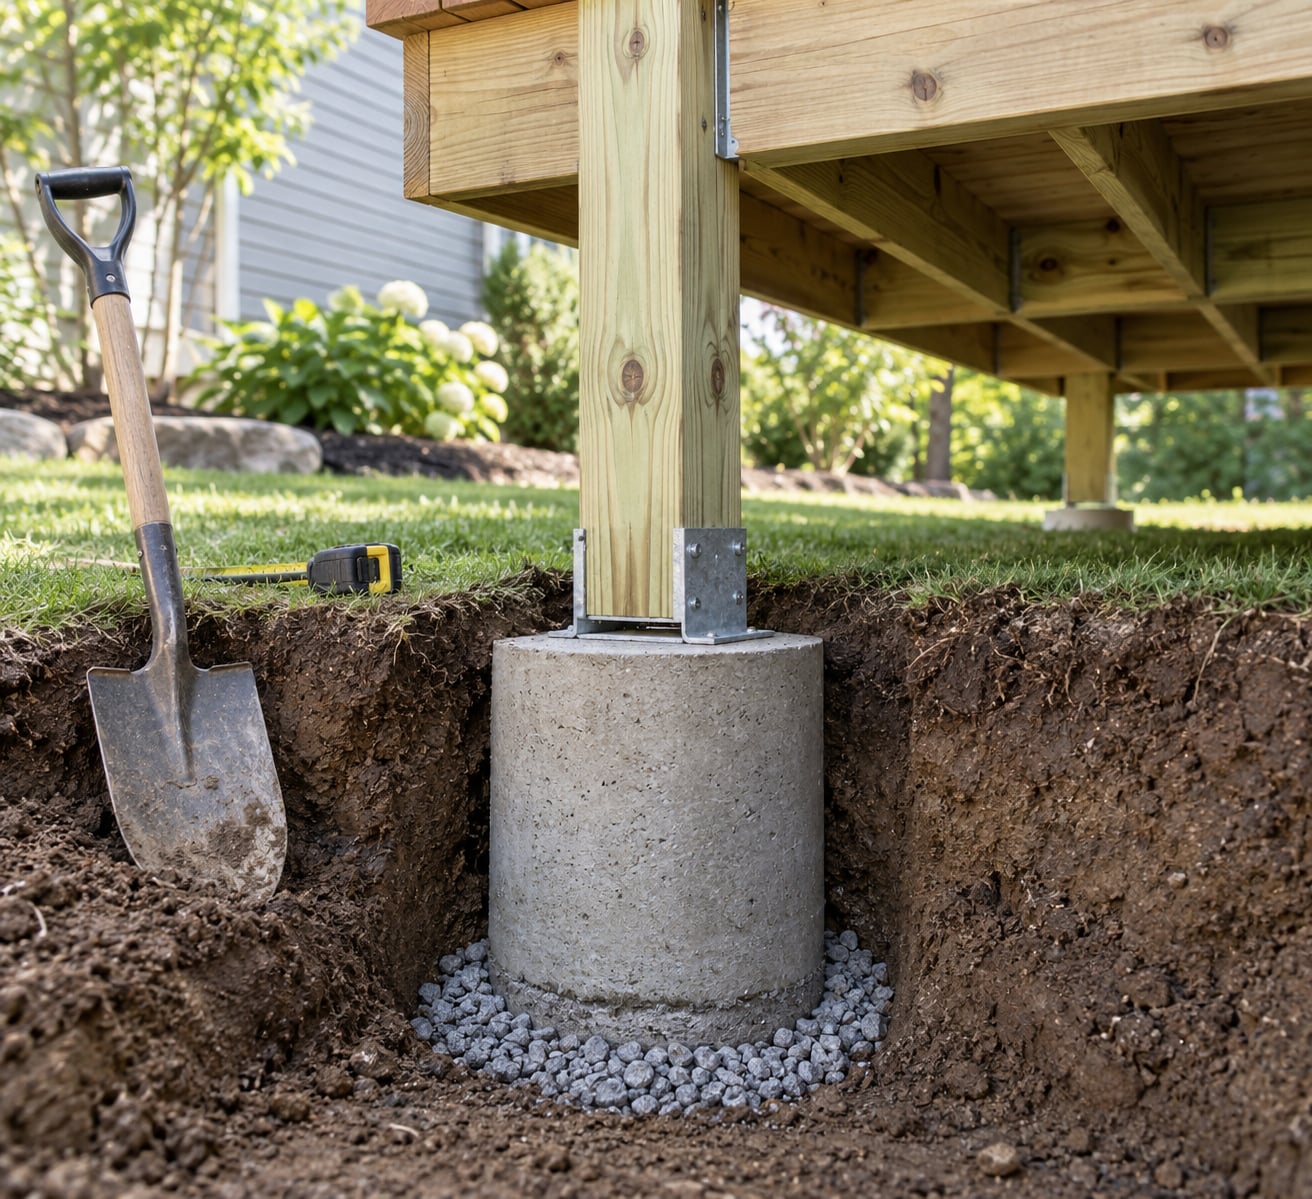
Bottom each hole with 3 to 4 inches of compacted gravel so water drains instead of sitting under the pier. That layer is what keeps the bearing soil from turning to mud. Check your approved drawings before you dig for the depth and diameter — do not guess structural dimensions from an article, including this one.
Step 4: Install Anchors or Embed the Posts
Approved metal post anchors are the default choice, and they come in two types. Wet-set anchors drop into the fresh pour and grab the post with fins as the concrete cures, which means the concrete sets the post elevation for you. Cured-set anchors install later with epoxy or structural screws, which is easier when you want to trim posts precisely but adds a second day.
Embedded posts sit directly in the concrete with no anchor. It saves hardware and stiffness, but it traps the wood in moisture and locks in the post height at pour time, so the beam elevation has to be right before the concrete goes in.
Whatever the method, use lumber labelled for ground contact and keep the wood end grain above the concrete where your design allows. Never bury a post cap in wet concrete, and follow the anchor manufacturer’s embedment depth. Plumb each post with a brace on two sides before the concrete firms up.
Step 5: Pour and Level the Concrete
Bagged mix up to about 10 footings, ready-mix delivery beyond that. Add roughly half a gallon of water per 80 pound bag, no more, because excess water weakens the final mix.
| Footing diameter | Depth below grade | Volume | 80 lb bags |
|---|---|---|---|
| 8 in. | 24 in. | 0.9 cu ft | 2 |
| 10 in. | 30 in. | 1.6 cu ft | 3 |
| 10 in. | 36 in. | 2.0 cu ft | 4 |
| 12 in. | 36 in. | 2.4 cu ft | 5 |
| 12 in. | 48 in. | 3.1 cu ft | 6 |
| 16 in. | 48 in. | 5.6 cu ft | 10 |
Fill to within an inch or two of the top, rod the concrete to push air pockets out, then strike the top flat. Watch elevation with a straightedge across several posts before it stiffens, because adjusting concrete after it sets means chipping.
Keep it damp for at least three days. The American Concrete Institute is direct about this: concrete that cures moist gains far more strength than concrete left to dry out, and dry, hot, windy days do the most damage in the first 48 hours. Load the footing lightly after 24 to 48 hours. Most builders wait about seven days before setting beams, and check the bag or delivery ticket for the mix strength your design calls for, commonly 3,000 to 4,000 psi.
Step 6: Cut, Plumb, and Brace the Posts
Set every post top to the same elevation, measured from a level reference rather than from the ground, because your yard will not be level. A water level with a clear hose or a laser line beats a long spirit level across uneven ground.
Mark the beam bearing height on each post, cut with a circular saw, and check the distance from the mark to each footing top. Any mismatch means the footing is high or low, and fixing it now costs minutes while fixing it later costs a shim. Brace each post in both directions before the frame goes up, and re-check plumb after the wind picks up.
Step 7: Install Beams, Joists, or the Ledger
For a post-and-beam deck, set the beams on post caps or directly on the posts as your design specifies, then fasten through the beam into each post with approved structural screws or through-bolts. Predrill near the end of the grain so the fastener does not split the post.
For an attached deck, the ledger does the heavy work and takes the most care. Flash over the ledger before joists go up, fasten it into the rim joist or band with the structural screws your plan calls for, and keep it above grade with air behind it. Where the plan requires bolts instead of screws, use through-bolts with washers and nuts. Follow the approved structural layout for fastener spacing rather than copying a generic figure.
Step 8: Check Alignment, Drainage, and Connections
Walk the foundation before decking goes down and check eight things. Posts plumb and evenly spaced. Beam level along its whole run. Braces on every tall post. Concrete cured to the time your design specified. Wood treatment rating correct for ground contact. Flashing continuous at the ledger. Ground falls away from the house at about 1 inch per 6 feet. And every fastener present, tight, and the right type.
That last item, grade fall, is the one most decks skip. Water that ponds under the framing soaks the joist ends, and that is where rot starts.
Common Mistakes
Shallow footings. Anything above the frost line moves when the ground freezes. The fix is to dig to the depth your local code specifies, which means ignoring the plan someone posted online that finished at 12 inches in a state where frost reaches 30.
Post not centred on the footing. Homeowners buying older houses find this constantly — the post hangs over the edge, so the load lands on soil instead of concrete. The fix is a new footing with a sister post bolted alongside, set back far enough to clear the old one.
No gravel base. Water collects under a pier poured straight onto soil and weakens the bearing surface. Three to four inches of compacted stone costs little and prevents the sinking.
Unapproved post bases. Landscape edging blocks and fence-post brackets sit on top of the concrete and carry no uplift or lateral load. Use anchors rated for the job or embed the post properly.
Measuring post heights off the ground. Ground levels vary across a yard, so posts cut to length in the wrong order come out mismatched. Reference every cut from one level line.
Skipping bracing. A braced frame is far stiffer than an unbraced one during construction and under wind. Brace early, not at the end.
Ledger bolted to siding instead of structure. The ledger needs to reach framing, with flashing over the top and a clear gap behind. Screws into vinyl or thin trim will not hold a loaded deck.
Two safety habits cover most of these. Check the plans before the first shovel stroke, and re-check the footing holes for the pre-pour inspection your jurisdiction requires. That inspection happens with holes open and forms set. Pour first and you may be chipping out a footing to satisfy it.
Frequently Asked Questions
How deep should deck footings be?
Below the local frost line, and never shallower than 12 inches. The International Residential Code requires footings to sit at least 12 inches below the frost depth for your area, which ranges from nothing in the south to 30 inches or more in northern states. A 30 inch frost depth usually means a footing reaching 42 inches below grade. Confirm your number with your building department before you dig, since local amendments change it.
Do I need rebar in my deck footings?
Usually not. Rebar matters in footings where wide cracks or heavy bending loads are expected, and most residential deck piers do not see either. Many inspectors want a single piece of rebar in a pier or bell footing to tie the upper and lower sections, so check your approved drawings. If rebar is called for, keep it centered in the pier with about 2 inches of cover on all sides so it never sits against the form wall.
How long before I can build on concrete footings?
Wait about 48 hours before handling or lightly loading a poured footing, and about seven days before setting beams and posts. Full design strength takes roughly 28 days. Keep the concrete damp for at least three days, which is when moisture loss does the most damage. Bagged mixes list their own set and strength schedule on the bag, and it is worth following it rather than a general rule of thumb.
Can I build a floating deck without footings or concrete?
Sometimes, and it depends on height, attachment, and local code. Surface blocks, adjustable pedestals, or a compacted gravel pad work for low, freestanding, non-attached platforms that stay well under the guardrail height trigger. They are not below the frost line, so they can shift and go out of level over winter, and many jurisdictions reject them for anything attached or elevated. Your building department has the final word.
How do I attach a deck to the house?
Attach through a ledger board fastened into the house framing, with flashing over the top and a ventilated gap behind it. Structural screws or through-bolts at the spacing your plan specifies do the work, and any elevated deck needs diagonal bracing from the deck back to the house. Keep the ledger above grade so water can drain. Avoid bolting to siding, trim, or a window, none of which carry structural load.
When should I hire an engineer instead of building it myself?
Call an engineer when the deck is more than about 10 feet above grade, spans more than 20 feet without intermediate support, is attached to the house and above a lower level, sits on fill or soft clay, or carries a hot tub or roof. Engineered plans matter most in northern states where frost depth drives footing size, and in areas with expansive soil. Many departments require the engineer’s stamp on the drawing itself, not a contractor’s framing plan.
Do the paper first: get the permit, confirm your frost depth, and clear the 811 locate. Then batter boards, reference strings, and a shovel. Everything after that is repetition, and repetition is the easy part.