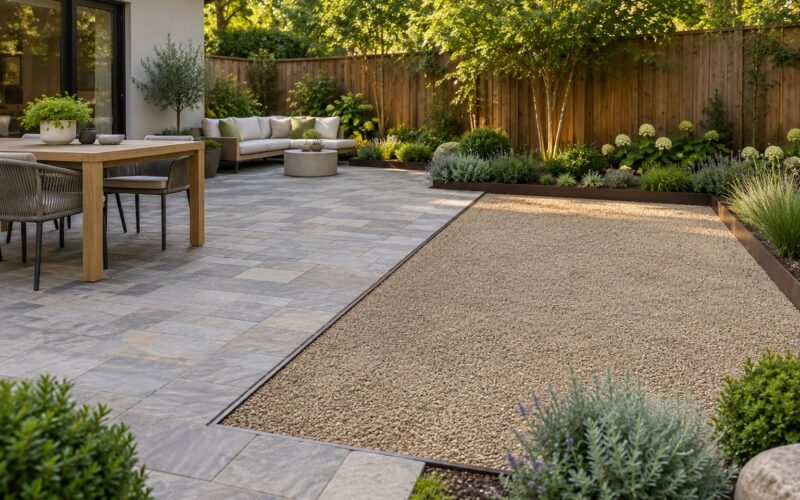
A paver patio is individual concrete, brick or stone pavers resting on a 1-inch screeded sand bed over 4 to 6 inches of compacted crushed gravel, held in place by edge restraints and sand-filled joints. The total excavation usually runs 8 to 10 inches deep, sloping 1 to 2 percent away from the house. Most first-timers can do a 100 to 200 square foot patio over a long weekend with a rented plate compactor, and the part that decides whether it lasts is the base, not the pavers.
Table of Contents
- What You Need
- Materials
- Tools
- Before you start
- Step-by-Step: How to Build a Paver Patio
- Plan the patio layout and measure the site
- How to Build a Paver Patio Base
- Spread and level the paver bedding
- Lay the pavers in the planned pattern
- Finish the joints and clean the patio
- Common Mistakes
- Digging too shallow
- Compacting one thick lift
- Walking on the screeded sand
- Skipping the edge restraint
- Forgetting the slope
- Over-filling the joints
- Frequently Asked Questions
- How deep should I dig for a paver patio?
- Do I need a permit to build a paver patio?
- Can you lay pavers directly on dirt?
- How do I keep weeds from coming through the joints?
- How do I cut pavers so the edges look straight?
- How long does a paver patio take, and when should I hire someone?
- Conclusion
What You Need
Before you touch a shovel, work out three numbers: the finished patio area in square feet, the total dig depth, and how the pavers will be cut at the edges. Every quantity below scales from those.
Materials
Buy a little extra on the pavers, usually 5 to 10 percent, because cuts and mistakes add up fast.
- Pavers. Four 6 by 6 inch pavers cover one square foot; 6 by 9 inch pavers cover about 2-2/3 per square foot. Multiply by your area, then add 5 to 10 percent for cuts and spares.
- Base material. Three-quarter inch crushed stone with fines, sometimes sold as road base or crusher run. Figure roughly 0.4 cubic yards per 100 square feet for a 4 inch base, and 0.6 for a 6 inch base.
- Bedding sand. One inch of washed concrete sand or screenings covers about 100 square feet per roughly 0.5 cubic yard.
- Joint sand. Plain paver sand fills the gaps; polymeric sand costs more up front but locks the joints against washout and weeds. One bag covers roughly 50 to 80 square feet depending on joint width.
- Edge restraint. Plastic or rigid PVC edging on all four sides, plus 8 to 10 inch anchoring spikes every 8 to 12 inches along each edge.
- Weed barrier fabric. Optional but cheap insurance at the bottom of the excavation on soil prone to weeds.
Here is the same list as a quick reference for a 100 square foot patio.
| Material | Amount for 100 sq ft | Notes |
|---|---|---|
| 6 by 6 inch pavers | 400 plus 5-10 percent | 4 per square foot |
| 6 by 9 inch pavers | 270 plus 5-10 percent | 2-2/3 per square foot |
| 3/4 inch crushed base | 0.4 to 0.6 cubic yards | 4 in base to 6 in base |
| Bedding sand | About 0.5 cubic yards | 1 inch layer |
| Edge restraint | Project perimeter in feet | All four sides |
| Anchoring spikes | 2 per foot of edge | 8 to 10 inch spikes |
| Joint sand | 2 to 3 bags | Plain or polymeric |
Tools
A flat spade and a square-point shovel beat a rounded digging shovel for cutting clean patio edges. A flat shovel also makes scooping gravel from a pile far faster than a scoop.
- Shovel, square-point spade, and a sod cutter if you are replacing lawn
- Rake and a stiff broom
- Wheelbarrow, plus 3/4 inch conduit or PVC pipe for the screed rails and a 2×4 board to pull across them
- Plate compactor, or a jumping jack for tight spaces; a hand tamper only for very small areas
- 4 foot level and, if you want precision, a line level
- Rubber mallet for seating pavers
- Masonry saw with a diamond blade, or an angle grinder with a diamond blade for a handful of cuts
- Gardener’s hose or a mister for the polymeric sand
Rent the plate compactor and the saw for a weekend rather than buying them. A compactor is worth buying only if you already have several yard projects ahead of you.
Before you start
Call 811 before you dig, at least a few business days ahead. They mark gas, water, electric and communications lines free of charge, and hitting an unmarked line is expensive and dangerous. Sprinkler runs are not marked, so probe carefully where you know irrigation heads and valve boxes sit.
Pick a spot that drains. Stay at least 6 inches below the finished floor if the patio attaches to a house, and plan the slope before you dig rather than after.
Step-by-Step: How to Build a Paver Patio
Plan the patio layout and measure the site
Measure the finished area, not the excavated hole. Add the width of your edge restraint on all sides and decide whether a soldier course border runs around the outside, because that border changes your paver count.
Drive stakes a couple of feet past each corner, stretch string between them, and mark the whole footprint with marking paint or a shallow scratch line. A 2 by 4 laid on the ground with a hose level on top gives you the grade you want: high side near the door, dropping about 1/8 inch per foot as you move away.
Sketch the pattern on paper before you cut a single paver. Running bond and a soldier course border are the most forgiving for beginners because most pavers land whole. Basket weave is easy too if you design the border to absorb the half pavers at the corners.
How to Build a Paver Patio Base
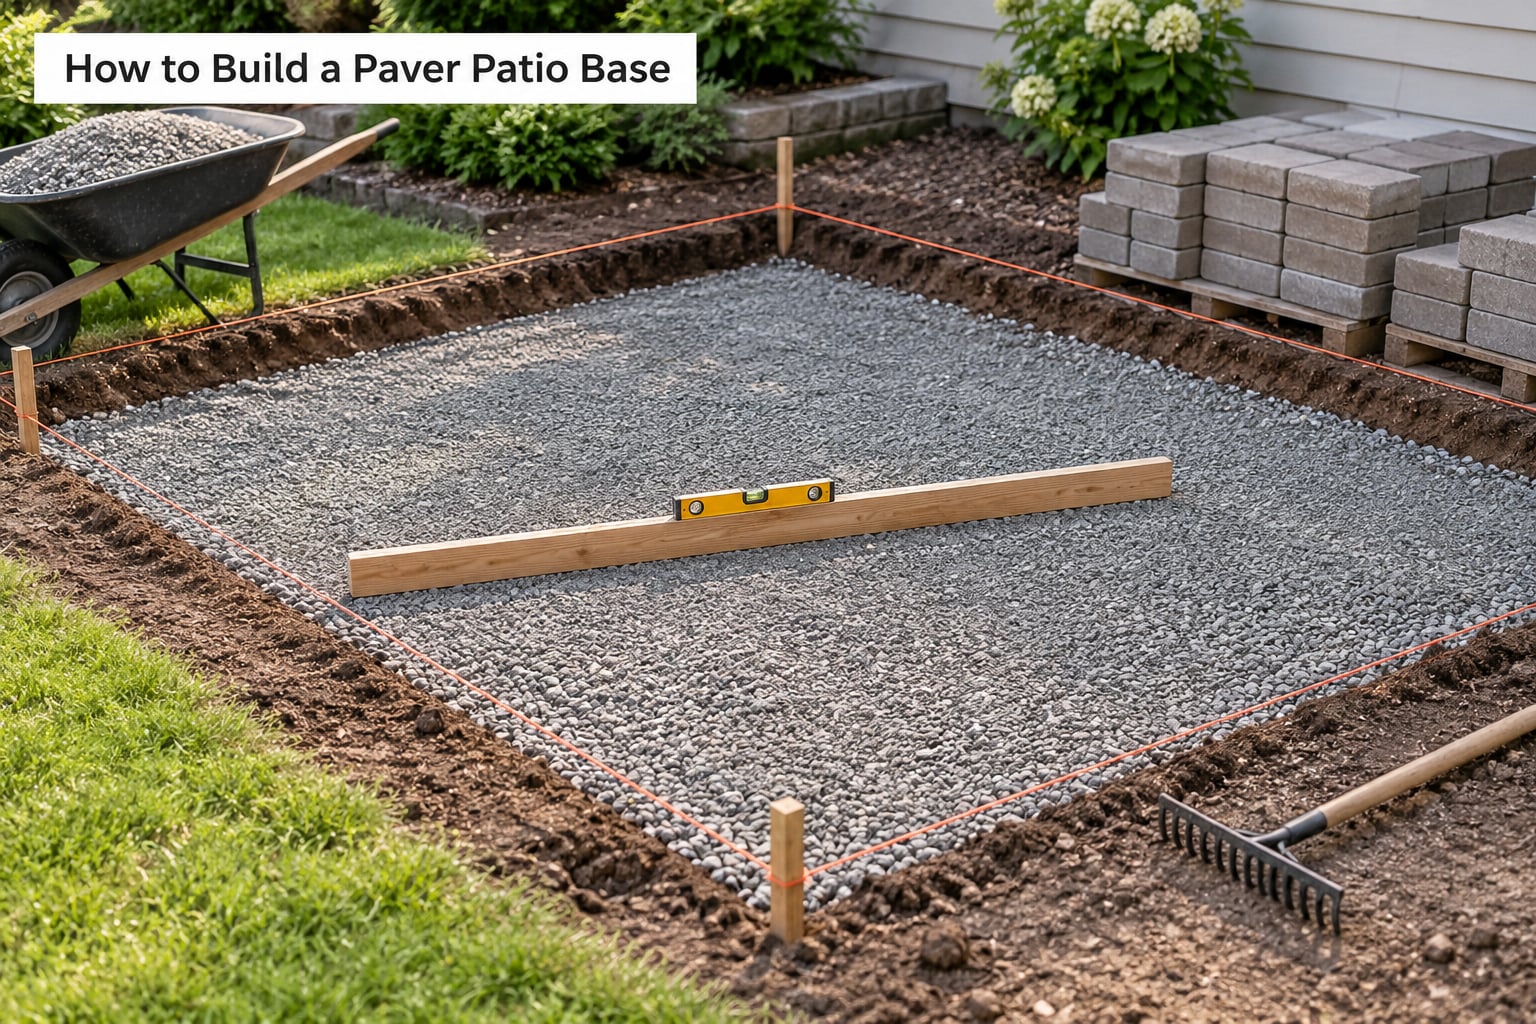
Dig to a total depth of 8 to 10 inches: the paver thickness, plus 1 inch of bedding sand, plus 4 to 6 inches of compacted base. The table below shows how those numbers stack for a typical 2-3/8 inch concrete paver.
| Layer | Depth | Purpose |
|---|---|---|
| Finished paver surface | Reference plane | Set grade here |
| Paver thickness | 2 to 2-3/8 inches | Occupies the top of the hole |
| Bedding sand | 1 inch | Level bed the pavers sit in |
| Compacted crushed base | 4 to 6 inches | Carries the load, drains water |
| Total excavation | 8 to 10 inches | What you actually dig |
Remove sod, roots and any loose soil down to firm earth. If you hit soft fill or buried concrete, take it out rather than building over it. That is where patios start sinking two years later.
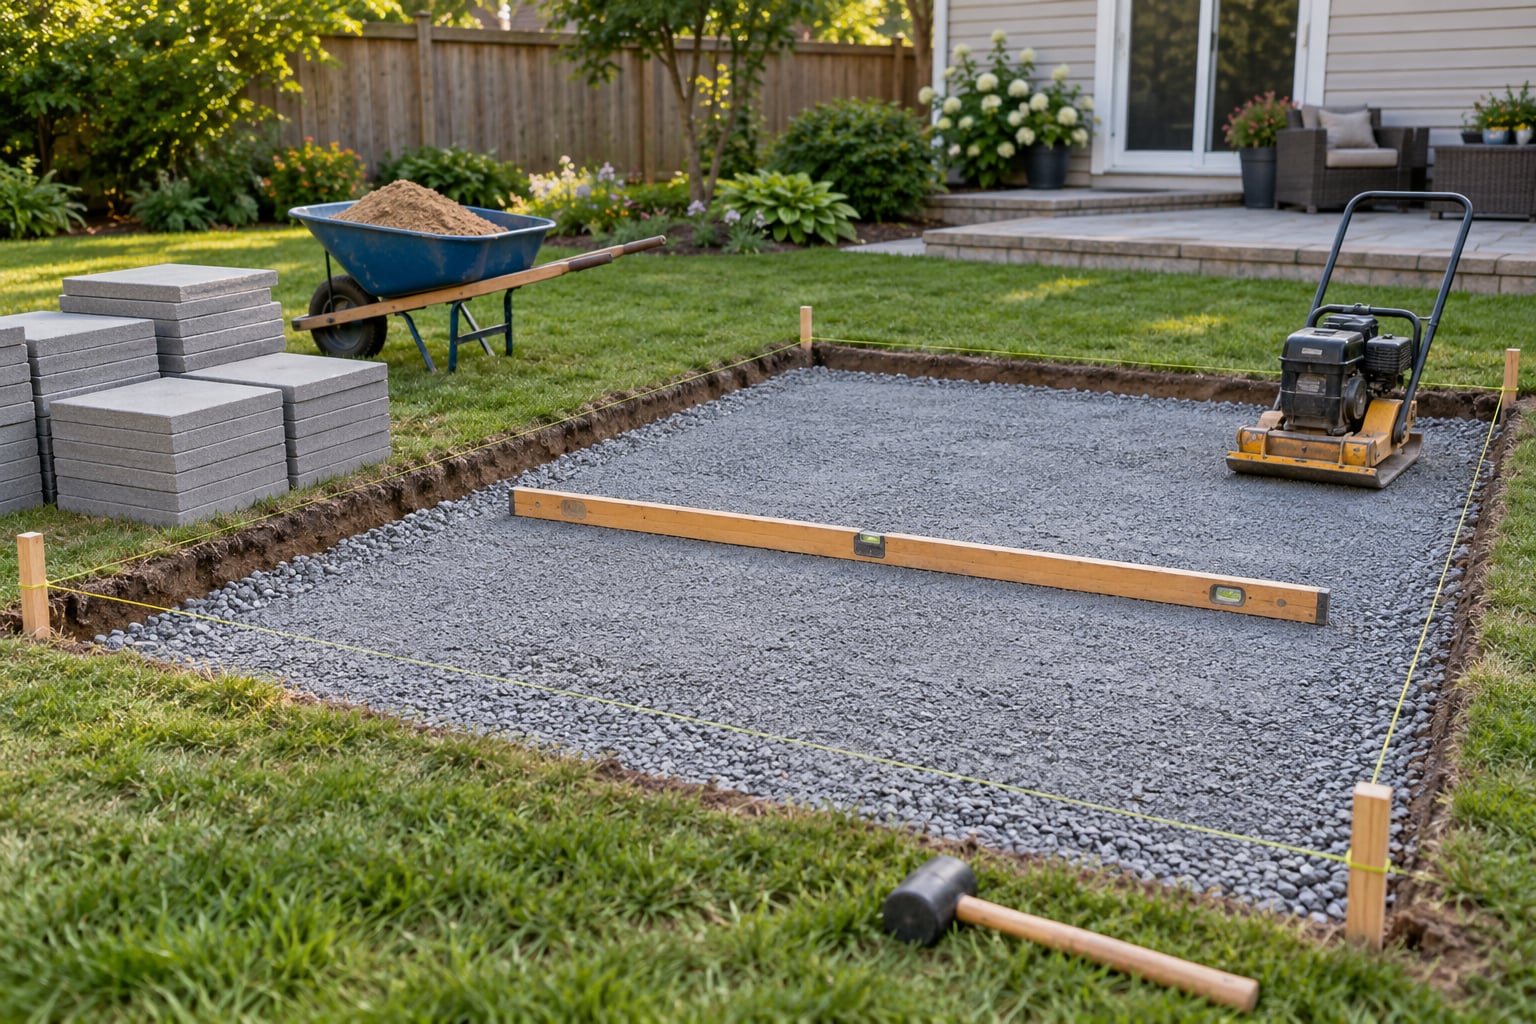
Lay weed barrier fabric on the bottom if the site grows dandelions, then add base material in 2 to 3 inch lifts. Compact each lift with the plate compactor before adding the next, and make three or four passes over the whole surface on the final lift. A single thick lift does not compact evenly, and you will feel soft spots under the pavers later.
Set the edge restraint on the base before screeding. Drive the spikes at a slight angle toward the patio and hammer them until the head sits snug against the top of the rail. Rake the crushed stone against the restraint so nothing shifts when you tamp.
Spread and level the paver bedding
Screed the sand to exactly 1 inch. Lay 3/4 inch conduit or PVC pipe on the compacted base every 6 to 8 feet, set the tops to your planned grade, then pull a straight 2×4 across them to knock the sand flat between the rails.
Re-check the grade across the whole patio, not just at the rails. Low spots show up as puddles two rains later, and this is the last moment you can fix them cheaply. On larger patios, moving the guide rails to fresh sand every 8 feet is what keeps the surface even.
Once the sand is screeded, do not walk on it. Boots sink and leave dimples you cannot sand out later, and the bedding layer is what keeps the pavers level. Work from a board laid across the finished surface, or from the edge in, and stage your pavers before you start screeding rather than hauling them across it.
Lay the pavers in the planned pattern
Start at a corner or a straight edge, whichever your pattern demands. Align the first paver precisely against the string line, because small errors accumulate across a 12 foot run.
Set each paver by hand, tap it once with the rubber mallet to seat it into the sand, and check it with a straightedge across the row. Leave a joint of 1/8 to 1/4 inch between pavers. A consistent gap lets the joint sand lock the surface; a random gap lets pavers rock and shift.
Work in sections of about 4 feet at a time, and keep the string lines taut so you can re-check your line at any point. Pull the pattern across the patio rather than building outward in a spiral, which leaves you cutting into the finished center later.
Cut edges last. Measure each gap twice, score a full-depth cut with a diamond blade on a masonry saw, then break the paver along the score. Score both sides and the back for a thick paver so it does not blow out on the underside.
Finish the joints and clean the patio
Run the final pass with the plate compactor fitted with a rubber-surfaced mat after the joints are filled, so the pavers settle together as a single surface instead of each rocking on its own sand bed.
Sweep joint sand into the gaps with a stiff broom, work it diagonally into the joints, and brush off the surface. Mist lightly and repeat two or three times until the joints stop taking sand and stay full at that depth.
For polymeric sand, keep the surface dry for at least 24 to 48 hours after filling. Rain before it cures can leave the top crust firm and the sand underneath soft and washable, and the fix is to scrub off the hardened crust, re-sweep and re-apply. Plain joint sand has no cure window, but it washes out sooner and does nothing against weeds.
Leave the patio alone for a day before you put furniture or a grill on it. Sweep up the leftover sand, check that water runs off rather than pooling, and backfill along any open edge with soil or mulch to keep grass out of the border.
Common Mistakes
Most failed patios trace back to the same handful of errors, and all of them are cheap to avoid before the pavers go down.
Digging too shallow
Stopping at 5 or 6 inches total leaves no room for base and bedding. The fix is the depth table above: measure from the finished paver surface down, not from the lawn.
Compacting one thick lift
Four to six inches dumped in at once compacts unevenly and leaves soft pockets. Add 2 to 3 inches at a time and compact each layer.
Walking on the screeded sand
One boot print becomes a low spot that collects water. Lay a board across the finished area and work from the edges inward.
Skipping the edge restraint
Without restraint, the outer pavers slide into the sand over a few seasons and the border loses its line. It is the cheapest item on the list and the one nobody should leave out.
Forgetting the slope
A dead-level patio holds water. Set the finished surface to fall 1 to 2 percent away from the house, and mark that slope on your stakes before you dig.
Over-filling the joints
Packing sand level with the paver face wears away with the first wind-blown rain and leaves the surface loose. Fill to about 1/8 inch below the top.
Frequently Asked Questions
How deep should I dig for a paver patio?
Dig 8 to 10 inches total from where the finished paver surface will sit: 4 to 6 inches of compacted crushed base, 1 inch of screeded bedding sand, and the thickness of the paver itself. Measure from the finished grade down, not from the lawn, and drop the high edge 1/8 inch per foot as you move away from the house.
Do I need a permit to build a paver patio?
Most local jurisdictions treat a paver patio as a flat, non-structural surface and do not require a permit, especially when it is not attached to the house or below grade limits. Rules change, and a municipality may want one for anything over a certain size or for anything touching a foundation. Check your city or county building department before you dig.
Can you lay pavers directly on dirt?
You can get away with it for a short walkway on firm, dry soil, but it will settle unevenly and weeds come up through the joints. For anything you plan to sit on, build the 4 to 6 inch compacted crushed base under the bedding sand. Without the base, the pavers follow every dip in the soil and low spots turn into puddles.
How do I keep weeds from coming through the joints?
Weed barrier fabric at the bottom of the excavation blocks growth from below but nothing stops seeds that land on the surface. Sweep the joints full with polymeric sand and mist it so it hardens, then keep an inch of soil or mulch along the border where grass creeps in. Plain joint sand does nothing against weeds and needs topping up each spring.
How do I cut pavers so the edges look straight?
Measure the gap twice, mark a full-depth line on all four sides, and score the face with a diamond blade before cutting through. On a thick paver, score the back as well or the cut blows out underneath. A masonry saw gives the cleanest result; for a handful of cuts an angle grinder with a diamond blade is faster to rent less often.
How long does a paver patio take, and when should I hire someone?
A 100 to 200 square foot patio takes a capable beginner two to three days including drying time, and longer if the ground needs clearing or many pavers get cut. Hire a hardscape contractor if the patio attaches to the house at grade, the site has heavy clay soil, or you are dealing with a slope, steps or a large area.
Conclusion
The pavers are the part everyone pictures and the least of what matters. Before you buy a single one, settle the grade so water runs away from the house, mark a footprint that leaves room for the border, and call 811. Then dig the full 8 to 10 inches, compact the base in thin lifts, and check the screeded sand for level before you set a paver on it.
Get those three things right and the rest is laying, cutting and sweeping. Get them wrong and no amount of careful tiling saves the patio from settling, puddling and spreading.