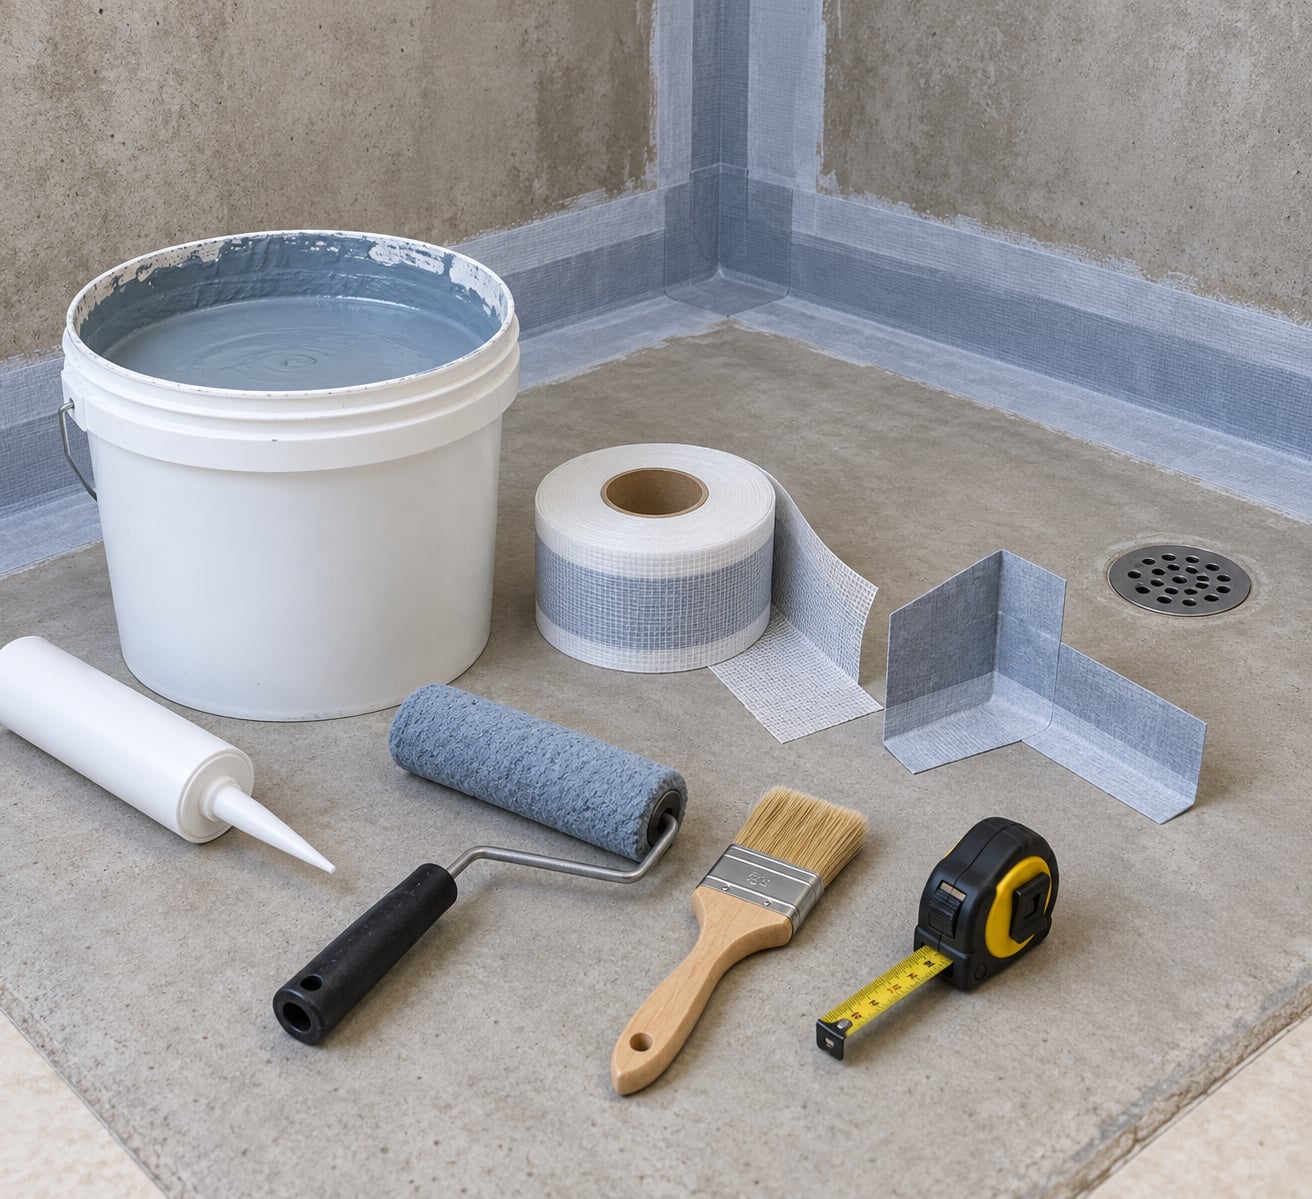
To waterproof a shower before tiling, you clean and fully dry the substrate, reinforce every inside corner, seam and pipe penetration with banded membrane, then apply two full coats of liquid membrane or a bonded sheet system at the specified wet film thickness. Tile and grout are not waterproof on their own, and the layer you build now is the only thing between your framing and years of water.
The whole job takes most of a weekend for a standard alcove shower, plus cure time you cannot skip. Most of the labor is in the corners, the penetrations and the drying. Skip those three and you have a shower that looks finished and leaks behind the tile within a few seasons.
Building codes treat it the same way. IRC R307.2 and UPC 408.5 require a shower to be lined with a continuous waterproof layer, and the standard that membrane is tested against is ANSI A118.10. Manufacturer data sheets override everything written on the internet, including this guide, so read the sheet for the system you buy before you open the pail.
Here is the process, in the order it needs to happen.
Table of Contents
- What You Need
- Pick the system before you pick the product
- Cure times before you tile
- Materials and tools
- Step-by-Step: How to Waterproof a Shower Before Tiling
- Inspect and Repair the Shower Base
- Clean and Dry the Surface
- Treat Corners, Changes of Plane, and Seams
- Apply the First Waterproofing Layer
- Apply the Second Layer and Allow It to Cure
- Test and Document the Waterproofing
- Common Mistakes
- When it has to be ripped out
- Special cases worth knowing
- Frequently Asked Questions
- Do I need to waterproof a shower before tiling?
- How long should I wait before installing shower tile?
- Can I tile directly over a waterproof membrane?
- Do I need to waterproof cement board before tiling?
- How do I test a shower for leaks before installing tile?
- Is Hydro Ban better than RedGard?
- Conclusion
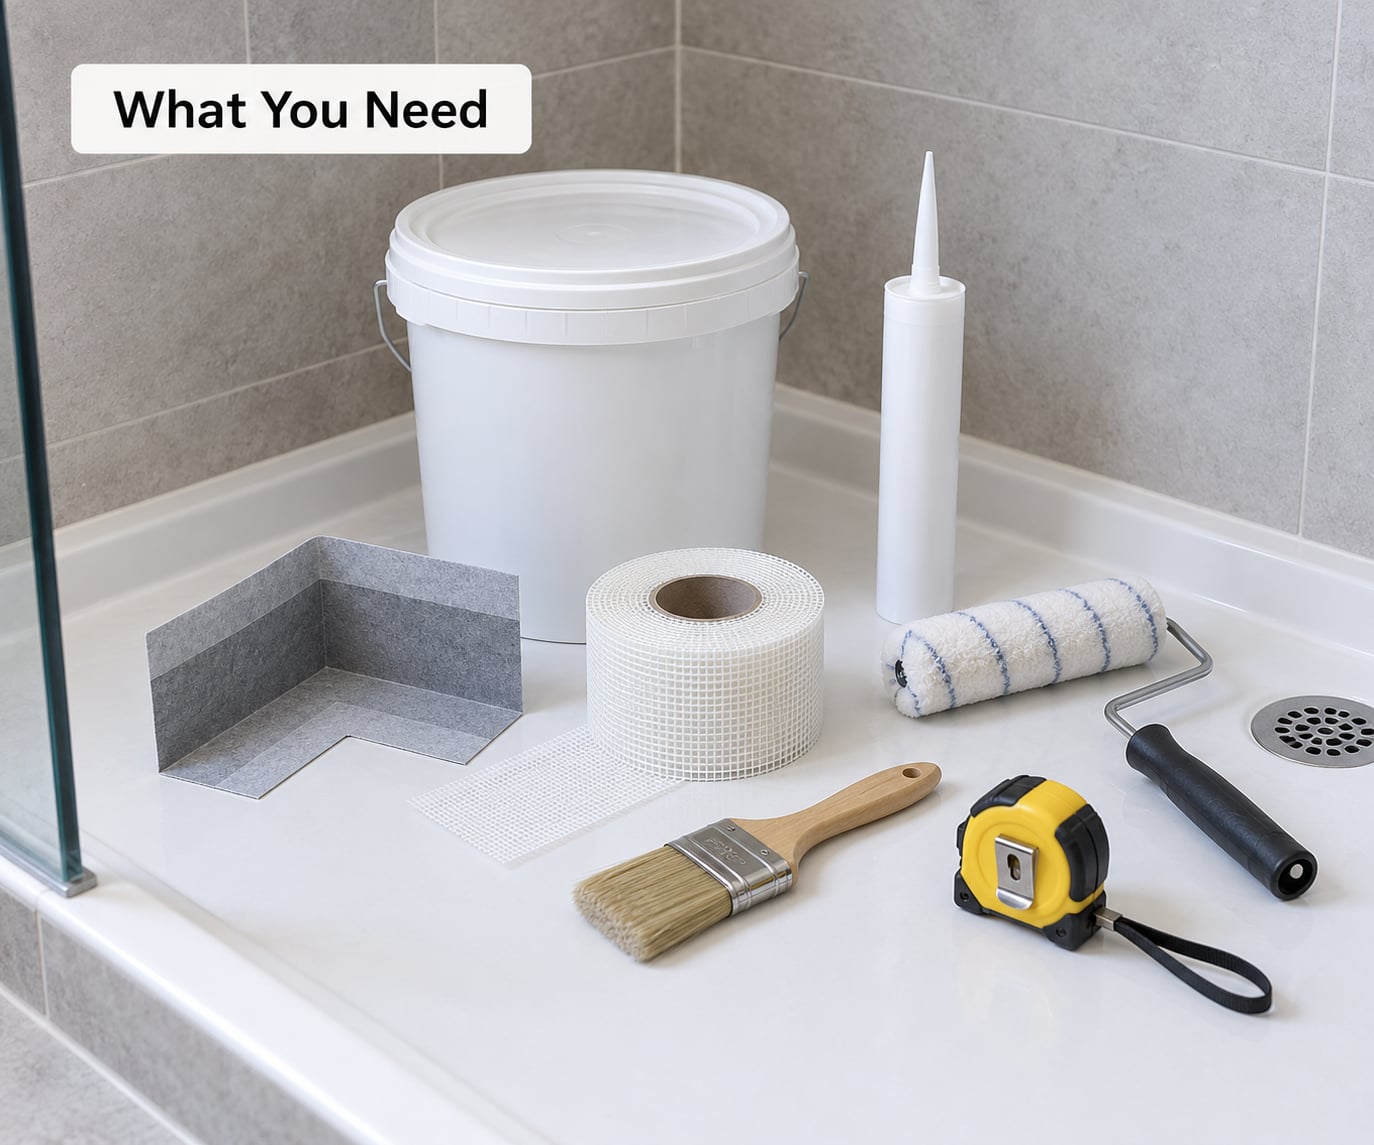
What You Need
Pick the system before you pick the product
There is no single best membrane. The right one depends on your geometry, your substrate and how much patience you have for cure time.
| System | Examples | Thickness | Ready for flood test | Skill level | Best geometry |
|---|---|---|---|---|---|
| Liquid-applied membrane over cement board | RedGard, Hydro Ban, Mapelastic AquaDefense, BAL Waterproof 1C | Two coats, often 12 mil wet film per coat | Usually 24 hours at 70F and 50 percent relative humidity | Moderate; wet film thickness matters | Curves, odd corners, many penetrations |
| Sheet membrane bonded to foam board | Schluter Kerdi | Factory thickness, about 8 mil | Often same day once bonded | Lower; seams are the risk | Straight walls, standard niches |
| Foam board with integrated membrane | Wedi, GoBoard | Factory thickness | Usually same day | Lower; one product does both jobs | Standard showers, curbless pans |
| Cement board plus liquid coating | USG Durock, James Hardie HardieBacker, plus any coating above | Depends on coating | Follow the coating data sheet | Highest; two separate systems to get right | When you want standard board handling |
Cement board is water-resistant, not waterproof. It stays dimensionally stable when wet, which is exactly why tilers like it, but water passes through it. Every shower built on cement board needs a membrane over the top, every time.
Cure times before you tile
| System | Dry before flood test | Tile after | Cool or humid room |
|---|---|---|---|
| RedGard, two 12 mil coats | 24 hours | After a passed flood test | Add roughly half again the time |
| Hydro Ban, two coats | Per data sheet, commonly 24 hours | After a passed flood test | Add roughly half again the time |
| Kerdi sheet | As soon as the adhesive has set | Same day or next | Bond takes longer |
| Wedi or GoBoard | Immediately | Same day | Adhesive cure still applies |
| AquaDefense or BAL | Per data sheet | After a passed flood test | Add roughly half again the time |
Surface-dry is not cured. A membrane that feels dry to the touch can still hold solvent or water underneath, and you trap it when tile goes down. Airflow helps a lot. Tilers on ContractorTalk report getting a full RedGard coat sequence done in a day with a fan running, which is realistic for liquids in a ventilated room, but it is not the same as a cool, humid bathroom with no window.
Materials and tools
- Waterproofing membrane, liquid or sheet, plus the primer that system requires
- Corner reinforcement bands or pre-formed corners for inside and outside corners
- Alkali-resistant mesh tape for board seams and screw heads
- Penetration collars or sealing washers for the mixing valve, shower arm and any other pipe
- Thin-set mortar approved for the substrate, plus fasteners with corrosion-resistant coatings
- Backer board, blocking and fasteners sized so the board edges land on solid framing
- Silicone sealant for the final joint, which is maintenance, not waterproofing
- Roller or brush sized for the wet film target, a wet film gauge, a mixing paddle, a notched trowel
- Safety gear: eye protection, nitrile gloves, and a respirator if your product’s data sheet calls for one
- A camera or phone, plus a marker for the flood test waterline
One thing people forget: a wet film gauge. It is a cheap plastic comb that tells you the thickness of the coat you just laid, before it soaks in. Skipping it is how a two-coat job ends up as a thin coat in the corners and a thick one in the middle.
Step-by-Step: How to Waterproof a Shower Before Tiling
Inspect and Repair the Shower Base
Start by finding out whether the shower underneath can hold a membrane at all. Look for cracks, soft spots in mortar or concrete, hollow-sounding areas, and any flex when you press on the floor. A base that moves after tiling will crack grout no matter how good the membrane is.
Check the slope while you are there. Water should run to the drain, not sit in a corner. The common target is at least 1/4 inch of fall per foot, and a shower floor with no fall will pond regardless of waterproofing.
Then run the plumbing. Fill the pan and let it drain, then check the drain joint and the supply lines from below before anything gets covered. A leak you find now costs an afternoon. The same leak found after tile costs a rebuild.
Replace rather than repair a base that is cracked through, soft, or out of level. Coating over a compromised base hides the problem until the tile moves.
Clean and Dry the Surface
Membrane does not bond to dust, soap film, oil, loose mortar or damp board. Vacuum and wipe the substrate, then let it dry completely.
This is where impatience quietly costs you. If you seal moisture inside the board, the coat above it delaminates later, usually as a blister or a fish mouth you find after tile is set. On a cool day with a closed bathroom, give the board more time than you think it needs.
Once the surface is dry, mark the control joints and any cracks. Your membrane system may require a specific sealant or reinforcing tape at those lines rather than membrane alone.
Treat Corners, Changes of Plane, and Seams
Corners are where showers fail. Tile and grout cannot flex, and an inside corner is a change of plane that moves as the framing moves. Caulk is not waterproofing, and a bead of silicone in a corner without membrane behind it will let water straight through to the board.
Band the inside corners with corner reinforcement or mesh embedded in membrane. Press the band into wet membrane, work it flat with a tool or brush, and let the membrane soak through rather than sitting on top of it. Outside corners, the wall-to-floor transition, and the curb get the same treatment.
The details worth getting right:
| Detail | Reinforcing material | How it is embedded |
|---|---|---|
| Inside corner | Corner band or mesh tape | Bed into membrane, both walls, top to bottom |
| Outside corner | Corner band or mesh tape | Bed into membrane, wrap the edge, float flat |
| Wall-to-floor transition | Fleece or mesh plus membrane | Continuous into the pan, no break at the joint |
| Mixing valve and riser | Sealing washer or collar | Bed into membrane, seal to the pipe, never leave raw board exposed |
| Shower arm | Collar or sealing washer | Bed into membrane before the escutcheon goes on |
| Niche and bench | Band and membrane per system | All edges, seams and corners treated as changes of plane |
| Board seams | Alkali-resistant mesh tape | Bed into thinset or joint sealant, screw heads covered |
| Drain | System drain assembly | Membrane laps into the drain body, weep paths kept clear |
If you are working over an existing pan, the membrane must continue onto the pan liner and up the wall above the flange, commonly at least 3 inches, or the width of the flange plus its upturn, depending on the system. That tie-in is the single most-asked detail on plumbing and tiling forums, and it is the one nobody shows a photo of. Lap the wall membrane into the pan, keep it continuous, and do not stop at the tile edge.
Apply the First Waterproofing Layer
Mix the membrane exactly as the data sheet says, stir thoroughly, and apply it in one consistent direction across the whole shower. Corners and bands go on first, then the field.
Wet film thickness is the number that decides whether this works, so check it with the gauge while the coat is still wet. If the target is 12 mil, a coat that measures half that has to be redone while it is still workable. Overlap passes instead of stopping to reload, and lay the roller or brush strokes so no thin lane is left between them.
Watch the drain and the penetrations. Those are the spots people rush, and they are the spots that drip. Membrane should flow into every corner of the drain body and around each collar.
Apply the Second Layer and Allow It to Cure
The second coat goes on perpendicular to the first, in the opposite direction of travel. Crossing the coats is what closes pinholes and fills the small valleys left by the first pass.
Watch the recoat window. Most systems give you a limited time to put the second coat down while the first is still tacky or lightly damp. Go past that window without recoating and you may have to wait, sand or remove the first coat and start over.
Then wait the stated cure period at the stated temperature and humidity. Keep the room ventilated, keep other trades out, and do not lay tile or backer over it early. Before tile covers the membrane, mark the wall in pencil next to a covered section so whoever tiles next knows the surface underneath is waterproofing, not a cure-in-progress.
Test and Document the Waterproofing
Once cured, inspect before you test. Look along every inside corner, around every penetration, at the wall-to-floor joint and around the drain, looking for pinholes, thin spots, voids or lifting edges.
Repair any defect by abrading, cleaning, applying fresh membrane and letting it cure fully. This is far cheaper than finding it later. Skim coat over the whole area if the system allows it rather than patching a tiny spot in a way that leaves a visible ring.
Then flood test, if the system and your local inspection requirements call for it. Plug the drain or set the test block, mark the waterline on the wall with a pencil, and flood to a depth the manufacturer specifies. Hold it for the stated window, commonly 24 to 72 hours, and longer for steam shower installations.
Watch the waterline, not the floor. A drop greater than about 1/8 inch over the test period means fail, and so does any water showing on the framing side. Longer for steam rooms, where the assembly runs hotter and wetter than a normal shower.
Photograph everything before it disappears: each corner, each penetration, the flood test with your pencil line and a timestamped photo of it, and the product pail label so you can record the batch. Tile should cover confirmed waterproofing, not conceal uncertainty. If a leak shows up years later, those photos and the inspector’s sign-off are what you argue from, and plenty of insurers ask for exactly that.
Common Mistakes
These are the failures that come back repeatedly, and each one has a fix that is cheap if you catch it before tile.
Skipping the membrane because the board is cement. Cement board is water-resistant and permeable. It will not stop water, it only stays stiff when wet. This is the most repeated myth on tiling forums, and it is why so many people end up with a wet wall cavity and no idea why.
Caulking corners instead of banding them. Silicone is a joint sealant for maintenance, not a waterproof layer. It stops surface water for a few years, then it fails, and when it fails there was nothing behind it.
Leaving board seams unmeshed. Seams and inside corners without tape and sealant are the classic path. When a contractor skips that first pass of tape, the homeowner has to decide mid-job whether to buy corner reinforcement, and that is exactly the moment a shower gets compromised.
Driving screws too deep. An overdriven screw head punches through the membrane and behaves as a pinhole later. Set the fastener depth so heads sit flush in the board without breaking the surface.
Thin-set squeeze-out at a sheet seam. Too much mortar under a sheet seam squeezes out and lifts the edge as it cures, opening a gap. Comb the mortar properly and keep the seam seated flat.
Blocking the weep holes. The drain’s weep paths let trapped water escape from the pan. Seal them with grout or thinset and water has nowhere to go, which pushes it into the walls.
Tiling the next morning. Tiling before the cure period traps moisture. This one bites hardest in a cool, humid bathroom, where the stated cure time quietly doubles.
No slope, or no tie-in to an existing pan. Water that sits finds the lowest exit, which is often not the drain. And a wall membrane that stops at the tile edge instead of lapping onto the pan liner leaves the most common leak path in the whole assembly unprotected.
Assuming grout sealer waterproofs the shower. Sealer repels stains. It does not stop water, which is why we waterproof before tiling rather than after. Plenty of modern grouts need no sealer at all; read the bag.
Adding a plastic vapor barrier with no plan. Poly sheeting behind the board is a separate layer from the surface membrane and it changes with the system you chose. Sheet and foam-board systems often include or imply their own vapor control, and an extra trapped layer can hold moisture against the assembly. Follow the system documentation rather than adding layers by habit.
When it has to be ripped out
If waterproofing is already compromised and tile is up on the shower floor, the honest answer from tilers is not a repair. You tear it out and build the shower correctly. Loose tile over compromised waterproofing will keep moving, and no amount of regrouting fixes water that is already through the assembly.
Waterproofing over existing tile is possible in limited cases, such as a splash zone where you will not disturb the pan, and it is a judgment call best made by someone who can see the substrate. Ask before you accept it.
Special cases worth knowing
A curbless shower needs a properly sloped floor that still meets accessibility loading, and the assembly at the opening has to be handled as carefully as the walls. A steam shower needs a membrane system rated for higher heat and humidity, plus whatever vapor control the system specifies, and its flood test runs longer. A tub surround is a wet area too, and the same rules apply to the wall behind the tile.
Frequently Asked Questions
Do I need to waterproof a shower before tiling?
Yes. Tile and grout are porous and develop hairline cracks over time, so water passes through them regardless of how good the grout is. Codes require it: IRC R307.2 and UPC 408.5 call for a continuous waterproof layer in a shower, tested against ANSI A118.10. Cement backer board is water-resistant, not waterproof, so it never replaces a membrane.
How long should I wait before installing shower tile?
Wait for the number on the waterproofing data sheet and the tile-set manufacturer, not just until the surface feels dry to the touch. Two 12 mil wet coats of a common liquid membrane typically need 24 hours at 70F and 50 percent relative humidity. In a cool or humid bathroom, add roughly half again that time before you flood test, then tile after the test passes.
Can I tile directly over a waterproof membrane?
Yes, once the membrane has fully cured and passed a flood test. Match the mortar to the system: sheet membranes generally want unmodified thin-set meeting ANSI A118.1, while most liquid membranes work with a modified mortar meeting ANSI A118.4 or A118.15. If the membrane gets scuffed or contaminated during handling, follow the data sheet for cleaning, scuff-coating or recoating before tile goes down.
Do I need to waterproof cement board before tiling?
Always, in a shower. Cement board is dimensionally stable when wet, which is why it is a good substrate, but it is permeable and water passes through it. The board gets a continuous membrane over every face, plus banded corners, seams and pipe penetrations, and that membrane extends onto the shower pan so the wall and floor assembly act as one continuous barrier.
How do I test a shower for leaks before installing tile?
After full cure, inspect every corner, seam, penetration and the drain for pinholes or thin areas, and repair those first. Then flood the pan to the depth the manufacturer specifies, mark the waterline with a pencil, and hold it for the stated window, commonly 24 to 72 hours. A drop greater than about 1/8 inch, or any water on the framing side, is a fail and must be fixed before tile.
Is Hydro Ban better than RedGard?
Both are reputable liquid membranes and either will do the job if applied to its stated wet film thickness. Compare them on the data sheet: required reinforcement over gaps wider than 1/8 inch, substrate compatibility, cure time at your actual room temperature, and whether the product is self-priming. The right choice is usually the one whose system accessories, corners and collars you can get and follow completely.
Conclusion
Start by inspecting and drying the shower base. A cracked pan, a soft spot or a floor that does not slope to the drain will defeat any membrane you put over it, and finding that takes an afternoon instead of a rebuild.
From there, pick one system and follow its data sheet end to end: prepare the substrate, band the corners, seams and penetrations, lay two coats at the stated wet film thickness, let it cure in a ventilated room, flood test, photograph the result. Then tile.
The membrane is not the expensive part of a shower. The demolition behind the drywall is. Ten careful hours now is the cheapest insurance in the room.