To remove wallpaper without damaging drywall, soak the adhesive with warm soapy water, wait 15 to 20 minutes, then push the paper off with a plastic scraper held flat against the wall. If the paper resists, wet it again and wait longer rather than pulling harder. Most damage happens because people rush the soak.
I have stripped paper off enough walls to know that some scuffing is basically unavoidable, especially in houses where the wallpaper went straight onto unpainted drywall. That is common in homes from the 1970s through the 1990s, where the paper face of the gypsum board had nothing between it and the paste.
What separates a clean job from a three-day repair is technique, not luck. This guide walks through the tools, the six-step process, and the repair path for the spots that tear anyway. Budget a full day for a 12 by 12 room, and more if you are working overhead or dealing with paint on top of the paper.
Table of Contents
- What You Need
- How to Remove Wallpaper Without Damaging Drywall: Step-by-Step
- 1. Prepare the room and test the wallpaper
- 2. Score the wallpaper without cutting the drywall
- 3. Wet the adhesive and let it loosen
- 4. Peel the paper away gradually
- 5. Remove stubborn backing and residue carefully
- 6. Clean, repair, prime, and repaint or reinstall
- Common Mistakes
- Frequently Asked Questions
- Is removing wallpaper difficult for a beginner?
- Is it safe to use a heat gun to remove wallpaper?
- What should I do if the drywall paper tears?
- How do I remove wallpaper adhesive left on the wall?
- How long should the wall dry before painting or reinstalling wallpaper?
- A Safer Wallpaper Removal Plan
What You Need
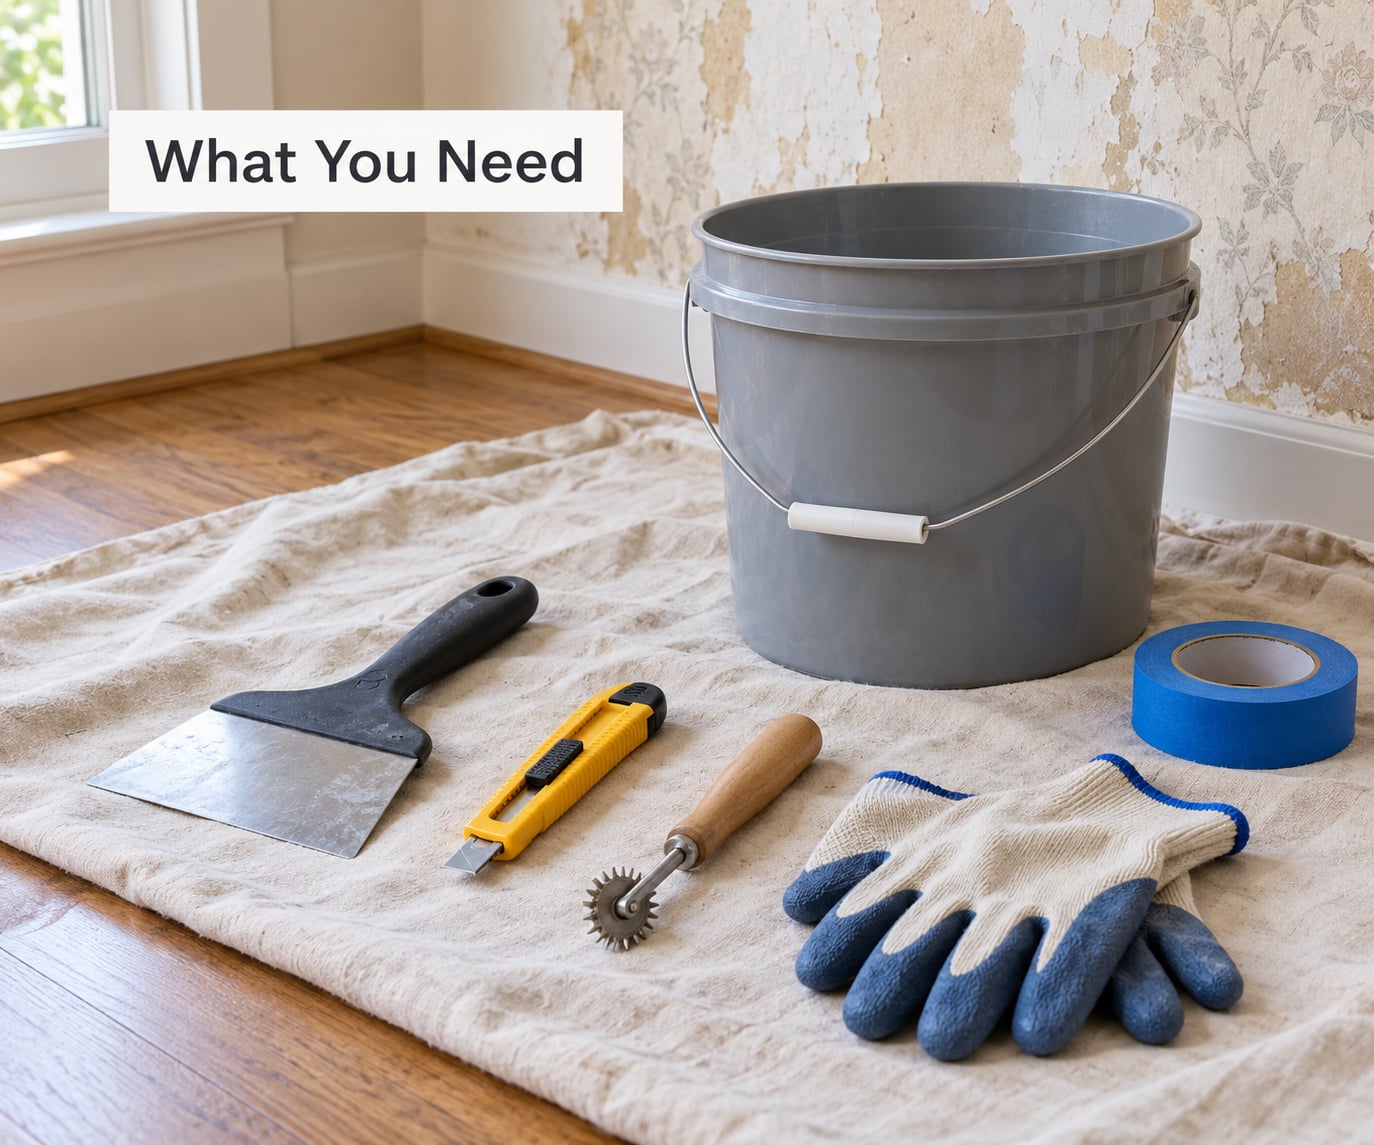
Gather everything before you turn on the water. Half-finished jobs are where floors get ruined.
- Plastic wallpaper scraper or putty knife. Plastic, not steel. A metal blade will find every soft spot in the paper face.
- Wallpaper scoring tool or a utility knife with fresh blades.
- Bucket for mixing solution and rinsing the scraper.
- Spray bottle plus a sponge for applying and re-wetting.
- Painter’s tape for covering outlets and light switches.
- Drop cloth or heavy towels to protect the floor and baseboards.
- Gloves and eye protection. Wet paste strips off in sheets that land wherever they land.
- Pigment-based stain-blocking primer and joint compound for repairs.
- 100, 120, and 220 grit sandpaper for the finish work.
Skip the metal razor blades. Score the surface, and if a blade must be used, hold it at a shallow angle and drag it rather than sawing with it.
Tape over every outlet, switch, and any surface-mounted fixture before you start. Water runs downhill on a wall just as surely as it does anywhere else, and a wet outlet is a short.
How to Remove Wallpaper Without Damaging Drywall: Step-by-Step
1. Prepare the room and test the wallpaper
Move furniture out, push the baseboards loose if they are loose, and lay the drop cloth across the floor with a couple of inches of overlap on the baseboard. Run tape along the top edge so paste drips land on the cloth.
Then find a hidden spot, behind a piece of furniture or in a closet corner, and test it. Peel the top layer by hand. Vinyl and peelable paper usually strip off cleanly and leave the backing stuck to the wall, which is a good sign because it means the top layer was not bonded to the drywall.
Regular paper wallpaper feels soft and fibrous, and vinyl feels like a thin plastic sheet with a corner you can lift. Genuinely vinyl-coated wallpaper peels as a single layer and needs almost no soaking. Everything else needs moisture and time.
If your home was built before 1978, treat the paper as a lead-containing material. Wear a dust mask, keep the area ventilated, and wet everything before you pull it down. Bag the debris and wash down the room.
2. Score the wallpaper without cutting the drywall
Run the scoring tool in overlapping passes so the surface is covered in shallow perforations. The goal is to let water in and break the bond, not to slice the wall.
Keep the tool light. A wallpaper scoring wheel is a plastic toothed wheel that perforates without cutting. If you use a utility knife instead, hold the blade almost flat and drag it, and only cut seams and edges where you know what is underneath.
You will know you went too deep if you see white gypsum, a fuzzy brown fiber surface, or a gouge that catches a fingernail. Stop, move on to a different area, and adjust your pressure.
3. Wet the adhesive and let it loosen
Mix warm water with a couple of tablespoons of dish soap per gallon. The soap is a surfactant, which is what actually lets the water wet the paste instead of beading off it. A 50/50 mix of warm water and white vinegar also works and can be a little stronger on old paste, though it smells more.
Apply it evenly with a sponge or spray bottle. Do not be stingy with it. Saturate the paper without dripping down the wall.
Wait 15 to 20 minutes. Longer is fine, and longer is better than scrubbing. Forum DIYers consistently report that the people who rushed the soak are the ones who ended up with torn drywall paper.
The signal that it has worked: the surface goes darker and dull as it soaks, the seams lift slightly, and the paper has a soft, spongy feel when you press it gently. No softening means give it more water and more time, or switch approaches.
4. Peel the paper away gradually
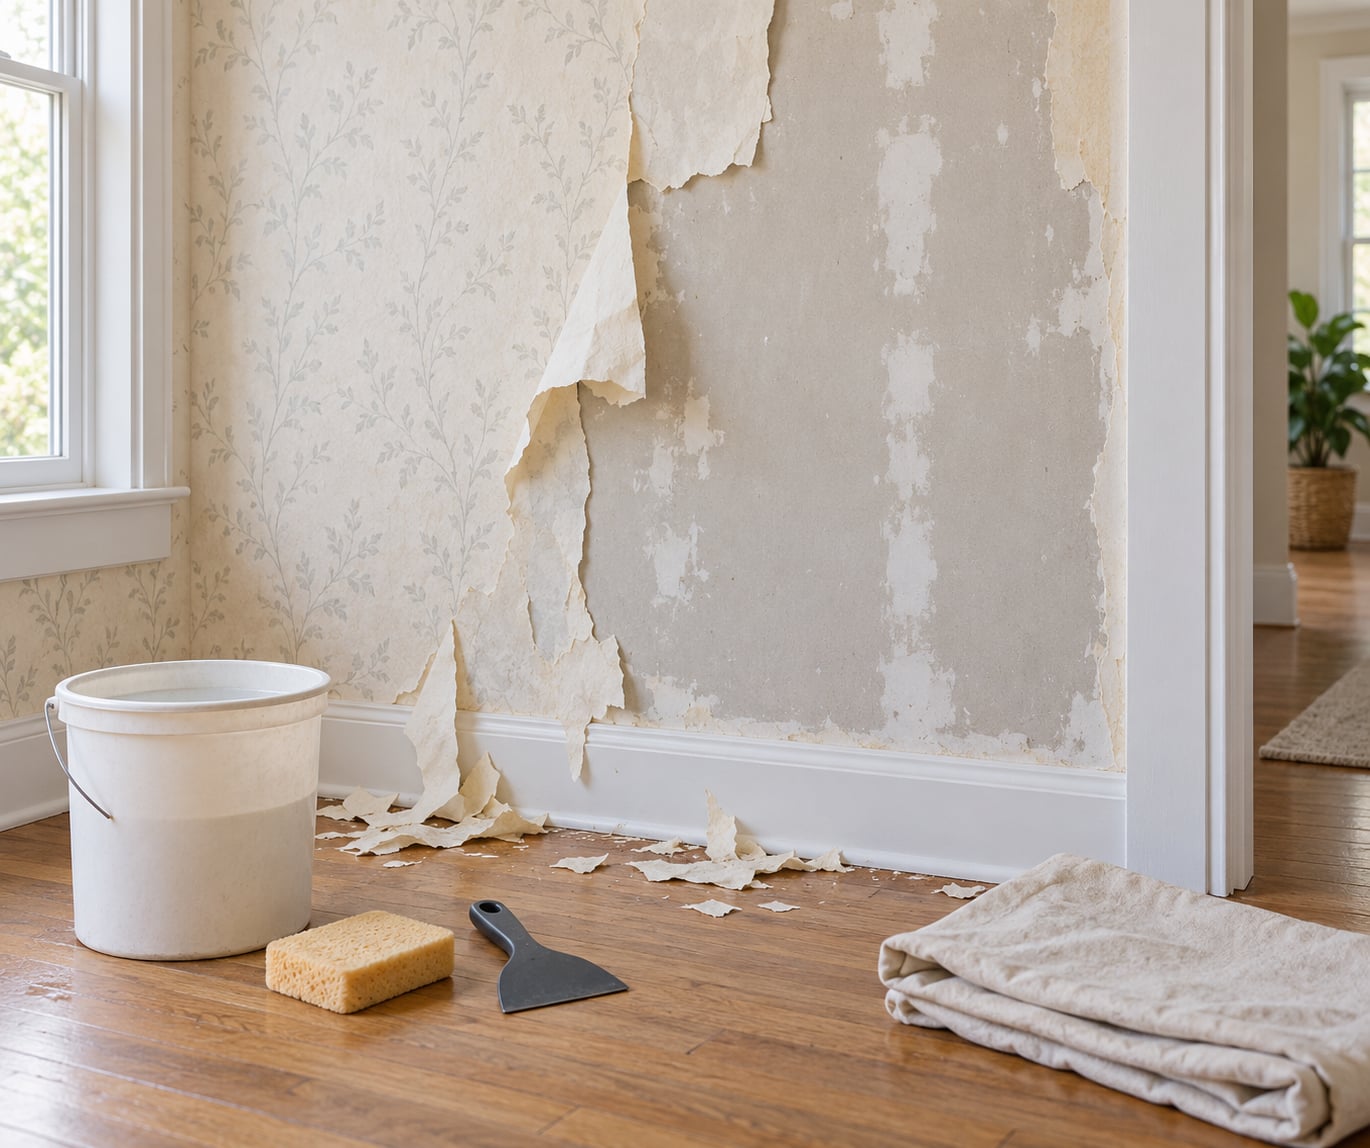
Start at a loose seam or at the edge you scored. Press the plastic scraper flat against the wall, slide it under the softened edge, and push forward with light pressure so the paper comes away in sheets.
Pull with a shallow angle, almost parallel to the wall, never straight out. Pulling at 90 degrees puts all the force on one spot and takes the paper face with it.
Work in sections roughly the size of a door. Small sections stay wet and soften while you are busy with the next one.
If the paper tears or you feel the blade skipping on something harder, stop. Rewet the area, wait another few minutes, score a fresh line, and try again from a different starting edge. Removing wallpaper without damaging drywall depends entirely on never forcing a section.
5. Remove stubborn backing and residue carefully
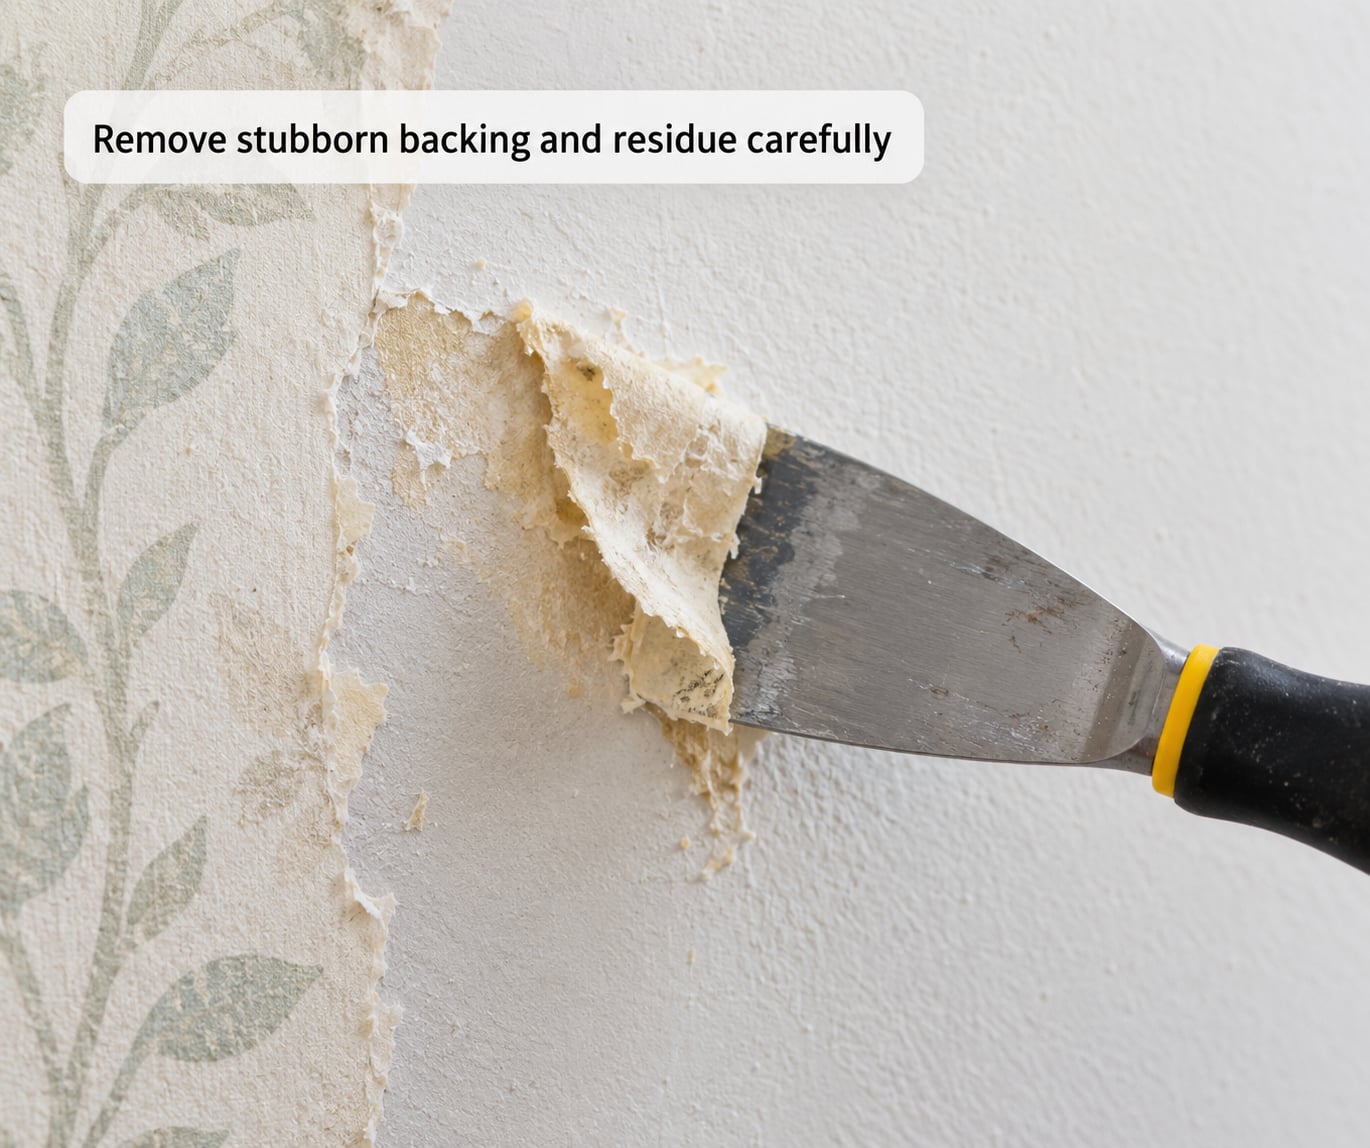
Brown paper backing often stays when the top layer peels away. That is normal, not a failure. Work through this part in order.
Soak the backing directly until it is thoroughly wet and soft. Slide the scraper under it and push, keeping the blade flat. Rinse the scraper often so it is not dragging paste across the wall.
For a really stubborn piece, re-wet it, wait, and cover it with a wet towel for 15 minutes or so. Direct contact holds moisture against the paper far longer than a spray does.
Wash what remains with a sponge and warm soapy water. Do not scrub hard, and do not let a wet sponge sit in one place. A residue that feels slick is usually adhesive that will bubble paint later, so rinse until the sponge comes away clean.
At this stage, stop scraping. Drywall paper face that has lifted needs sealing, not more blade work. More scraping turns a repairable tear into a gouge through the paper face and into the gypsum.
Peel back loose backing to a solid edge rather than leaving a ragged lip. Trim loose fibres with scissors so nothing lifts further while you work.
6. Clean, repair, prime, and repaint or reinstall
Let the wall dry completely before you touch it. Give it at least 24 hours, longer if the room is cold or poorly ventilated. Sanding damp compound tears it, and paint applied over damp paste blisters later.
Sand the dried residue lightly with 100 grit to knock down lumps, then 120 grit to smooth it. Follow with 220 grit for the finish before painting.
Where the paper face tore, press loose paper back down flat, then seal exposed brown paper with a pigment-based stain-blocking primer. Give it 3 to 4 hours to dry.
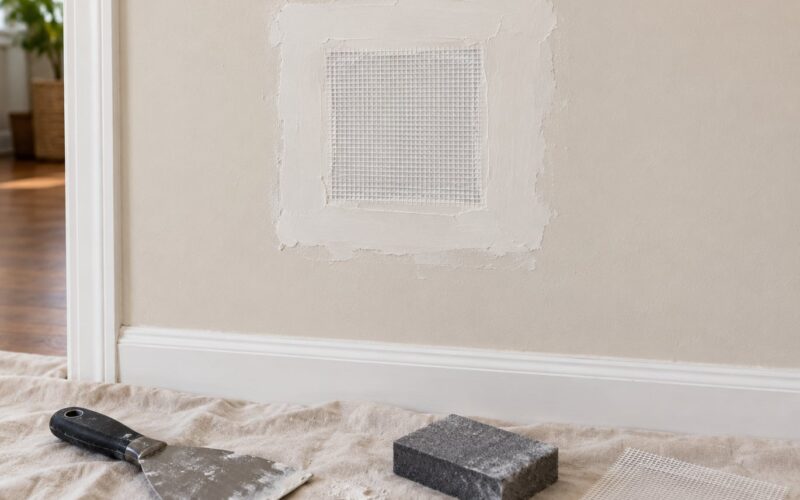
Skim gouges with setting-type compound, which hardens quickly and does not shrink much while curing. After that, skim the damaged areas with all-purpose joint compound using a 12 inch knife, holding it at about 30 degrees and pulling a thin, even coat. Let it dry, sand with 220 grit, wipe with a damp cloth, and prime.
One honest note: if the whole wall feels lumpy after you clean it, a full skim coat across that wall will finish smoother and faster than chasing dozens of small patches. Choose by the wall, not by the tool.
Now angle a light close across the wall. Low raking light reveals hollow spots and ridges that your eyes miss in flat room lighting. Mark them with a pencil, sand them out, and skim anything still bad.
Prime the whole wall, not just the repairs. Bare gypsum and patched compound absorb paint differently, and a full coat of primer is what keeps the patches from flashing for years.
Common Mistakes
Cutting too deep. A scoring tool held down hard perforates the paper face instead of the wallpaper. Light passes, and you change direction whenever the blade changes feel.
Using a sharp knife like a saw. Pushing a blade away from you across drywall carves a channel you will fill for hours. If the wallpaper resists, that is a moisture problem, not a blade problem.
Soaking the wall. Waterlogged gypsum softens, delaminates, and dents under the scraper. Apply evenly, let it drink in, and keep an eye on drips rather than puddling them.
Pulling at a steep angle. The paper tears in a long strip at a 45 or 90 degree pull. Stay almost parallel to the wall and let the softened adhesive do the work.
Forcing stubborn backing. If it will not move, more moisture and more waiting will fix it. Force does not.
Forgetting the floor. Wet strips of paper and paste land wherever they fall. Tape the drop cloth to the baseboard and let it extend past the wall line.
Sanding before the wall is dry. Damp joint compound gums the paper and tears it out. Wait a full day, and longer in a cool room.
Two habits help more than any other advice I can give. Test a hidden square first and note how long it takes, since that is your soak time for the whole room. And work in sections you can finish, because soaking an entire wall at once means scraping half-dry paper.
Frequently Asked Questions
Is removing wallpaper difficult for a beginner?
It is a slow job rather than a hard one. The technique takes about ten minutes to learn, and the difficulty is patience: letting water soak for 15 to 20 minutes and rewetting instead of pulling harder. Budget most of a day for a 12 by 12 room, more for painted-over paper or ceilings. Tools are cheap and the skills transfer to any wall repair.
Is it safe to use a heat gun to remove wallpaper?
A wallpaper steamer is safe on drywall. A handheld heat gun is riskier: held too close, it dries and scorches the paper face, and it can ignite wallpaper paste and backing. If you use either, keep the tool moving, stay at least six inches off the wall, and never work above your head. Warm water and time do the same job with far less chance of damage.
What should I do if the drywall paper tears?
Stop scraping that area immediately. Press loose paper back down flat, trim ragged fibres with scissors, and let the wall dry. Seal the exposed brown paper with a pigment-based stain-blocking primer, then skim gouges with setting-type compound, sand with 220 grit, and prime. Small torn spots are normal and repair cleanly; torn paper left unsealed is what causes lasting damage.
How do I remove wallpaper adhesive left on the wall?
Wash it off. After the backing is gone, sponge the wall with warm water and dish soap, rinsing the sponge often, and let the wall dry. Residue that feels slick will bubble paint within a few months, so check again once the wall is bone dry. Sand stubborn spots with 100 grit rather than scraping, which protects the paper face underneath.
How long should the wall dry before painting or reinstalling wallpaper?
Wait at least 24 hours after the last rinse or scrape, and give it 48 hours in a cool or humid room. Everything must be bone dry, including any paste residue left behind, because paint applied over damp adhesive blisters and peels within months. Test the darkest corner of the room with your palm before you roll on the primer.
A Safer Wallpaper Removal Plan
Start by testing one hidden square. Learn whether your wallpaper peels or needs soaking, then time it, because that number sets your whole schedule. From there it is warm water, light scoring, and a plastic scraper held flat, with more waiting than you think you need.
Damaged spots are part of the job, not a failure. Seal what tore, skim it, sand it, prime the whole wall, and the result is better than what was underneath.
Bring in a pro if the tears go deep into the gypsum, if the wall is soft or crumbling, if you suspect moisture damage behind the paper, or if you hit wiring or plumbing while removing outlet covers.