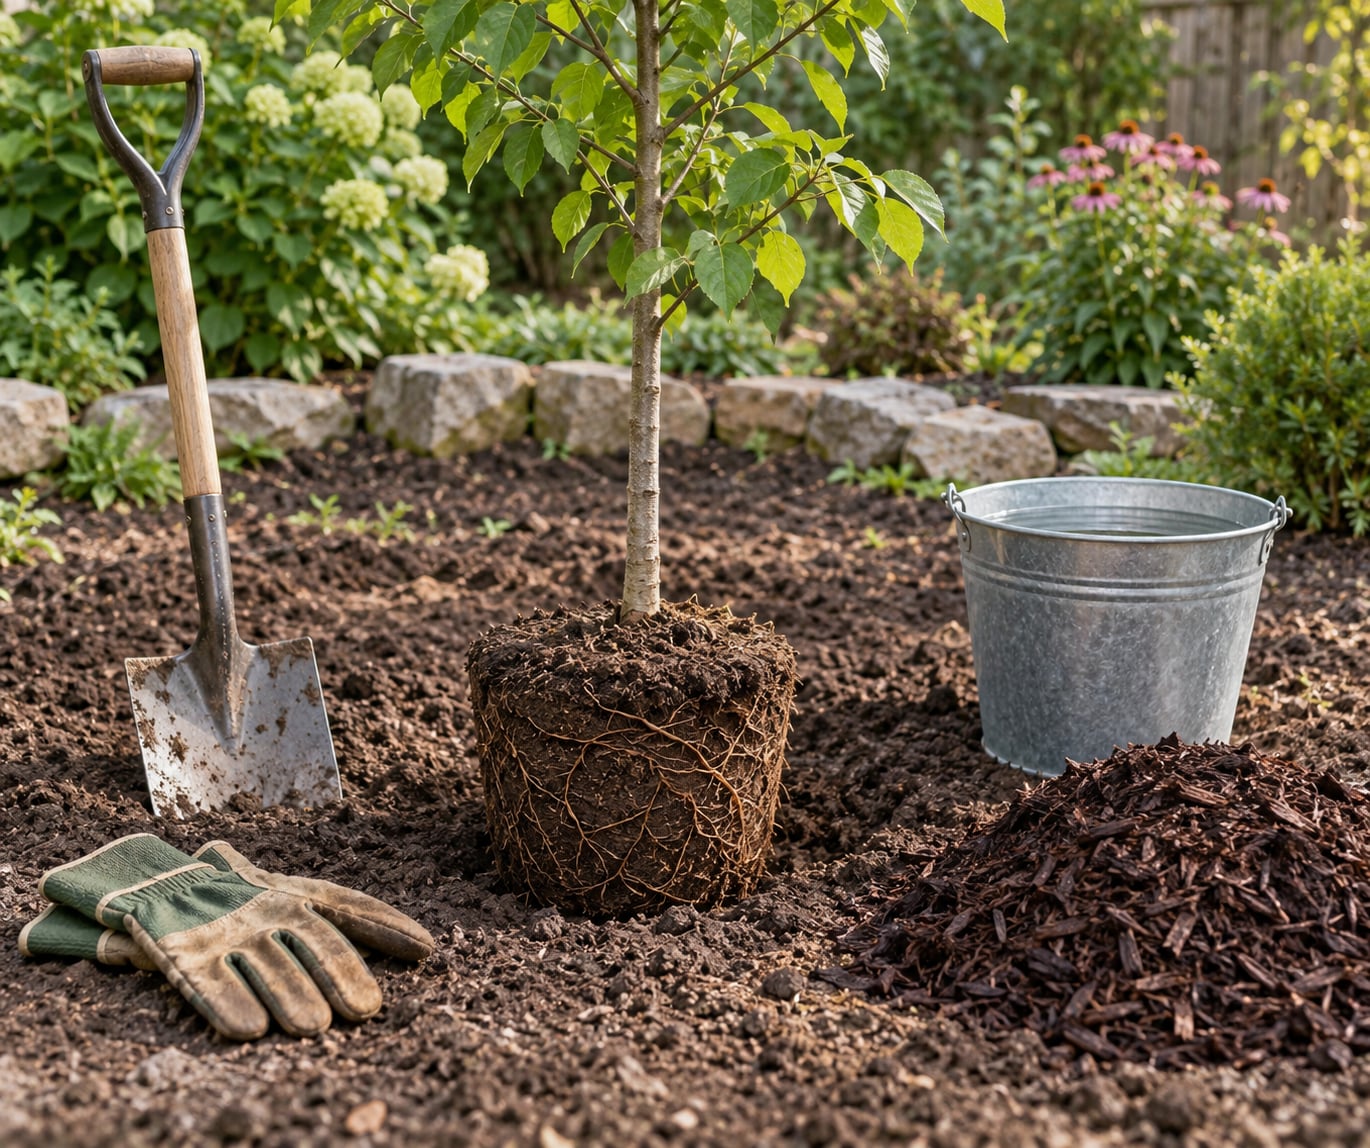
To plant a tree correctly, dig a hole two to three times wider than the root ball but no deeper than the root ball itself, set the trunk so the root flare sits at or slightly above the original ground level, and backfill with the native soil you dug out.
That wide-and-shallow rule, plus a 2 to 4 inch mulch layer kept off the trunk and about an inch of water a week through the first growing season, covers most of what separates a tree that lives for decades from one that sulks out in two summers. Budget a full afternoon for a small tree, a strong back for a caliper-size one, and someone to call 811 before you touch a shovel.
The rest of this guide walks through the whole job in order, from choosing a site to knowing when your tree has actually taken. If you already know the answers and just want the checklist, scroll down to the step list.
Table of Contents
- What You Need
- Step-by-Step
- How to choose the right planting site
- How to prepare the tree and planting hole
- How to plant a tree correctly: set the tree at the right depth
- How to water and mulch after planting
- How to care for a newly planted tree
- How to know the tree is planted correctly
- Common mistakes
- Frequently Asked Questions
- Which is the most common mistake made in tree planting?
- Should the root flare be above ground?
- How deep and wide should the planting hole be?
- Should you water a newly planted tree every day?
- Should I add compost or fertilizer when I plant a tree?
- How long should stakes stay on a new tree?
- Get the First Step Right
What You Need
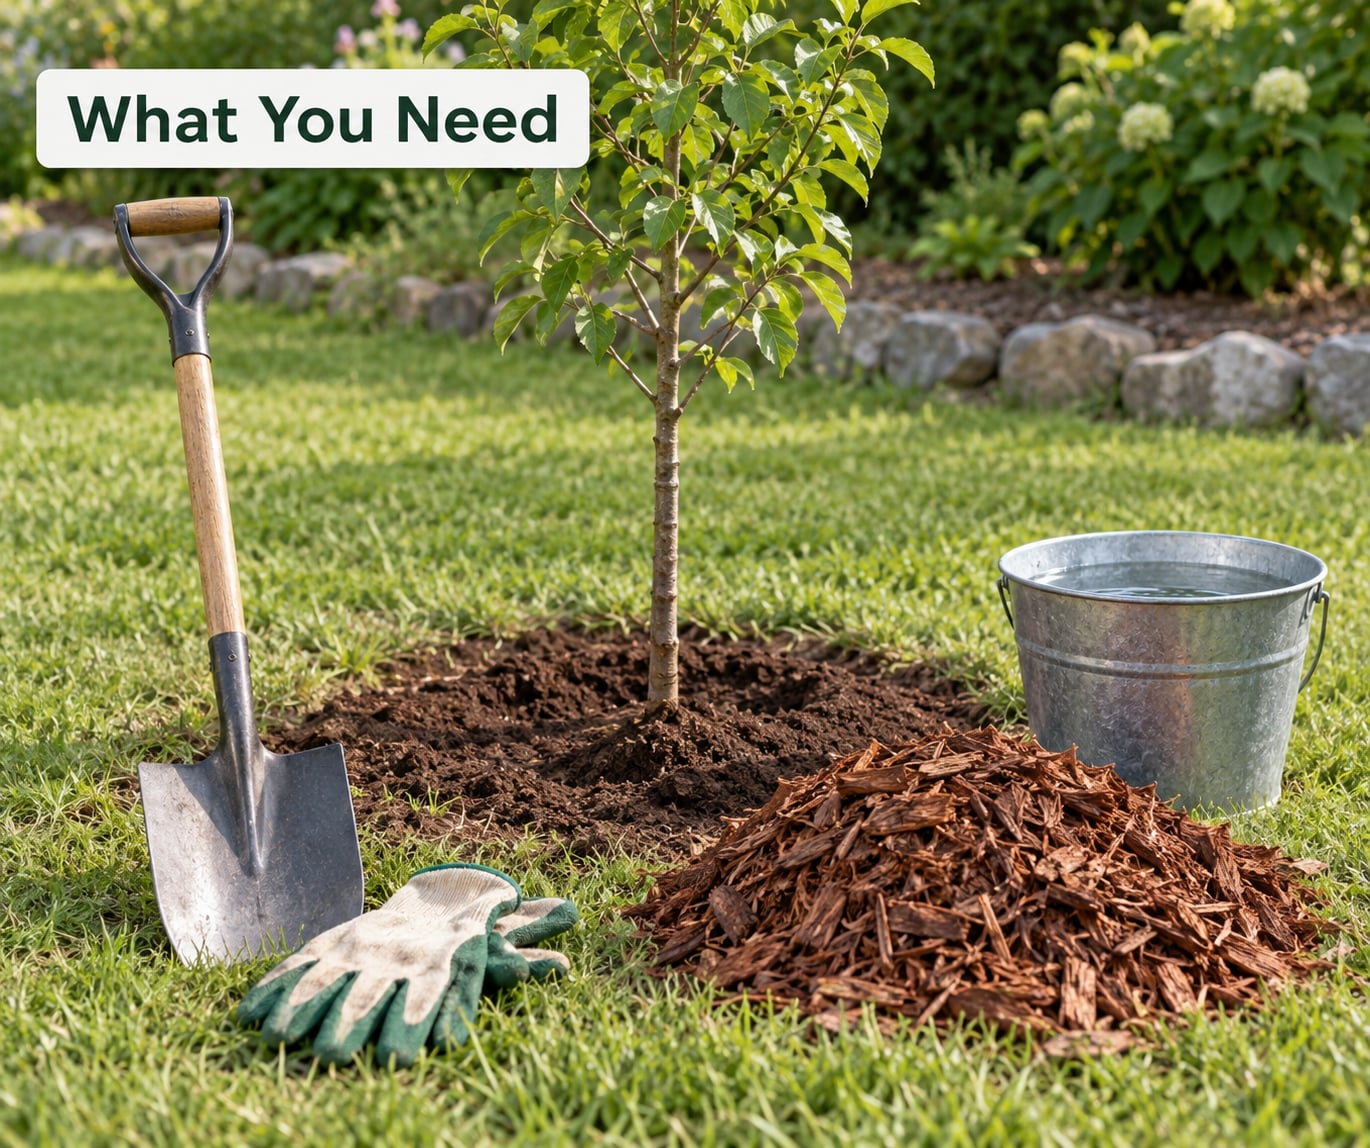
Most of what people call planting equipment is stuff you already own. The list below is what a planting actually requires, not a shopping wish list.
- Digging tool. A spade or digging shovel for the hole, plus a garden fork if your soil is compacted. A power auger works in open ground but it is optional, and it has a real drawback covered later in the mistakes section.
- A way to measure depth. Digging a wide hole means shaving the sides into a slope, so a ruler gets lost fast. A length of PVC pipe with the depth marked on it slides down the hole and gives you a straight read in a second.
- Mulch. Two to three cubic feet per inch of mulch over a 3 foot circle. Shredded hardwood, bark, or leaf mold all work. Avoid dyed mulch and anything that matts into a crust.
- Water. A hose with a slow soaker nozzle, plus roughly 10 to 15 gallons for the initial watering-in. A bucket works if you are patient.
- Gloves and eye protection. Digging in clay or rocky ground is where gloves earn their keep.
- Soft ties and a stake, if the tree needs support. Wide fabric straps or old nylon stockings. Never wire, and never twine.
- Optional: a root protection basket for gopher and vole country, a soil test kit, and a 5 gallon bucket for mixing backfill.
On picking the tree itself, buy from a local nursery rather than a big-box clearance rack when you can. Local stock is already acclimated to your climate and usually less root-pruned. Pick a tree that is healthy at the nursery first, and pick the species second.
Match the species to the space, not the space you wish you had. A red maple under a power line will be a permanent conflict, and a full-grown silver maple drops more junk than most people want to rake twice a year. Look up the mature canopy width and height, then measure your clearance.
Step-by-Step
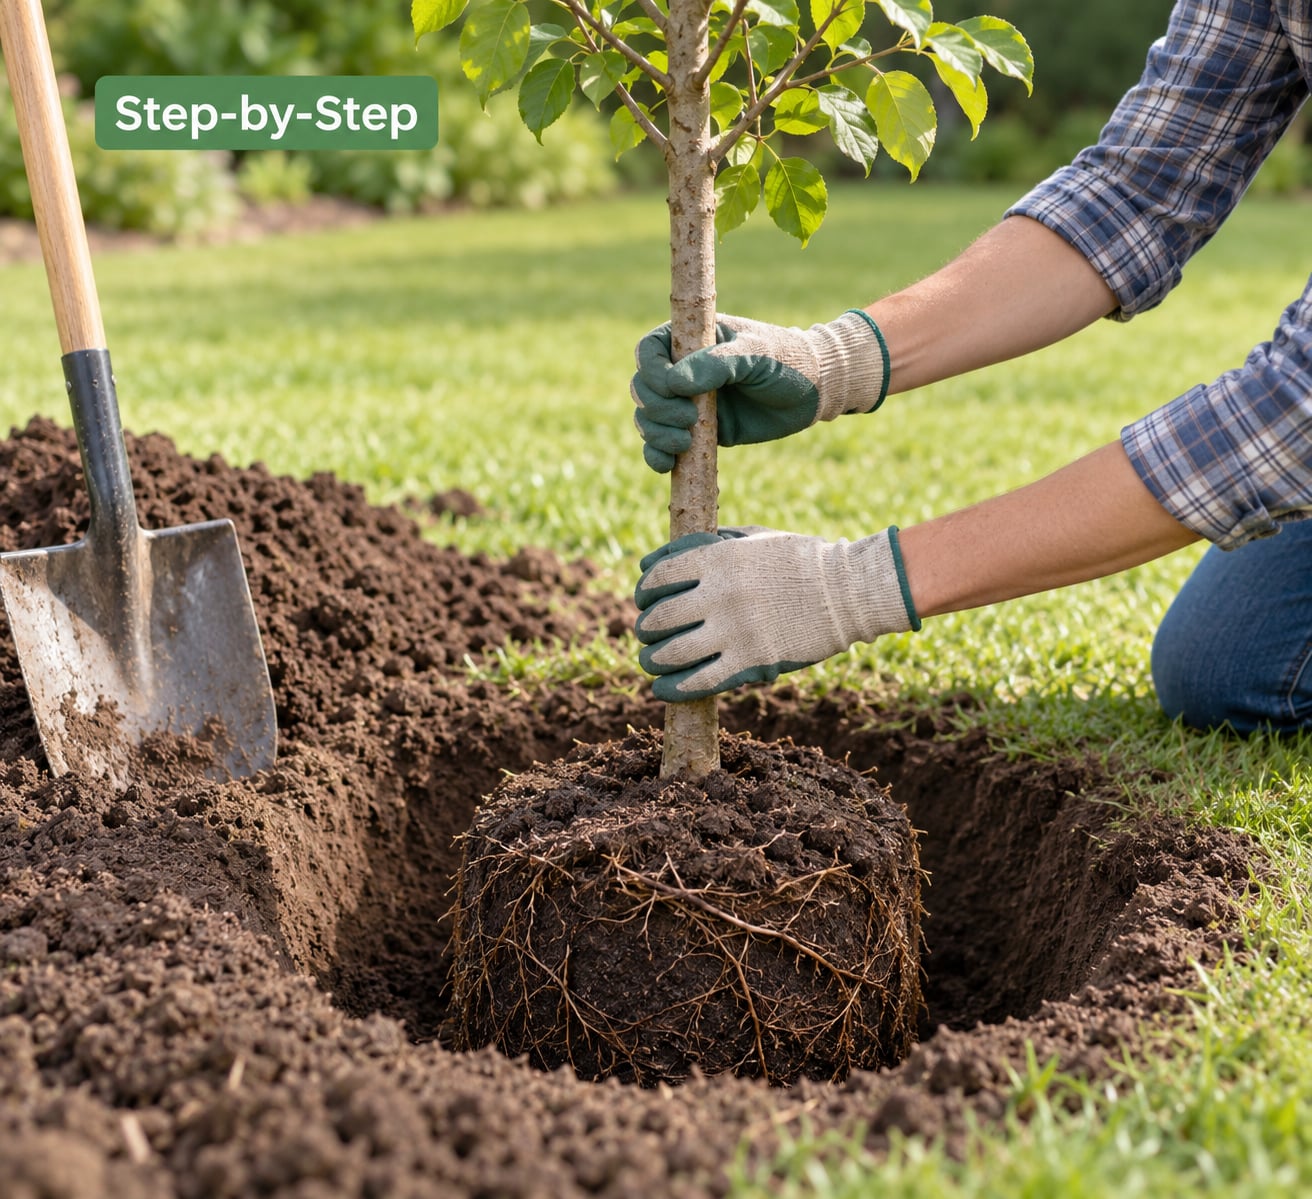
Seven steps, in this order. The measurements below are the whole job in numbers.
| Measurement | Rule |
|---|---|
| Hole width | 2 to 3 times the root ball width |
| Hole depth | Same as the root ball depth, no deeper |
| Hole sides | Sloped outward, not vertical |
| Hole bottom | Firm, flat, no sump |
| Trunk position | Root flare at or 1 to 2 inches above original grade |
| First lateral roots | Just under the soil surface |
| Mulch depth | 2 to 4 inches, held 4 to 6 inches off the trunk |
| Water | About 1 inch per week, deep and slow |
How to choose the right planting site
Get sunlight right first, since you cannot move the tree later. Most fruit trees and ornamentals want six or more hours of direct sun, and maples and oaks tolerate more shade than people expect. Watch the site across a full day before you commit.
Then check drainage. Dig a test hole about 12 inches deep, fill it with water, and see how long it takes to drain. If it is still standing after a few hours, or if water sits in low spots after rain, that corner will drown the tree over its second or third summer.
Call 811 before you dig. This is the one step people skip and the one that can take out a gas line, a water main, or a fiber line nobody knew was there. Do it several days ahead so the marks have time to show up on the ground.
Clearance matters too. Keep large trees well back from foundations, hard surfaces, and sewer lines, and check local ordinances and any neighborhood covenants, which sometimes cap tree height outright.
How to prepare the tree and planting hole
Water the root ball before it goes anywhere, whether it is in a container, wrapped in burlap, or bare-root and heeled into a pile of damp soil. A dry root ball rejects water for weeks, and that rejection is a common reason new trees die in their first summer.
Container-grown trees need the pot off. If the root ball is snug, cut the bottom off the pot, set the tree in the hole, then cut down the side and peel the pot away. That keeps the ball in one piece instead of shattering it.
Look at the roots before they go in the ground. Roots circling the outside of the ball in a tight spiral will girdle the trunk in a few years, so score them with a knife or pry them loose with your fingers. Do not tear them into pieces.
Balled-and-burlapped trees get their wire basket and burlap loosened in two stages: cut the top of the wire off once the tree is positioned, then pull the burlap away from the trunk and remove the rest of the wire. Leaving that wire on is a slow strangulation.
Now the hole. Dig it two to three times the width of the root ball and no deeper than the root ball itself. Slope the sides outward, and firm the bottom flat so the tree does not settle into a sump. If you used an auger, scrape the glossy sides with a shovel to break the glaze.
Do not dig deeper to add better soil on the bottom. Extension services and master gardeners all land on the same conclusion: a rich layer underneath a plain layer above behaves like a bathtub, and the roots find it first.
How to plant a tree correctly: set the tree at the right depth
Find the root flare, where the trunk flares outward into the first lateral roots. That point is the one you align with the soil, not the trunk collar above it, and the difference between the two is the whole ballgame.
Set the root flare level with the surrounding grade, or one to two inches higher on heavy, settling soil. The first lateral roots should end up just under the surface, where they can get oxygen and warm quickly.
Have someone hold the tree plumb while you backfill. Use the soil you removed, broken up by hand, with clods smashed against the hole wall. No compost, no peat moss, no garden bag filler in the hole itself.
Fill in layers and tamp lightly. Compaction is fine, machine compaction is not; you want the soil firm enough to hold the tree but porous enough for air. Leave a shallow basin, roughly the width of the root ball, so water settles in instead of running off.
Water it in thoroughly right after the backfill. Slow, steady water expels air pockets and settles the soil around the roots while they are still fresh.
How to water and mulch after planting
Soak the basin until you see water pooling at the surface, then stop and let it drain. That first watering does more for root-to-soil contact than anything else you will do that day.
Spread mulch two to four inches deep over a circle that reaches the drip line, the outer edge of the canopy. That radius is not arbitrary; it encourages roots to travel outward instead of circling near the trunk.
Pull the mulch back four to six inches from the trunk and keep a bare ring there. Mulch touching the trunk holds moisture against the bark, which invites rot, and a pile up the trunk is the mulch volcano that kills more trees than bad watering.
Check that the root flare is still visible after mulching. If you cannot see it, you have buried the trunk, and you need to pull the mulch back down.
How to care for a newly planted tree
Stake only if the tree cannot stand on its own or if wind is a constant problem. A flexible trunk that moves a little develops stronger wood than one bolted rigid. When you do stake, put the stake on the windward side and use one wide soft tie at the base, snug enough not to slide but loose enough that a thumb fits under it.
Check the tie every few weeks. Soft ties shrink and girdle a growing trunk faster than you would expect. Remove all support within one growing season.
Water about an inch per week during the first growing season, delivered slowly and deeply. A soaker hose left running for an hour beats a daily sprinkle, because the daily version wets only the surface and trains roots shallow.
Do not fertilize at planting. Nursery trees arrive with fertility, and fertilizer in the hole burns roots. Hold off until the following spring, and feed only if a soil test says the nutrient is actually missing.
Prune only dead, damaged, or crossing branches at planting. Heavy pruning removes leaf area the tree needs to recover from transplant shock.
If something looks wrong, match the symptom before you guess at the cause.
| Symptom | Likely cause | Fix |
|---|---|---|
| Yellowing across the whole tree, soil stays wet | Planted too deep or hole holds water | Check depth against the root flare, cut a drainage channel at the basin edge |
| Wilting in afternoon, soil is dry | Under-watering | Slow, deep soak twice a week |
| Wilting with wet soil | Over-watering, poor drainage, or roots suffocating | Stop irrigation, check for a bathtub hole or compacted clay |
| One or two branches dying back | Transplant shock or root damage at planting | Usually normal; keep watering steady and prune dead wood |
| Roots or bark gnawed below ground | Voles or gophers | Install a wire mesh root basket and fill the basin less often |
| Trunk soft at the base, bark slipping | Over-mulching or mulch touching the trunk | Clear mulch back off the bark immediately |
| Tree pulls straight out of the ground | Newly planted, soil never firmed around roots | Tamp the backfill harder and water it in again |
A tree that yellows and lifts out of the ground with the roots still loose is usually a planting problem, not a soil problem. The fix is backfill quality and depth, not swapping in a different soil mix.
How to know the tree is planted correctly
Stand back and check six things before you call the job done.
- The trunk is upright on its own, without a stake, or leans only slightly.
- You can see the root flare spreading out above the soil line.
- The first lateral roots sit just under the surface, not exposed in an open bowl.
- The soil around the trunk is level, with no mound pushed up against the bark.
- Mulch stops several inches short of the trunk and reaches out toward the drip line.
- After watering, the basin holds moisture for a couple of days rather than draining straight through or staying soupy.
If the flare is buried, the honest fix is to lift the tree back out, remove soil from beneath the ball, and reset it. Some people build up and leave it, but a trunk buried below the flare rarely recovers fully.
Common mistakes
Planting too deep. This is the single most common error, and the one paid crews most often leave behind when nobody checks the depth on the way out. The trunk gets buried below the root flare, the bark stays wet and dark, and girdling roots start. Check the flare before you backfill, while you can still fix it.
Amending the hole. Compost, peat moss, and bagged garden soil thrown into the hole create a rich layer inside a poor one. Roots rush into the good stuff and then hit the wall. Backfill with native soil and, if you want to improve anything, cultivate the whole area a foot deep rather than the hole alone.
Planting in heavy clay without a plan. This is where the bathtub effect does most of its damage. Do not replace clay with compost in a narrow hole. Instead, cultivate a wide area, mix compost and sand into the surrounding soil rather than the hole, and expect slower drainage. Building a raised mound to plant on also works in the worst spots.
Using an auger without breaking the glaze. A power auger leaves smooth vertical walls that roots cannot cross and that hold water against the ball. Shovel-scrape the sides and firm the bottom.
Mulch against the trunk. Keep that bare ring. Pull volcano piles down to two to four inches and off the bark.
Watering daily. Frequent shallow watering keeps roots near the surface, where they dry out and heat faster. Deep soakings with a dry-down in between are what build the root system.
Leaving wire on. Burlap and basket wire left in place choke the trunk. Cut the top off once the tree stands, then remove the rest.
Leaving stakes on for years. Remove support within one growing season, or you have traded transplant shock for a girdling tie.
One last tip, and it is the cheapest one: plant in the right season. Fall planting in mild climates gives roots a cool, wet stretch to establish before leaf-out. In cold regions or heavy clay, early spring after the soil drains beats a late fall planting that sits frozen for months.
Frequently Asked Questions
Which is the most common mistake made in tree planting?
Planting too deep. The trunk ends up below the root flare, the bark stays wet and dark, and roots circle the trunk until they girdle it. Check the flare before you backfill: it should sit at or one to two inches above the original soil level, with the first lateral roots just under the surface.
Should the root flare be above ground?
Yes, at or slightly above. If the root flare sits below grade, water collects in the crotch between trunk and soil and the bark rots. On soil that will settle, set the tree one to two inches high so it ends up level after the first season.
How deep and wide should the planting hole be?
Two to three times wider than the root ball, and no deeper than the root ball. Digging deeper to lay in better soil at the bottom creates a bathtub that traps water. Slope the sides outward, firm the bottom flat, and never leave a sump under the ball.
Should you water a newly planted tree every day?
No. Daily shallow watering wets only the surface and trains roots to stay near it. Give the tree roughly an inch of water per week, delivered slowly and deeply, and let the soil dry slightly between soaks. A soaker hose running for an hour or two works well.
Should I add compost or fertilizer when I plant a tree?
Skip both in the hole. Nursery trees already arrive with fertility, and fertilizer can burn fresh roots. Backfill with the native soil you removed. If you want to improve the ground, cultivate the whole area a foot deep and mix compost into that wider zone, not into the planting hole itself.
How long should stakes stay on a new tree?
One growing season at most. Use one wide soft tie at the base of the trunk, snug but loose enough for a thumb, attached to a stake on the windward side. Never use wire or twine. Check ties every few weeks and remove them all by the end of the first summer.
Get the First Step Right
Before anything else, confirm the site will still suit the tree in ten years, and check drainage there rather than at the nursery lot. Everything after that is mechanics: inspect the root ball, set the root flare at or above grade, backfill with the soil you dug out, mulch two to four inches deep away from the trunk, and water deeply through the first season.
That one afternoon decides whether you are watering a shade tree in fifteen years or replacing a stump. Getting the depth right costs nothing extra, and it is the part paid crews most often get wrong.