Learning how to install a bathroom vanity is mostly plumbing and patience: shut off the water, pull the old cabinet out, set the new one level against the studs, cut holes for the drain and supply lines, then hook everything back up and watch for leaks. A straightforward swap takes a competent beginner two to four hours, most of it spent on the drain connection and the caulking.
The reason people hesitate is the part they cannot see. Behind the cabinet there is a drain stub-out at a specific height, two supply valves at a specific spacing, and wall studs that may not be where the new cabinet wants them. Get those measurements first and the rest of the job is mostly following instructions.
This guide is updated for 2026 and covers freestanding and wall-mounted cabinets, undermount and drop-in sinks, and the awkward real-world cases: crooked walls, stubborn shutoff valves, and supply lines that do not line up with the cabinet’s pre-cut openings.
Table of Contents
- What You Need
- Tools
- Materials
- Step-by-Step: How to Install a Bathroom Vanity
- 1. Measure and Check the Bathroom Layout
- 2. Turn Off Water and Protect the Area
- 3. Remove the Old Vanity and Sink
- 4. Prepare the Wall and Plumbing Connections
- 5. Set the New Vanity in Position
- 6. Attach the Cabinet, Sink, Faucet, and Drain
- 7. Seal, Test, and Finish the Installation
- Common Mistakes
- Frequently Asked Questions
- Can I install a new bathroom vanity myself?
- How is a bathroom vanity attached to the wall?
- Do I need to screw my vanity to the wall?
- Does the plumbing have to be centered under a vanity?
- Should a bathroom vanity be flush against the wall?
- How long does it take to install a bathroom vanity, and when should I call a pro?
- Conclusion
What You Need
Most people either have these tools already or can borrow them from a neighbor. Renting a basin wrench or a hole saw for an afternoon beats buying a whole box for one job.
Tools
- Adjustable wrench and a basin wrench for nuts that sit in tight spaces behind the cabinet
- Cordless drill with a driver bit, plus a 2.5 to 3 inch cabinet screw
- Stud finder and a pencil or marker for marking locations
- 4 foot level for the cabinet and a shorter level for the countertop
- Hole saw or jigsaw with a fine-tooth blade for cutting the pipe openings in the cabinet back
- Utility knife, plus a hook knife or grout rake for scoring caulk
- Flashlight for the final leak test, and a shallow pan or bucket
- Shop towels, a putty knife, a pry bar, and painter’s tape if the drywall behind needs protecting
Materials
- The new vanity cabinet, countertop, sink, and faucet, plus any hardware the cabinet did not come with
- 2.5 to 3 inch screws, or the mounting rail and angle brackets that came with a wall-mounted unit
- Wall anchors rated for the load if you cannot hit a stud
- P-trap kit, or a new P-trap if the old one was galvanized and brittle
- Braided stainless steel supply lines, usually 3/8 inch compression to 1/2 inch FIP
- Plumber’s tape for threaded drain and supply joints, plumber’s putty or a rubber gasket for a top-mount sink
- 100 percent silicone kitchen and bath sealant for the backsplash and countertop seams
- Shims or tapered cedar wedges for leveling
- Optional: backer rod and paintable acrylic caulk if you have a wide gap to fill at the wall
Step-by-Step: How to Install a Bathroom Vanity
Work in this order. Each phase depends on the one before it, and skipping ahead usually means opening the wall back up later.
- Remove the old vanity and clear the wall.
- Prepare the wall and check the plumbing rough-in.
- Set the new cabinet, level it, and secure it to studs.
- Install the sink, faucet, and countertop, then reconnect the drain and supply lines and test for leaks.
1. Measure and Check the Bathroom Layout
Do all of your measuring before the old vanity comes out, then measure again afterward to confirm. Old houses lie about their dimensions more often than new ones.
Measure the width of the opening at the floor and again at counter height, roughly 32 to 34 inches up. A wall that leans will give you two different numbers, and the wider one decides whether the cabinet fits.
Then record the plumbing rough-in and compare it to what the new cabinet expects:
| Measurement | Standard rough-in | What to check |
|---|---|---|
| Drain stub-out height from finished floor | 16 to 20 inches | The drain also has an offset, usually 9 inches back from the wall face. Both numbers must clear the new cabinet back panel. |
| Supply valve height | 20 to 22 inches | Too high and the cabinet will not slide over them. |
| Spacing between hot and cold valves | 8 inches on center | Matches an 8 inch widespread faucet. A 4 inch centerset needs valves about 4 inches apart. |
| Faucet hole pattern on the countertop | Single hole, 4 inch centerset, or 8 inch widespread | Count the holes before you buy the faucet, not after. |
| Cabinet width | 18, 24, 30, 36, 48, and 60 inches are standard | Leave about an inch on each side for the filler strip or scribe trim. |
| Cabinet height | 30 to 34 inches for standard comfort-height units | Measure against your existing backsplash and outlet height if the top has to align with anything. |
A vanity does not need to be centered on the plumbing. The drain and supply lines can sit off-center inside the cabinet as long as the pipe openings clear the sink bowl and the drawer boxes above them. Cutaway cabinets and plumbing-U designs exist for exactly that reason.
Also check the height of the drain. A stub-out installed at 24 inches instead of the usual 16 to 18 leaves you with a gap under the cabinet that no amount of trimming fixes, and it is much cheaper to add a cabinet riser than to lower the pipe.
2. Turn Off Water and Protect the Area
Test the shutoff valves before you need them. Open each valve fully, then close it and confirm it actually holds by opening a faucet and watching for flow. A valve that will not close cleanly is the single most common reason a vanity swap turns into an emergency call.
If a valve is frozen, seized, or completely absent, find the main shutoff for the house before you disconnect anything. Replacing a failed quarter-turn valve with a compression fitting is a short job, but do it with the water off and a bucket under the pipe.
Move towels, a hamper, and any rug out of the room, and lay down a drop cloth. If a GFCI outlet sits within six feet of the work area, note which breaker serves it so you can restore power cleanly.
Plan the lift before you start. Solid-surface and stone tops weigh far more than they look, and getting one out of a doorway with two people is easier than getting it back in.
3. Remove the Old Vanity and Sink
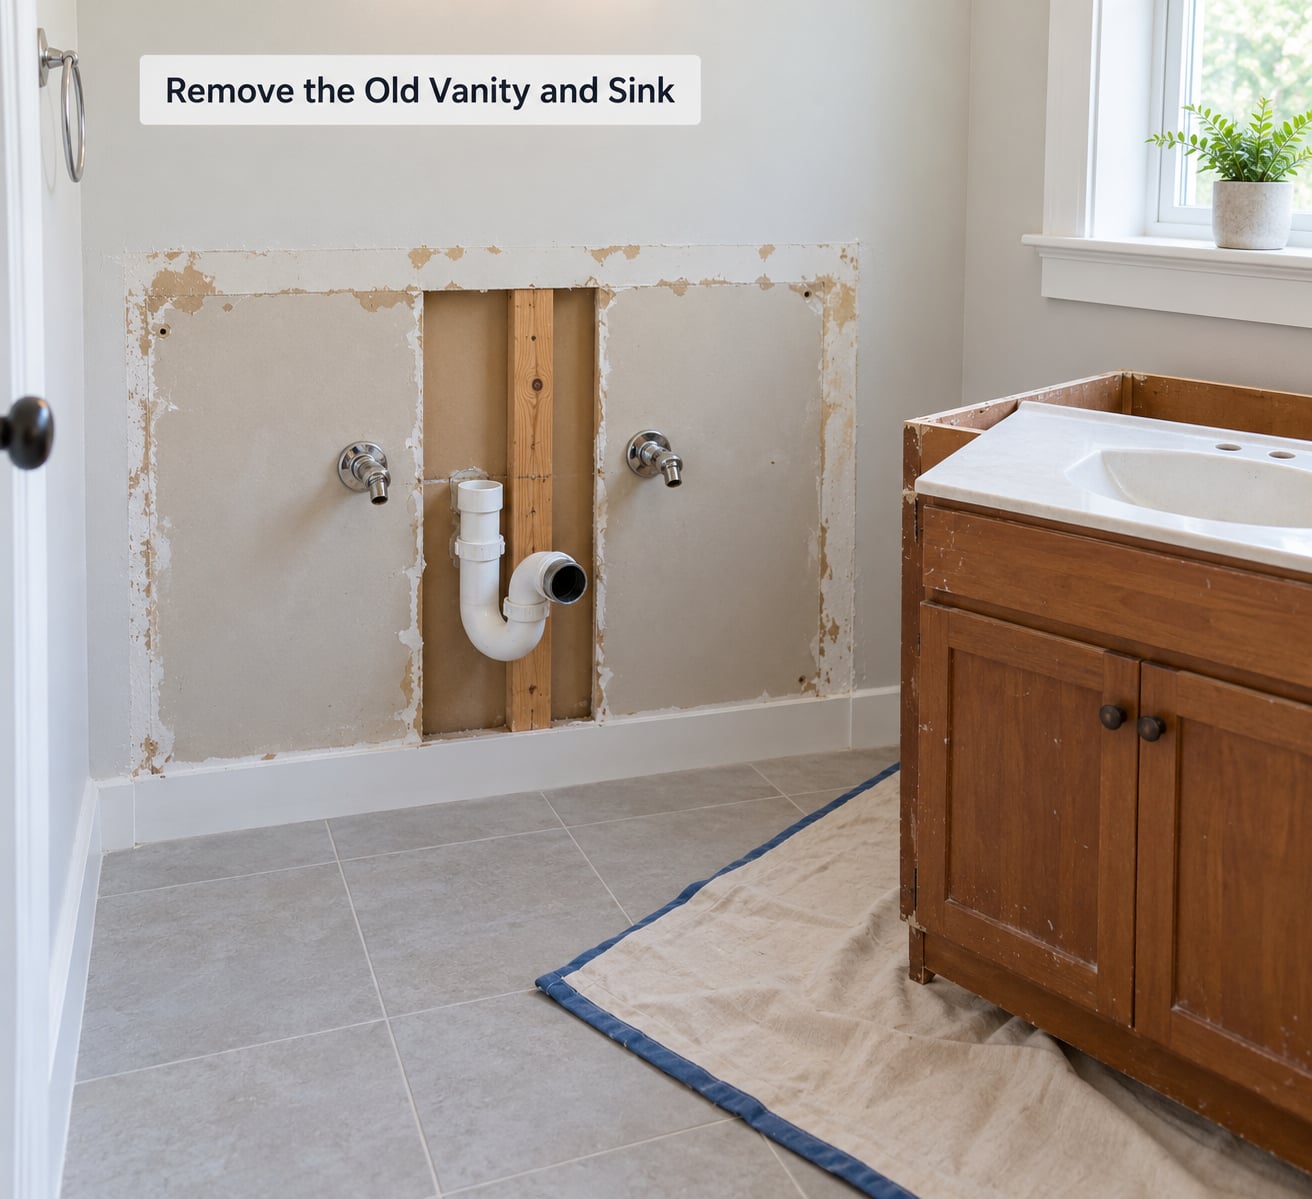
Score the caulk line where the sink or backsplash meets the wall and countertop, and keep scoring it until the joint releases. Homeowners on r/fixit and r/HomeImprovement repeat this advice more than any other: pry gently and work the seam loose rather than levering the cabinet away from the drywall.
Under a top-mount sink, loosen the drain nut from below and lift the sink straight off. For an undermount sink, remove the mounting clips and adhesive from underneath after the drain comes apart.
Disconnect the plumbing in this order: the P-trap, then the tailpiece from the drain flange, then both supply lines. Fill the pipe with a towel before you break a joint so the drain trap does not empty into the cabinet.
Remove the mounting screws or angle brackets, then lift or slide the cabinet out. Watch for a baseboard behind it; many homeowners find one jammed behind the base and end up cutting the cabinet to get around it.
Look at what is behind the cabinet before you decide anything. Fresh water damage means a soft subfloor, and old galvanized supply lines that crumble when touched mean you should be pricing new valves and lines into this project.
4. Prepare the Wall and Plumbing Connections
If the old vanity was glued or heavily caulked in, the drywall paper may have torn off with it. That is fixable: scrape back to sound drywall, patch with setting compound, prime, and paint. If the tear is wide, cut a square hole and add a backer board so the new cabinet has something solid to screw into.
Use the stud finder to mark the stud centers behind the cabinet’s mounting rail, and mark the faucet hole centers on the wall at faucet height so you can transfer them to the cabinet back later.
Verify the supply and drain lines are still solid and correctly placed. Do not cap or relocate them just to make the cabinet fit. If the pipes need to move, that is a plumber job, and forcing it is how a small remodel becomes a wall repair.
Where a baseboard runs behind the vanity, most installers leave it out so the cabinet top sits flush against the wall. If you want it kept, notch the base or split the cabinet with the top.
5. Set the New Vanity in Position

Carry the cabinet into place dry, before you cut anything, and check the fit. If it will not slide over the plumbing, you find that out now rather than after you have drilled.
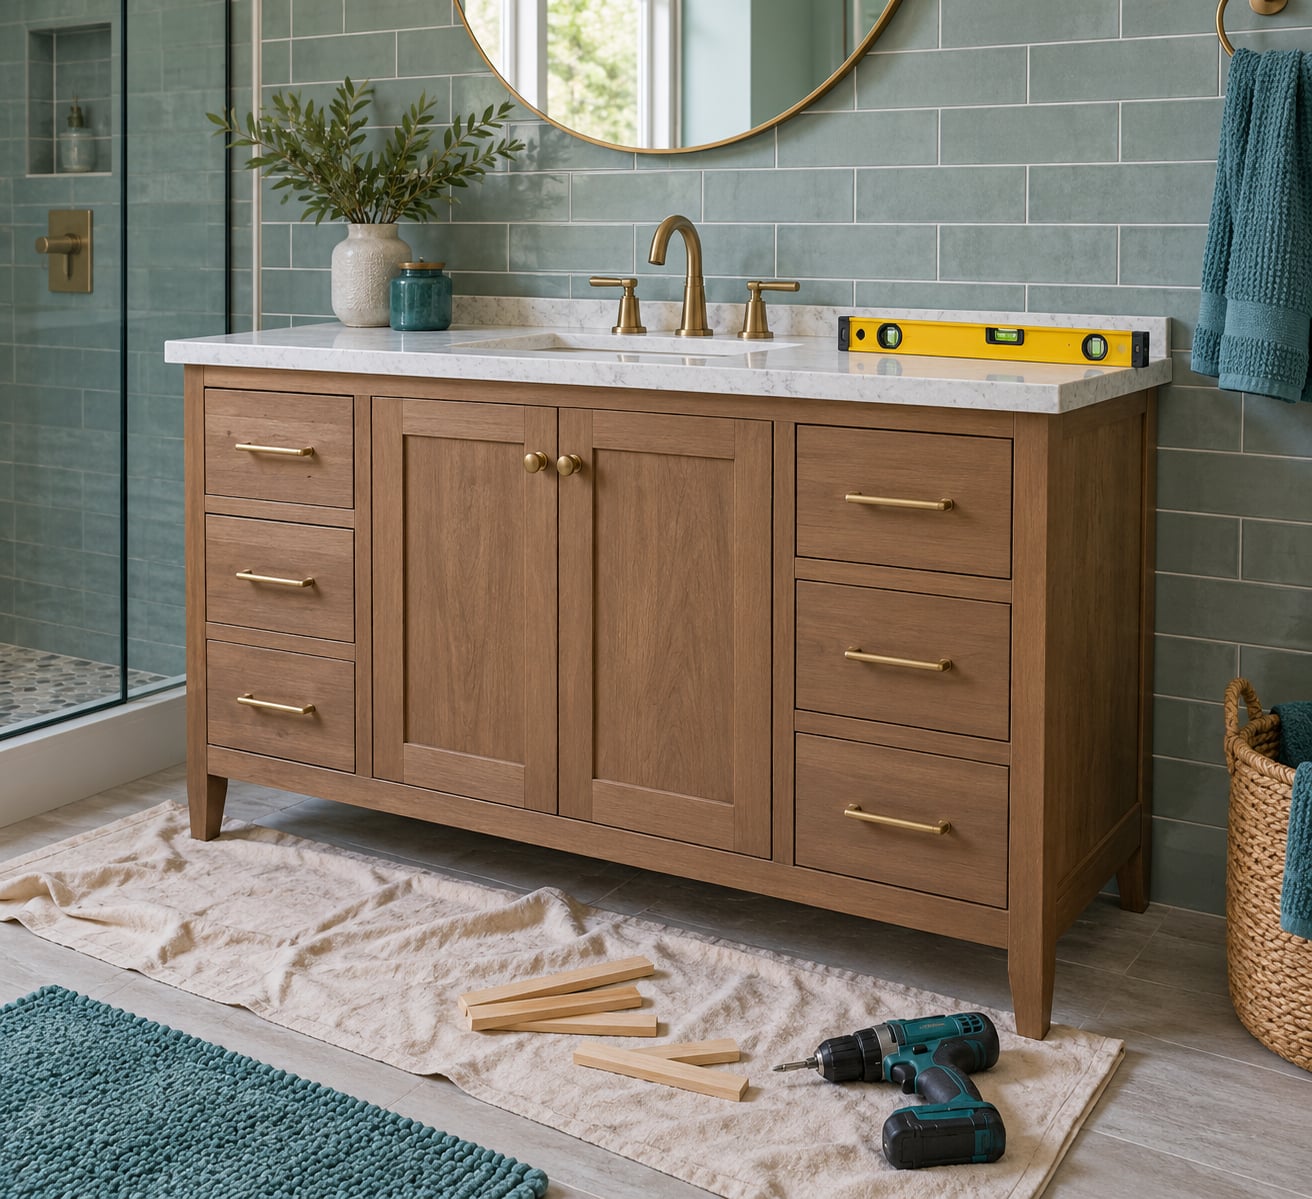
Shim the base with tapered wedges until the cabinet sits level front to back and side to side. Check for plumb with a short level on the cabinet side, and keep taking readings as you shim rather than assuming one corner settled the whole cabinet.
Hold the cabinet tight to the wall and drive a temporary screw through the mounting rail into a stud to hold it while you work. If you will not be shimming on that side, back the screw out after the real fasteners go in.
Mark the pipe locations on the cabinet back using a pencil held against the pipe, or trace the escutcheons that came with the cabinet. The back panel of most cabinets is thin veneer or MDF, so measure twice before you commit to a hole saw size.
6. Attach the Cabinet, Sink, Faucet, and Drain
Secure the cabinet with 2.5 to 3 inch screws through the mounting rail and into studs, or into rated wall anchors where no stud is available. Do not rely on drywall paper alone. Cabinets anchored only into drywall slowly pull away and take the countertop with them, and the water damage that follows is the expensive part.
Wall-mounted and floating cabinets use their own hardware: a steel rail screwed into studs, with angle brackets bolting the cabinet to the rail. Level the rail first, then hang the cabinet and adjust the brackets. The same applies to a cabinet on legs, which still needs a back mounting strip so it cannot rack away from the wall.
Cut the pipe holes in the cabinet back with a hole saw, working from the inside face and stopping before you hit the finished edge, or use a jigsaw for a rectangular cutout. Seal any oversized hole with a scrap of the same material or a foam gasket so the cabinet is not a draft path.
Install the faucet through the countertop holes with the supplied gasket or plumber’s putty under the base, then hand-tighten the mounting nuts. Fit a top-mount sink on its own putty or gasket bead, or clip an undermount sink to the underside of the countertop per the sink maker’s instructions. A vessel sink sits on top of the counter and only needs the faucet hole behind it.
Reconnect the drain from the bottom up: tailpiece into the drain flange, then the P-trap to the stub-out. Use plumber’s tape on the threaded slip joints only, never on the rubber-seated slip nuts, and snug them by hand plus a quarter turn. Braided supply lines go from the valve to the faucet shanks, hand-tight plus a quarter turn.
If a compression fitting spins instead of releasing, you are looking at a galvanized or corroded line. Cut it off with a tubing cutter and install a new compression fitting rather than trying to wrench it loose.
7. Seal, Test, and Finish the Installation
Run a continuous bead of 100 percent silicone where the countertop meets the backsplash and where the sink meets the counter, then tool it smooth with a damp finger. Keep the bead unbroken around corners; a gap there is where water finds the cabinet frame.
For an out-of-square wall, shims will not close a wedge gap on their own and the countertop has about an eighth inch of play at most. Fill the gap with a painted backer strip, scribe the cabinet side to the wall and trim it, or pack it with backer rod and paintable acrylic caulk. A visible gap behind a vanity is not a defect as long as it is sealed.
Restore the water supply slowly, then open the faucet and let it run for a full minute. Get down with a flashlight and a dry paper towel under the cabinet and check every joint: the P-trap slip nuts, the tailpiece, both supply connections, and the drain flange. A slow drip at the flange is the most common leak in this job and the easiest to miss with the doors closed.
Push the cabinet to check for movement, confirm the doors and drawers clear the wall, and reinstall any doors, drawer fronts, and countertop accessories you removed. Leave the water on for an hour and check again before you call it done.
Common Mistakes
Almost every failed vanity install traces back to one of these, and each one has a straightforward fix before the cabinet goes in.
- Buying a vanity that does not match the rough-in. The cabinet is cheap compared with moving a drain in a finished wall. Measure the stub-out height, offset, and valve spacing first, then buy.
- Anchoring into drywall instead of studs. Mark stud centers with a stud finder and drive 2.5 to 3 inch screws into them. Use rated anchors only where a stud genuinely is not available, and add blocking behind the wall if a stone top needs more support.
- Shimming one corner and assuming the cabinet is level. Take a reading at the front and back of the top. An uneven cabinet shows up later as a countertop that rocks and a door that will not close.
- Overtightening the drain fittings. Hand-tight plus a quarter turn is enough. Cracked slip nuts and a stripped drain flange come from wrenching plastic and brass hard.
- Putting plumber’s tape on slip nuts and rubber-seated joints. Tape belongs on the threaded male ends of pipe, not on the nuts, where it splits the washer and guarantees a leak.
- Leaving an unsealed seam at the backsplash or countertop. A continuous silicone bead, tooled into the corner, is what keeps water out of the cabinet frame.
- Prying an old cabinet off a caulked wall. Score the bead with a hook knife until it releases. Prying tears drywall paper and leaves you patching before you have even started.
- Skipping the leak test or testing too briefly. Open the faucet, run it, and physically inspect every joint with a flashlight. Most amateur installs fail at exactly this step.
- Leaving the old shutoff valves in place. If a valve does not close fully or looks corroded, replace it while the wall is open. The alternative is a surprise the next time someone flushes a toilet.
Two situations belong with a plumber. The first is moving or relocating the drain, stub-out, or supply lines in a finished wall. The second is a heavy stone or marble top on a cabinet that needs new blocking behind the wall, since the wall framing has to carry it.
Frequently Asked Questions
Can I install a new bathroom vanity myself?
Yes, most homeowners can. A basic swap where the new cabinet matches the existing plumbing takes two to four hours and needs a drill, an adjustable wrench, a level, and a basin wrench. Call a plumber if the drain or supply lines need to move, if the floor feels soft, or if you are setting a stone top that requires new blocking.
How is a bathroom vanity attached to the wall?
A freestanding vanity is screwed through a rear mounting rail into wall studs with 2.5 to 3 inch screws, then shimmed level. Wall-mounted and floating cabinets use a steel rail screwed into studs with angle brackets bolting the cabinet on. Either way the fasteners go into framing, never into drywall paper alone.
Do I need to screw my vanity to the wall?
Yes. Even a vanity on legs needs a back mounting strip or at least two screws into studs, because the cabinet carries the sink, the water in it, and the weight of the countertop. A cabinet mounted only into drywall slowly racks away from the wall and can take the plumbing with it when it goes.
Does the plumbing have to be centered under a vanity?
No. The drain and supply lines only need to clear the sink bowl and sit below the drain cutouts, not sit in the center of the cabinet. Measure the stub-out height, its offset from the wall, and the spacing and height of the supply valves, then pick a cabinet whose back panel and drawer layout work with those numbers.
Should a bathroom vanity be flush against the wall?
Close, but not necessarily flush. Old walls are often out of square, and the countertop has about an eighth inch of play at most. Seal the gap with a painted backer strip, scribe and trim the cabinet side, or pack it with backer rod and paintable caulk. An unsealed gap is the real problem, not a visible one.
How long does it take to install a bathroom vanity, and when should I call a pro?
A straightforward replacement runs two to four hours for a beginner, with the drain connection and the caulking taking the longest. Call a plumber before starting if the shutoff valves are absent or frozen and you cannot locate the main shutoff, if the pipes do not line up with the new cabinet, or if the subfloor is soft from an old leak.
Conclusion
The whole job comes down to what you do before the wrench comes out. Measure the rough-in, test the shutoff valves, and confirm the cabinet fits the opening and the pipes, because those are the only steps you cannot undo cheaply.
From there the sequence is simple: remove the old unit, repair the wall, set and level the new cabinet, fasten it into studs, install the sink and faucet, reconnect the drain and supply lines, seal the seams, and test with a flashlight in hand. If the pipes need to move or the top is stone, that is the point to call a plumber.