Smart thermostat installation is usually a 30- to 60-minute swap of a wall unit, provided your heating and cooling system runs low-voltage control wiring and has a C-wire to power the screen. Most failed installs are not wiring mistakes — they are compatibility problems discovered after the old thermostat is already off the wall.
That is why the planning stage matters more than the handiwork. Two questions decide whether you can do this yourself at all: is your system 24-volt low voltage, and does it give the thermostat continuous power?
Before you touch anything, take five minutes and confirm all of these:
- Your system is 24V low voltage, not line voltage
- You know whether you have a C-wire, and whether it actually reaches the equipment
- You have the wiring guide from the smart thermostat manufacturer for your specific model
- You know which breaker controls the HVAC equipment and where the panel is
- You know whether your system is a heat pump, a zoned setup, a boiler, or a mini-split — these are not standard installs
If any of those are unclear, stop here and read the next section. Nothing on this page asks you to modify line-voltage wiring, and you should not attempt it.
Table of Contents
- What You Need
- Tools and materials for the job
- Check your system type before anything else
- Step-by-Step Smart Thermostat Installation
- Do You Have the Correct Wiring?
- What If You Do Not Have a C-Wire?
- How to Mount, Connect, and Configure the Thermostat
- How to Test Heating and Cooling
- Common Mistakes
- Skipping the compatibility check
- Guessing at unlabeled wires
- Powering off the wrong circuit
- Using an incompatible C-wire adapter
- Forcing wires into terminals
- Leaving the base plate crooked
- Skipping equipment setup in the app
- Testing too soon, or testing only one mode
- Frequently Asked Questions
- Do I need an electrician or HVAC professional to install a smart thermostat?
- How long does smart thermostat installation usually take?
- Can I install a smart thermostat if my old one has no C-wire?
- Can I reuse the wiring from my old thermostat?
- Why is my new smart thermostat blank or failing to connect to Wi-Fi?
- Can I rent a smart thermostat or do I need to own one?
- Conclusion
What You Need
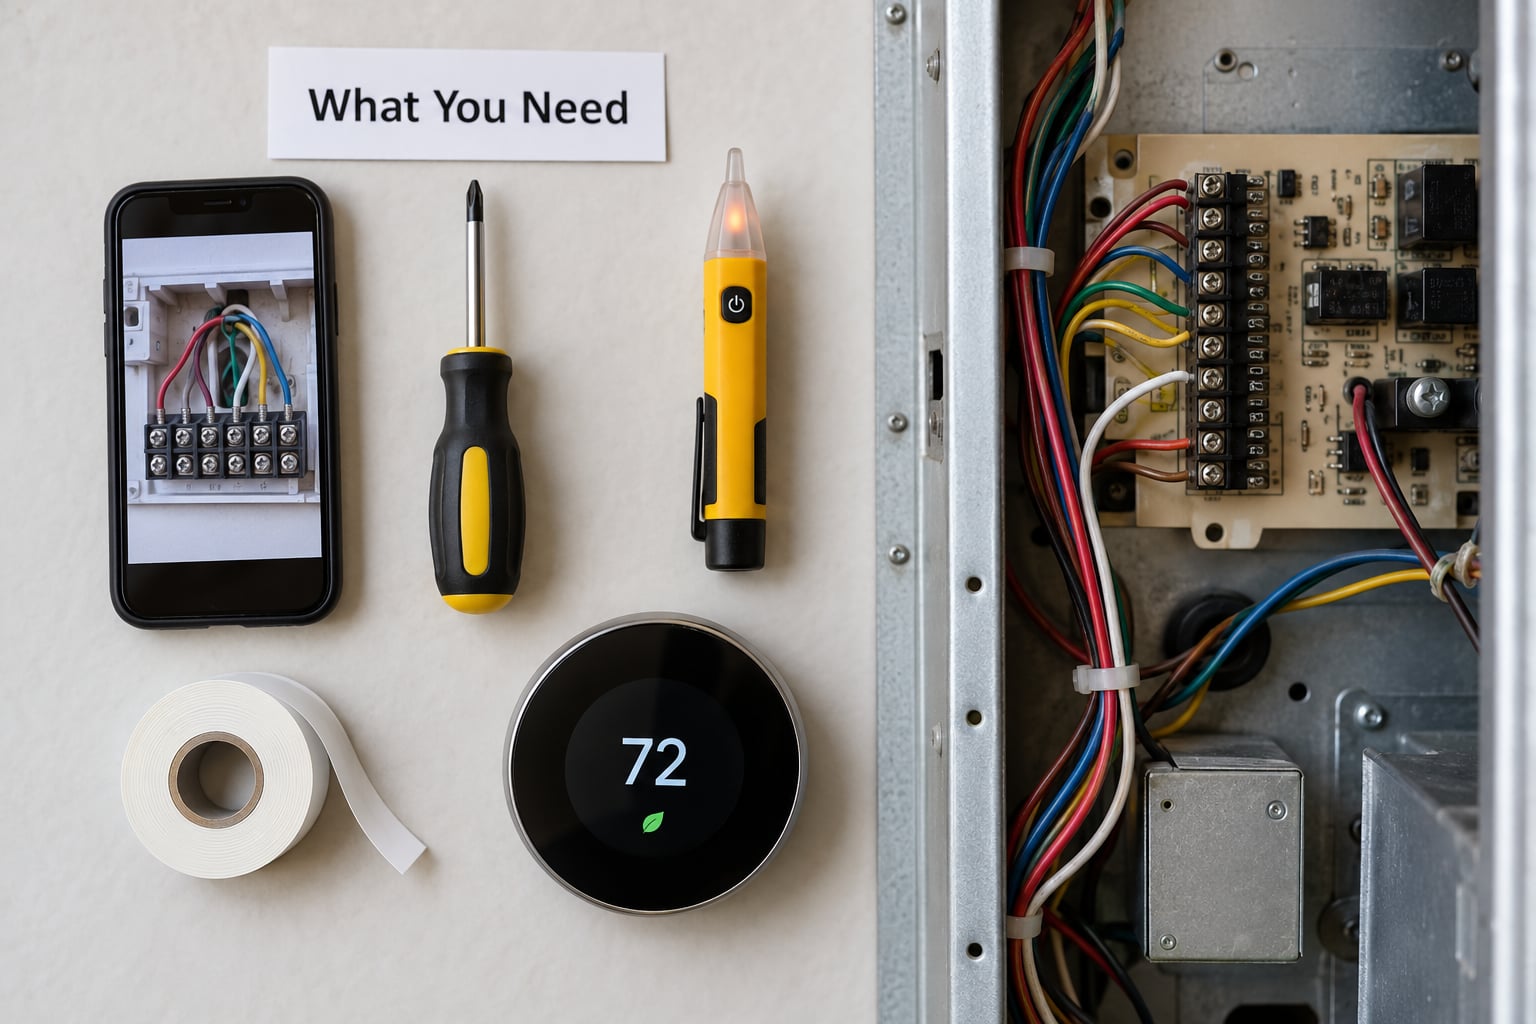
Start with documents, not tools. Every smart thermostat manufacturer publishes a wiring diagram keyed to their terminal layout, and HVAC equipment makers put an installation manual on the unit itself. Read both and confirm your system appears in them before you buy anything.
The second document is your system type. You can get it from the model and serial plate on the furnace, air handler, or boiler, usually on a side or the door frame of the equipment. Photograph that plate — you will need the model number when running the manufacturer’s compatibility checker.
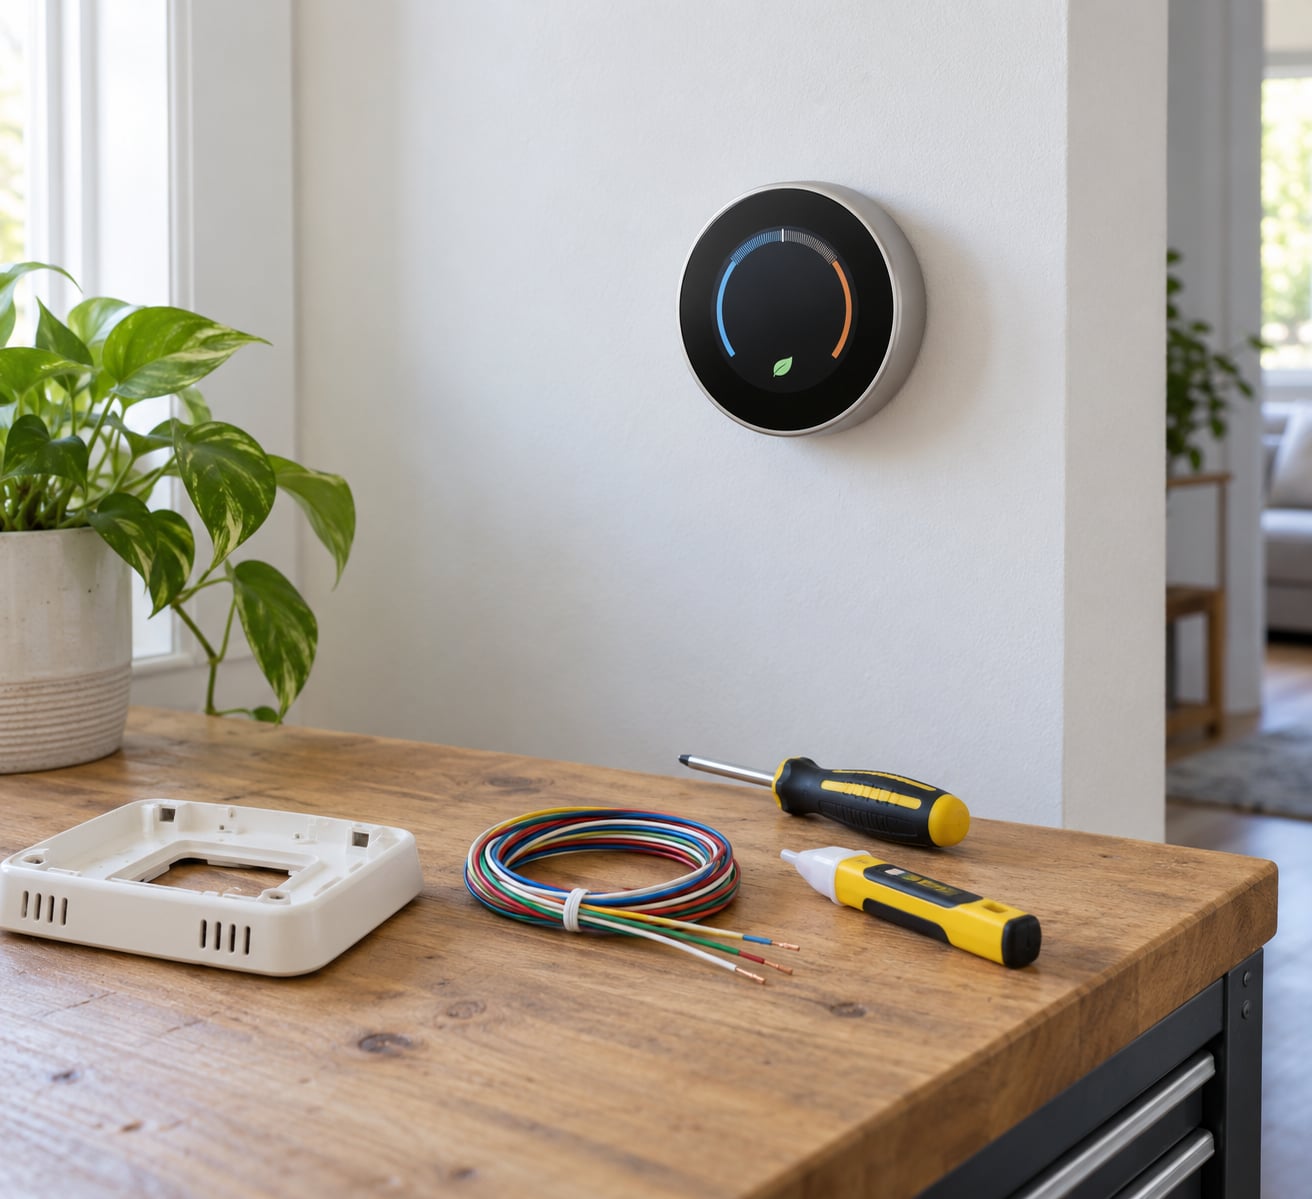
Tools and materials for the job
- A phone or camera for photographing the existing wiring before it comes off the wall
- A flat and a Phillips screwdriver
- Wire label tape or small sticky notes, plus a pen
- A non-contact voltage tester, and a multimeter if you have one
- Wire strippers and small needle-nose pliers
- A flashlight, a pencil, and a level for the base plate
- Drill and anchors only if you are moving the unit to a new stud location
- The power adapter supplied with the thermostat, if your system lacks a C-wire
Check your system type before anything else
This table is the compatibility gate. If your row says a professional is advisable, that is not a suggestion — it is a wiring-safety judgment.
| System type | Existing thermostat wiring | Power source needed | Professional advisable? |
|---|---|---|---|
| Central forced air (gas or electric furnace with central air) | Low-voltage 18 AWG, usually a bundle of colored wires at the thermostat | 24V transformer with a C-wire, or a listed power adapter | Usually no, if the C-wire checks out |
| Heat pump | Low voltage, with an added reversing-valve wire and often emergency heat | 24V transformer with a C-wire | Yes if the model is unfamiliar to you; wiring errors can strand the emergency heat |
| Zoned system (two or more thermostats on separate dampers) | Low voltage at each zone, plus an Aquastat or system controller | Each zone needs its own C connection or power connector | Yes — do not tie zones together at the Aquastat |
| Boiler or hydronic system with air handler | Low voltage, sometimes with legacy A, B, C, D terminals | 24V transformer with a C-wire | Yes for legacy terminal conversions |
| Legacy millivolt hydronic system | Very thin control wire, older than a smartphone | None available — the system makes its own millivolts | Yes, no exceptions |
| Mini-split or ductless head | Low voltage from the indoor unit, sometimes a dedicated control cable | 24V, often requiring the manufacturer’s interface or adapter | Yes unless the indoor unit exposes a standard C terminal |
| Line-voltage radiant or baseboard heat, or a 120-240V fan coil | Heavier wire, 10 to 14 AWG, no low-voltage control bundle | Mains power at the device | Yes — stop here, this is electrical work |
Two hard safety rules belong at the top of this page. First, never modify line-voltage wiring, and never open an energized control panel. Second, if you lift the old thermostat cover and see a high-voltage warning label, put the cover back down and call a licensed electrician.
Step-by-Step Smart Thermostat Installation
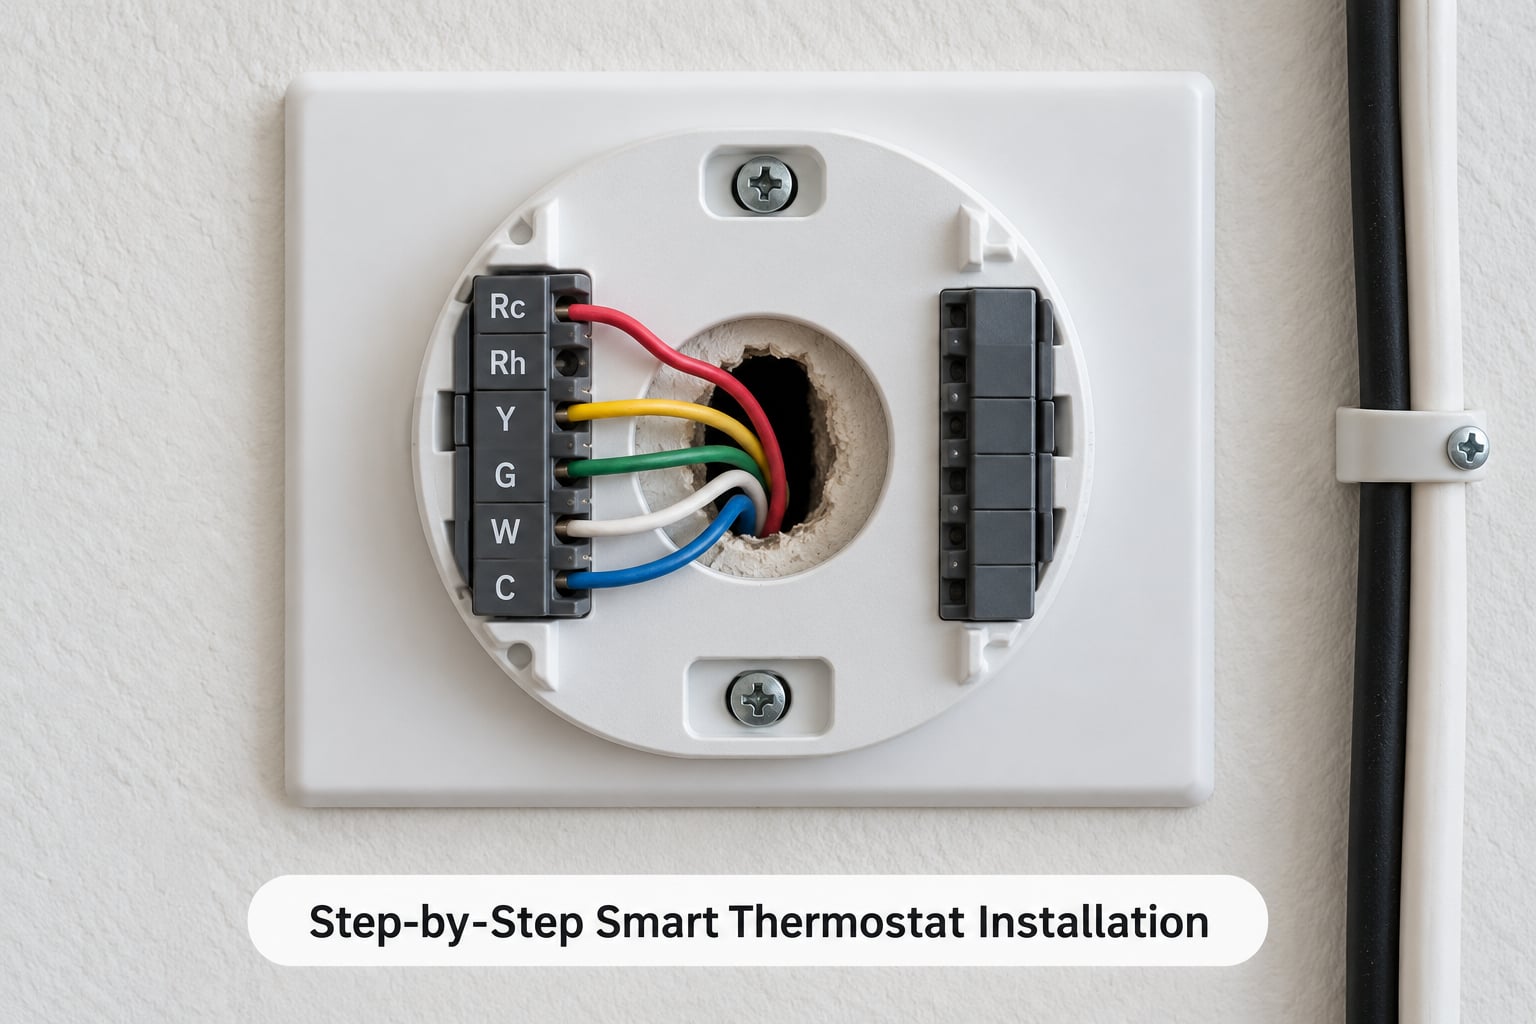
Work in this order. Each step below has an observable sign that it worked — check the sign before moving on, because backtracking a completed stage costs more time than pausing costs nothing.
- Photograph the existing wiring in place. Take two or three close-ups before you disconnect anything, including the model plate on the equipment. This photograph is what you will consult if a terminal is mislabeled.
- Confirm compatibility. Run your system model through the thermostat maker’s compatibility checker and read their wiring guide for your configuration. If your configuration is not listed, stop here rather than improvising.
- Identify the equipment breaker and turn it off. Open the panel, find the breaker serving the furnace or air handler, and switch it fully off. Verify with a non-contact voltage tester held near the wires inside the thermostat wall plate.
- Remove the old faceplate. Pull the cover straight off, then unscrew the mounting plate from the wall. Bring the wires forward gently — do not yank. If the wires tug or feel stiff, they may be stapled inside the wall.
- Label every wire while it is still attached. Write the letter printed next to each terminal on a strip of tape and stick it to that wire. This is the step most people skip and the one that makes reassembly possible.
- Mount the new base plate. Thread the wires through the center opening and screw the plate to the stud or anchor. Check it with a level before tightening. A crooked base shows on the display permanently.
- Land each wire on its matching terminal. Strip only enough copper to fill the terminal, no bare copper past the clamp, and tug gently to confirm the wire is seated. If you are using a power adapter, connect it to the C terminal at this stage.
- Restore power and attach the display. Switch the breaker back on, then snap or screw the display onto the base according to the manufacturer’s instructions. The screen should light within a few seconds.
- Complete app setup, then test heat and cooling separately. Follow the startup sequence on the device, connect to your Wi-Fi network, select your equipment type, build a schedule, and then run each mode independently to confirm the system responds.
Stop and reassess if any of these turn out to be true: the existing wires are unlabeled and you cannot identify them, the old plate was covering a high-voltage warning label, a wire is damaged, corroded, or bare beyond the insulation, or your system type does not match any row in the table above.
Do You Have the Correct Wiring?
Thermostat terminals are labeled with letters, and those letters map to what each wire actually does. Colors are a convention, not a guarantee — installers reuse wire, and later repairs replace one wire at a time, so trust the letter printed next to the terminal over the color of the insulation.
| Terminal | Typical wire color | What it does | What it drives |
|---|---|---|---|
| R | Red | 24V power from the equipment transformer, used when heat and cooling share one power wire | Powers the thermostat and the control circuit |
| Rc | Red | 24V power specifically for cooling, used in cooling-only systems | Powers the thermostat in cooling mode |
| Rh | Red | 24V power specifically for heating, used in heating-only systems | Powers the thermostat in heating mode |
| C | Blue | The common wire, completing the 24V circuit so the thermostat has continuous power | Screen, Wi-Fi radio, and internal electronics |
| W or W1 / W2 | White | Call for heat, sometimes split into stages on two-stage equipment | Furnace or boiler heating stages |
| Y or Y1 / Y2 | Yellow | Call for cooling, split on two-stage or multi-stage air conditioning | Air conditioner compressor stages |
| G | Green | Fan control | Air handler blower, used with continuous fan settings |
| O / B | Orange, or blue in some panels | Reversing valve command on heat pumps, and an older convention for the second stage of heat | Heat pump reversing valve, or second heat stage |
Do not guess. Do not bridge a terminal, jumper two terminals together, or repurpose a wire you cannot positively identify, because each of those can damage the control board, the compressor, or the transformer. If your existing terminals are labeled with letters such as A, B, C, D, you have a legacy panel and that conversion is not a beginner job.
How many wires you need also depends on the equipment: a basic heating-only system might use as few as two or three, a standard central air setup uses four or five, and heat pumps, two-stage equipment, and humidification add more.
What If You Do Not Have a C-Wire?
A smart thermostat needs steady 24V power to keep its screen and Wi-Fi radio running. Many older thermostats worked fine without a C-wire because they only needed power when a heating or cooling call came in. A smart thermostat never gets that luxury — it is awake at all times, so without continuous power it will shut down, lose Wi-Fi, or refuse to connect.
If you open the cover and see no C or blue terminal, you have two realistic paths:
- Run a new wire. A technician or electrician pulls a dedicated wire from the equipment to the thermostat location and lands it on the C terminal at both ends. This is the cleanest solution, and it is the only one that works on every equipment brand. It means opening the furnace cabinet, so it is not a pure DIY job in most homes.
- Use a manufacturer-supplied power adapter. The adapter plugs into an available terminal at the thermostat and reaches an outlet nearby, deriving the missing C connection from an existing wire. It must be the adapter made or approved for your thermostat model. Generic adapters, or repurposing the G wire as a C, are the source of most failed installs reported by homeowners.
There is a third option you will read about online: using an existing wire as the C-wire. It works in some specific systems with a specific adapter, and it is genuinely risky to guess at, because taking over a wire that the equipment still needs can disable cooling or the fan. If your system has exactly the terminals a listed adapter is designed for, that is fine; if you are inferring it, do not.
One forum failure mode comes up repeatedly enough to name: a C-wire present at the thermostat but never connected at the air handler or furnace. The app reports a missing C-wire even though you can see the wire on the wall end. That means the wire needs landing at the equipment end too.
How to Mount, Connect, and Configure the Thermostat
With power off and the base plate level, pull each labeled wire to the matching terminal on the new base and strip about a quarter inch of insulation. Leave no bare copper beyond the clamp, because a strand bridging two terminals is a short. If the terminal is a screw type, tighten until secure without stripping the screw head; if it is a pin type, press until it clicks.
Attach the display according to the manufacturer’s instructions, then restore the breaker. The thermostat boots and prompts you to pick a language and connect to Wi-Fi. Smart thermostat setup means walking through this on-device flow: connect the display to your 2.4 GHz network, create or join the household account in the app, and give the app permission to send notifications.
Two setup fields matter more than the rest. Choose your equipment correctly — heat pump versus furnace, single stage versus two stage — because the app uses it to make the right calls, and a wrong selection leads to short cycling. Then build the schedule: set a wake temperature, a setback temperature, and the times that actually match your household, rather than accepting the default.
Also set the temperature calibration offset if the room reads a degree or two warmer than a manual thermometer, pair any remote or room sensors within range, and turn on away or eco mode so the house drops back when nobody is home. Give a learning thermostat at least a week before hand-tuning it; it learns your rhythm from real occupancy, and manual overrides in the first few days just confuse it.
How to Test Heating and Cooling
Testing means running each mode on its own, not just watching the screen. Set the thermostat to cool with a setpoint well below room temperature, then go to the system and confirm the blower starts and the outdoor unit comes on. Then set to heat with a setpoint well above room temperature and confirm the same for the furnace or heat pump.
You do not need to open anything energized to confirm this. Listen at the register nearest the thermostat, stand near the indoor unit, or watch for the sound of the fan starting. Many apps also show the system state in real time, which is the easiest confirmation if you have one.
If a mode does not respond, go back to the terminal letters before touching anything else — a wire on Y that should be on O, or a reversed R and Rc, produces exactly this symptom. Confirm the app shows the thermostat online before you close up, since an offline display usually means a power problem rather than a wiring problem.
Common Mistakes
Most of these are avoidable and all of them are common. Here is what goes wrong, why, and what to do instead.
Skipping the compatibility check
Buying first and checking later is the single most expensive mistake, because the thermostat is often non-returnable once opened. Check the equipment model against the manufacturer’s compatibility list before purchase, not after.
Guessing at unlabeled wires
If the wires are unlabeled, you have three choices: look them up at the equipment end where they are usually still labeled, use a wire-detection method your meter supports, or call someone qualified. Never connect a wire just because it is the only one left over.
Powering off the wrong circuit
The thermostat itself is on the same circuit as low-voltage lighting in some homes, and cutting power at the wall switch does nothing. Find the equipment breaker at the panel — the furnace and air handler breaker is often labeled as a double breaker — and confirm with a non-contact voltage tester.
Using an incompatible C-wire adapter
Adapters are model-specific, and repurposing the G wire as a C will cost you your fan control. Use the adapter supplied with your thermostat, and if you are considering an alternate terminal, check that the equipment does not need that wire for something else.
Forcing wires into terminals
Stripped copper that extends past the clamp bridges terminals and blows a fuse or damages the board. Strip less than you think you need, and tug each wire after landing it to confirm it is seated. Wires with stiff or discolored insulation should be cut back to bright copper.
Leaving the base plate crooked
The display is not adjustable. Level the plate before the final screw, and use the template that came in the box if you are mounting on a fresh location.
Skipping equipment setup in the app
If you never tell the app you have a heat pump or two-stage equipment, it will make the wrong calls and the system will short-cycle or run the emergency heat constantly. Complete the equipment selection before you build the schedule.
Testing too soon, or testing only one mode
Wait for the startup sequence to finish before touching settings, and test heating and cooling independently. A system that heats fine and never cools usually means a mislanded Y wire; the reverse points at W.
Two habits prevent most of these. Before restoring power, recheck every terminal against the photograph you took and against the manufacturer’s wiring guide. After setup, run both modes before you put the furniture back where it was, so a fix does not mean moving the base plate again.
Frequently Asked Questions
Do I need an electrician or HVAC professional to install a smart thermostat?
You can do it yourself when your system is 24V low voltage, the wires are labeled, and a C-wire or approved adapter supplies continuous power. Hire an HVAC technician for line-voltage systems, heat pumps, zoned setups, boilers, mini-splits, and legacy millivolt systems. Call an electrician specifically when line-voltage wiring is involved, since a thermostat install on a 120-240V system is electrical work.
How long does smart thermostat installation usually take?
A straightforward swap on a conventional 24V system with a C-wire takes 30 to 60 minutes for most homeowners, plus another 15 minutes or so for app setup and scheduling. Add time for labelling wires properly, which is slower than it looks. If the wiring is unlabeled, the system is a heat pump or zoned setup, or a new wire has to be run from the equipment, expect a professional to spend considerably longer.
Can I install a smart thermostat if my old one has no C-wire?
Usually yes, but not without solving the power question first. Your two options are having a technician run a dedicated wire from the equipment to the C terminal, or using the manufacturer-supplied power adapter at the thermostat. Some homes also work with a listed adapter that repurposes an existing terminal, but only for specific equipment. Randomly assigning another wire to C can disable the fan or cooling.
Can I reuse the wiring from my old thermostat?
In most central 24V systems, yes — the low-voltage wires between the thermostat and the equipment stay exactly as they are, and you only move them to matching terminals on the new base. The exception is a legacy panel with A, B, C, D terminals, which must be converted to modern R, W, Y, G, and C labels. If your old thermostat was line voltage, millivolt, or a 240V baseboard controller, the wiring is not reusable.
Why is my new smart thermostat blank or failing to connect to Wi-Fi?
A blank or restarting screen almost always means it is not getting continuous 24V power, which points to a missing, mislanded, or unlanded C-wire. A thermostat that powers on but will not join the network is usually a Wi-Fi issue: most smart thermostats only join 2.4 GHz networks, and the signal at that wall may be weak. Move the router, add a mesh node, or separate the network name before rewiring anything.
Can I rent a smart thermostat or do I need to own one?
You are not usually buying the hardware — you are buying the service, and the account stays with you when you move, so most smart thermostats transfer to a new home by signing in. Two things are landlord territory: the wiring and the equipment. Ask before modifying anything electrical, and check whether your building controls the heating and cooling centrally, in which case your unit may only be a display.
Conclusion
Take one photo of the wiring behind your existing thermostat, then use it to answer two questions: is your system 24-volt low voltage, and does a C-wire actually reach the equipment? If both answers are clear and the wires are labeled, this is a comfortable afternoon job for any handy homeowner with a screwdriver and the manufacturer’s wiring guide in hand.
If the wiring is unlabeled, the system is a heat pump, a boiler, a zoned setup, or line voltage, or you would rather not have a half-finished job over your head in January, hire a licensed HVAC technician. And if line-voltage power is involved at any point, that is an electrician’s work, not a thermostat install.