Bleeding a radiator takes about a minute per unit and needs almost nothing: fit a small square key to the bleed valve at the top, open it a quarter turn counter-clockwise, let the trapped air hiss out, then close it the moment water appears. This guide covers home central-heating radiators — the ones fed by a boiler or hot water tank — not car engines.
Bleeding is the maintenance job homeowners put off longest and regret most in January. Air collects at the highest point of the system and forms a plug that stops hot water moving through, so the radiator warms at the bottom and stays stone cold up top. The boiler keeps firing, the rooms stay chilly, and the gas bill climbs for nothing.
It is free to do, it needs no plumbing experience, and the whole job takes longer than finding the radiator key in a drawer. Here is the method I would use, including what to do when the valve refuses to move.
Table of Contents
- What You Need
- How to bleed a radiator without a key
- Radiators you cannot bleed by the book method
- Step-by-Step: How to Bleed a Radiator
- 1. Turn Off or Adjust the Heating System
- 2. Let the Radiator Cool and Prepare for Water
- 3. Open the Bleed Valve Slowly
- 4. Release Air and Watch the Water
- 5. Close the Valve and Refill the System
- 6. Check That the Radiator Heats Evenly
- Common Mistakes
- What to do when the bleed valve is stuck
- Frequently Asked Questions
- Do you bleed radiators with the heating on or off?
- When you bleed a radiator, do you let all the water out?
- Can you bleed a radiator by yourself?
- How do you free a seized radiator bleed valve?
- Does bleeding one radiator bleed them all?
- What should I do if my radiator is still cold after bleeding?
What You Need
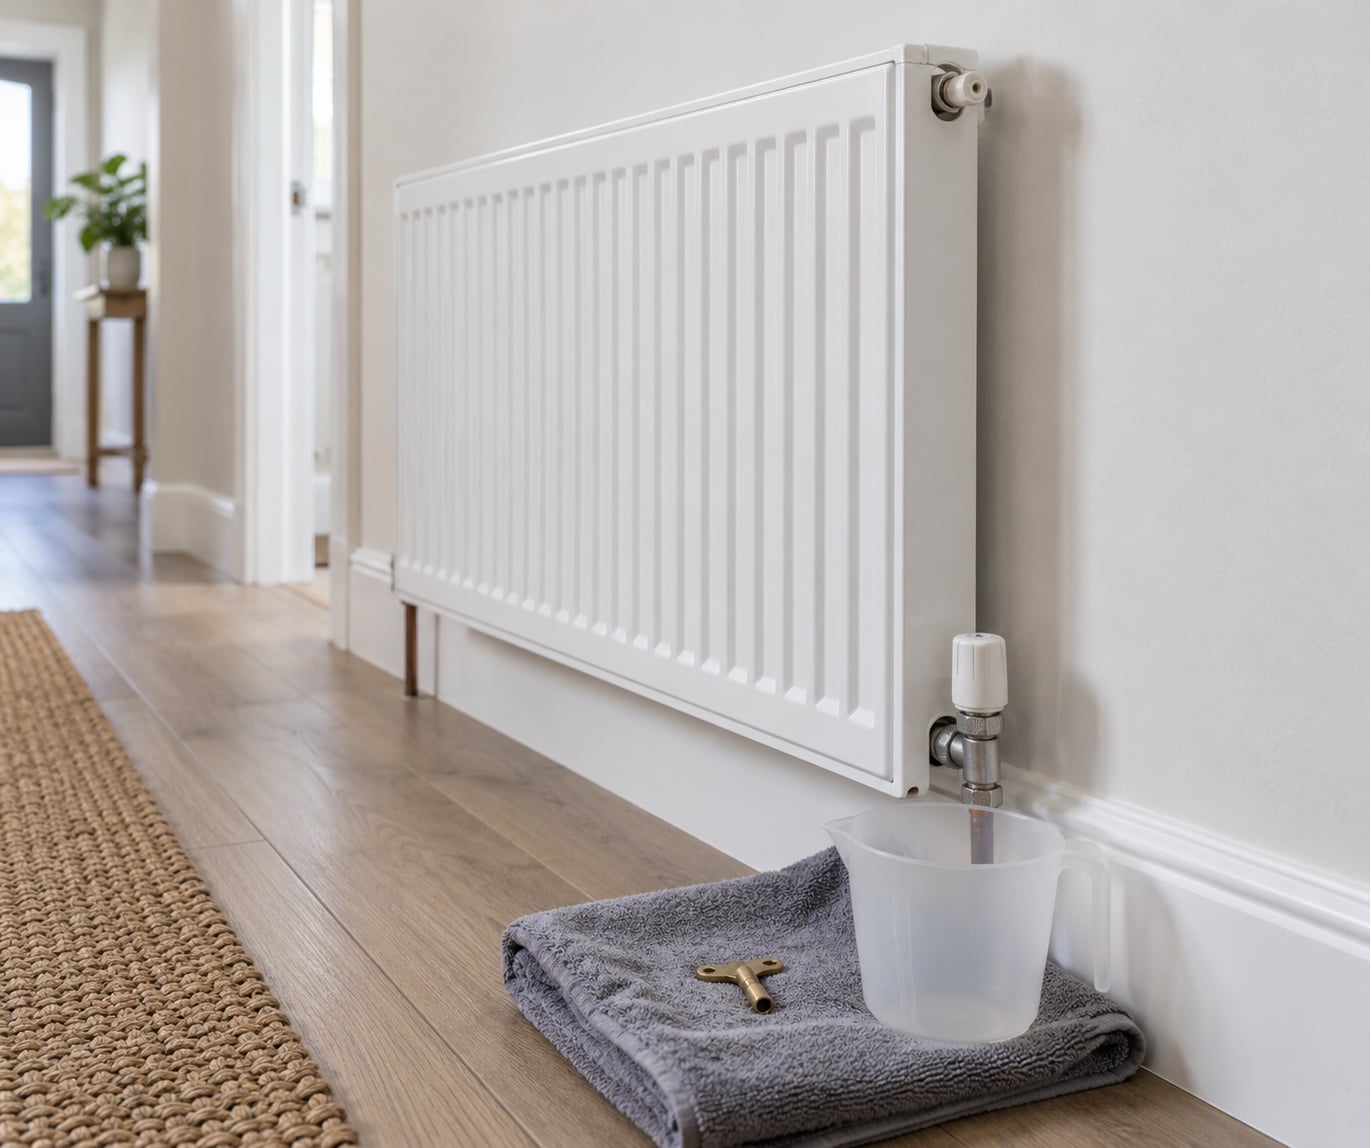
Most homes can bleed a radiator with what is already in a kitchen drawer:
- A radiator bleed key — the small plastic or metal tool with a square head that fits over the bleed valve. This is the correct tool and the cheapest fix for a valve that resists.
- A flat-head screwdriver — a sturdy one that fits the square slot. This is the common substitute when the key is lost.
- An adjustable wrench — for stubborn valves, once you have removed the plastic cap for grip.
- An old towel or rag — folded and draped under the valve, or spread on the floor beneath the radiator.
- A small jug, cup or plastic container — to catch the drips and the first burst of water. A washing-up bowl works if the container is awkward to get under the valve.
- Penetrating oil or WD-40 — only if the valve turns hard, sprayed into the joint before you force anything.
Avoid thin or hollow-bladed screwdrivers here. The bleed valve is a small hardened square nipple, and a screwdriver that slips under pressure will chew the corners and leave you with a valve that cannot be opened at all.
How to bleed a radiator without a key
A flat-head screwdriver is the usual stand-in. Fit it squarely into the bleed valve, turn counter-clockwise and open it only about a quarter turn, then close it in the same way. Needle-nose pliers or an adjustable wrench grip the square directly and give you more leverage, but the same warning applies: quarter turns only, and stop the moment the valve moves freely.
Radiators you cannot bleed by the book method
Some modern panel radiators and smart or electric systems have no bleed valve fitted, or hide it behind a removable plastic end panel or under a skirt. If you cannot find a small square valve at the top corner after removing the caps, do not force anything. On a concealed panel valve, unscrew the small blanking plug on the panel face and bleed through that opening instead.
Step-by-Step: How to Bleed a Radiator
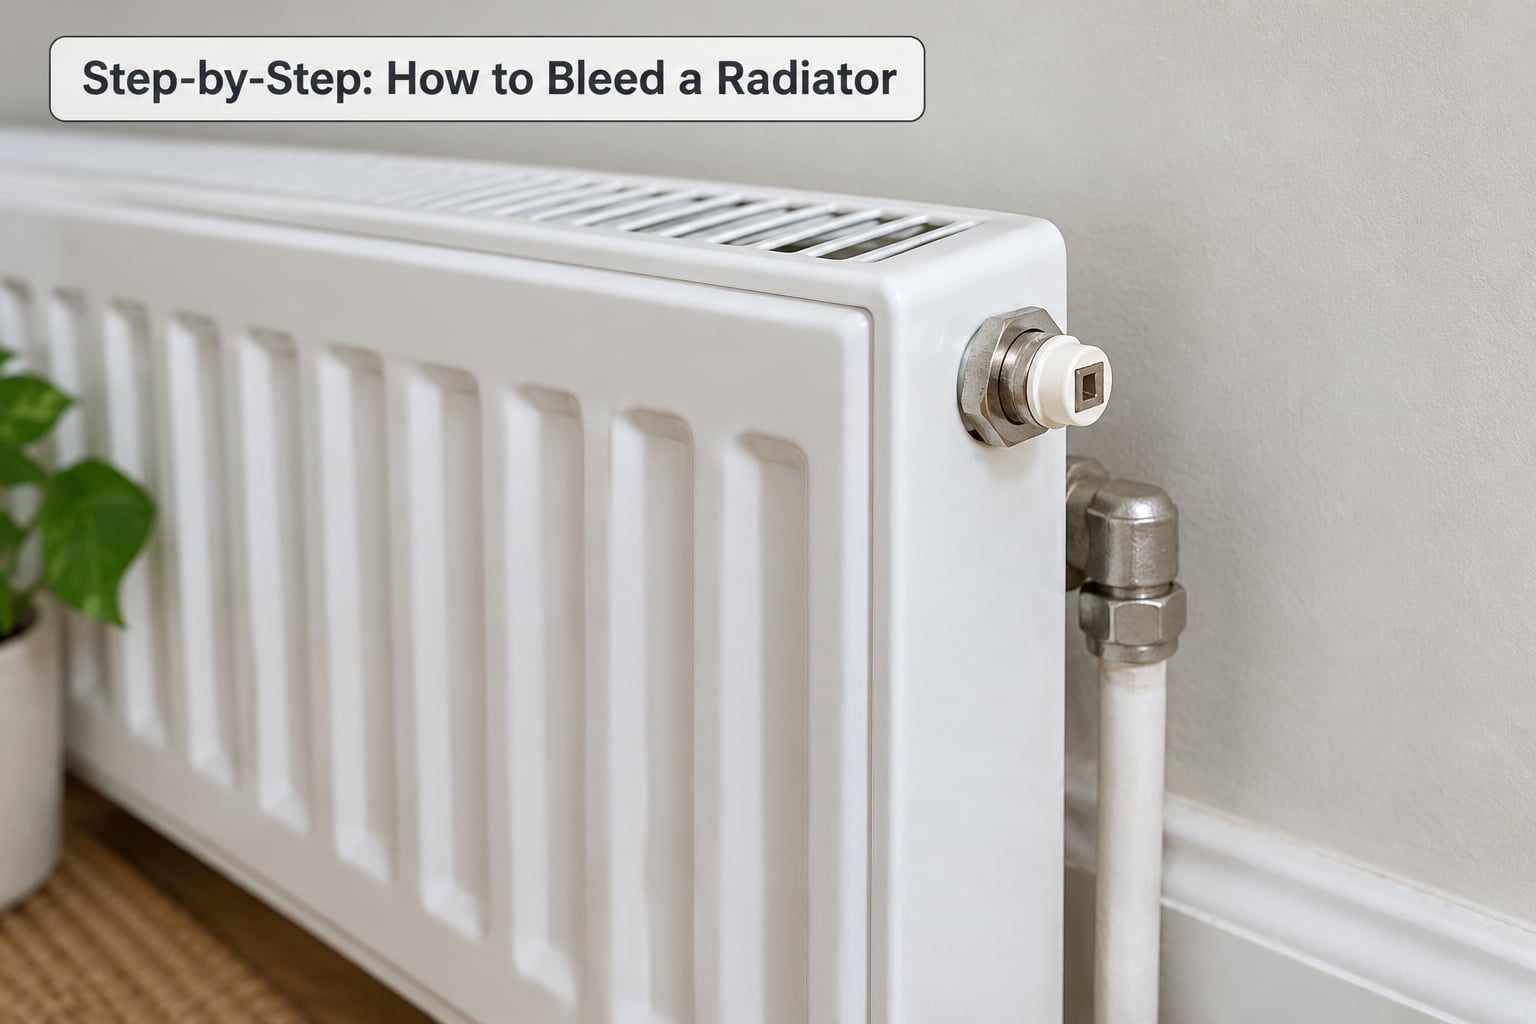
1. Turn Off or Adjust the Heating System
Switch the heating off at the boiler or the programmer and let the system settle for 15 to 20 minutes. This is the method most guides use, and it is the safer of the two options because the water is cooler and the system is no longer pushing water around.
The alternative is to run the heating until everything is warm, then turn it off and bleed immediately, while the system is still fully pressurised. This pushes air to the highest points faster, so it clears a stubborn air lock in one pass, but it means opening valves on genuinely hot radiators. Whichever you pick, read the pressure gauge on the boiler before you start so you know what number you are working from.
Start with the radiator furthest from the boiler and work back towards it, opening each valve as you go. Air travels towards the highest, most distant point, so this order lets each release push trapped air onward instead of back into the radiator you just finished. If the furthest radiator also happens to be the lowest in the house, both rules point at the same unit.
2. Let the Radiator Cool and Prepare for Water
Give the system long enough that the radiator is warm rather than dangerously hot. Working on a radiator that has been at full temperature risks scalding your hands and flooding the floor when the valve opens.
Fold the towel and wedge it under the valve with the jug beneath the low point, or lay the towel flat on the floor under the whole radiator. Water will run down the pipework and drip from the bottom connection as well as from the valve, so cover the floor, not just the valve. Keep the jug inside the towel’s edge so anything that runs down gets caught.
3. Open the Bleed Valve Slowly
Find the bleed valve at the top corner of the radiator — a small square or hex-shaped nipple sitting inside a round nut, usually with a plastic cap over it. Pull the cap off, fit the bleed key or screwdriver, and turn counter-clockwise.
A quarter turn is enough. Open it a fraction, listen, then open a little more. If you crack it wide open on a system that has just run hot, the expanding water can push a surprising volume out in seconds, and a small key does not close instantly.
4. Release Air and Watch the Water
Trapped air announces itself as a hiss, then a splutter or gurgle, sometimes followed by a burst of cloudy water. That hiss is the trapped air escaping. The transition you are waiting for is a change from gas noise to a steady stream of liquid water at the valve.
Close the valve the instant water appears, not a second later. A short, controlled release of air is the whole job. Let it run until the hiss stops, then close it gently and firmly.
5. Close the Valve and Refill the System
Turn the valve back clockwise until it is snug and the square stops turning freely. Do not crank it tight. Bleed valves are small and they are the most common thing to shear off on a DIY job, and the cost of a plumber replacing a snapped valve far outweighs a slightly loose one.
Move to the next radiator and repeat. Bleeding pushes water out of the system, so pressure drops as you go, and the gauge on the boiler is your running scoreboard. Keep bleeding until you reach the last radiator, then check the reading.
- Cold system, heating off: aim for 1.0 to 1.5 bar on most boilers.
- System hot and heating running: around 2 bar is normal.
- Below the cold range: top it up through the filling loop — a small hose and tap either under the boiler or on the cold pipework — open the tap slowly, let the boiler top up, then close it and recheck.
If the gauge sits above the range on the manufacturer’s label, or the pressure climbs steadily with the heating off, do not bleed to bring it down. That points to a fault or an expansion vessel problem, and it is an engineer job.
6. Check That the Radiator Heats Evenly
Turn the heating back on, set all the radiator valves to full, and wait 20 to 30 minutes. Hold your hand halfway up the panel. A properly bled radiator is warm from the top corner to the bottom, with no cool band and no delay before the heat arrives.
If the top is still cold, there is more air trapped, so bleed it a second time. If the bottom is cold but the top is hot, air is not the problem — that pattern is sludge and debris settled in the bottom of the radiator, and no amount of bleeding will fix it. If the radiator stays completely cold, check that the thermostatic radiator valve is actually open and its pin is not stuck in the valve body.
As a seasonal habit, run through every radiator in the house at the start of the cold months, even the ones that seem fine. Air locks spread as the system cools down and contracts, and the radiator that is fine today is the one that is gurgling next February.
Common Mistakes
Nearly every radiator problem I have been asked about traces back to one of these:
- Using pliers or a wrench on the plastic cap instead of the square. The cap is a dust cover, not a grip. Turning it just breaks it off and leaves a mess. Remove it, then work on the square underneath.
- Opening the valve more than a quarter turn. A bleed valve is a metering device, not a tap. It should never be left wide open, and the flow should be a trickle you control, not a gush.
- Ignoring system pressure while bleeding. Six radiators open in turn can drop the gauge well below range. Check the boiler gauge after every two or three and top up through the filling loop before you carry on.
- Over-tightening on close. Snug is enough. A seized-looking valve that has been overtightened often needs a plumber with a pipe wrench to remove.
- Bleeding one radiator and stopping. Air is pushed along the circuit as you bleed, so a single radiator rarely clears the system. Work through the whole run from furthest to nearest.
- Forcing a valve that will not turn. This is the one that turns a five-minute job into a replacement job.
- Assuming a cold radiator is always an air lock. Cold at the top is air. Cold at the bottom is sludge. Cold everywhere is a valve, a balance issue or a leak.
- Bleeding a heated towel rail without checking what powers it. Water-fed towel rails bleed like any radiator. Electric rails have no circuit to bleed, and opening anything on them is pointless.
What to do when the bleed valve is stuck
If the valve will not move, work up this ladder and stop at the first rung that frees it. Never jump to the wrench.
- Spray penetrating oil into the joint where the valve meets the radiator, not just onto the cap, and leave it for 15 to 30 minutes. Paint and corrosion around the base of the bleed screw is usually what is locking it, and the oil needs time to work into that gap.
- Scrape or pick away the dried paint and corrosion around the base of the square with a thin blade, so the lubricant can actually reach the threads.
- Remove the plastic cap completely for better purchase. Even with a key fitted, gripping the bare square with pliers or an adjustable wrench gives you the leverage that the moulded cap never will.
- Apply gentle heat to the outer metal fitting with a small torch or heat gun, never to the inner plug, let it cool, then try again. Expansion is often enough to break the corrosion bond.
- Grip the square with an adjustable wrench and turn anti-clockwise with steady, light pressure. If it does not give, the square is rounding off.
- Replace the valve. A rounded or snapped square nipple means the valve has to come out. On a system you are not pressurising, that is straightforward; on a live system, call a licensed heating engineer.
On a gas boiler, anything beyond bleeding — a valve replacement, a leak, a pressure that will not hold, a boiler that keeps locking out — belongs with a licensed heating contractor. In the UK that means a Gas Safe registered engineer. Bleeding itself is a homeowner job; taking the boiler apart is not.
Frequently Asked Questions
Do you bleed radiators with the heating on or off?
Either works, and both are widely used. Turning the heating off first is the safer option because the water is cooler and nothing is moving through the system. Running the heating until every radiator is warm, then switching it off and bleeding straight away, is faster at clearing a stubborn air lock because the system is still fully pressurised. Read your boiler pressure gauge before you start either way.
When you bleed a radiator, do you let all the water out?
No. You are removing air, not draining the radiator. Open the valve a quarter turn, let the hiss of escaping air stop, then close it as soon as a steady stream of water appears. If you empty the radiator you have to refill and repressurise the whole system by hand, and you will almost certainly lose more water and pressure than the air you removed.
Can you bleed a radiator by yourself?
Yes. It is a one-person job and needs no plumbing experience — a bleed key or a flat-head screwdriver, a towel and a small container. Allow about 30 to 60 seconds per radiator once the system is off, plus 15 to 20 minutes of cooling time at the start. The one job worth doing with a second person is bleeding a large panel radiator over a stairwell.
How do you free a seized radiator bleed valve?
Work in order: spray penetrating oil into the joint and wait, scrape the paint and corrosion from the base of the valve, remove the plastic cap for extra grip, then apply gentle heat to the outer fitting only. After that, grip the square with pliers or an adjustable wrench and use light, steady pressure. If the square rounds off, the valve has to be replaced by a heating engineer.
Does bleeding one radiator bleed them all?
No, but bleeding is a system job, not a single-radiator job. Air gets pushed along the circuit as you bleed, so opening one valve clears that unit and can shift air into the next one along. Start with the radiator furthest from the boiler and work back towards it, checking the boiler pressure as you go, and you will only have to do the whole house once.
What should I do if my radiator is still cold after bleeding?
Work down the diagnosis. Cold at the top means air is still trapped, so bleed it a second time. Cold at the bottom with a hot top means sludge sitting in the panel, which only a flush will clear. Completely cold means check the thermostatic radiator valve is open and its pin is not stuck. No heat anywhere in the house is a boiler or pump fault for an engineer.
Start with the furthest radiator, work back towards the boiler, and keep the boiler gauge in view the whole time. Do the whole house in one pass at the start of the season and any time you hear gurgling, and you will not be troubleshooting a half-warm living room in the cold.
Stop at the first sign of trouble you cannot handle: a rounded bleed valve, a leak, a pressure reading that will not hold, or a boiler that needs touching. Bleeding a radiator is a homeowner job with a screwdriver. Everything past that is a licensed heating engineer’s.