Knowing how to clean air vents and registers is a 30-minute job for most homes: turn the system off at the thermostat, vacuum the grille, wipe it with a damp microfiber cloth, and wash the cover in lukewarm soapy water when the buildup is more than a light film. You never need to open the ductwork itself to get a good result.
The covers are the only part most homeowners ever touch, and they carry most of the visible grime. Dust that settles on a slat gets pulled back into the room every time the blower kicks on, so a dirty register quietly re-circulates the same allergens you just wiped off the shelf. Restricting airflow also makes the system run longer for the same temperature, and a rattling grille is often the first sign that something behind it has loosened.
A note on vocabulary before we start, because it saves a lot of confusion. A supply register is where conditioned air leaves the ductwork and blows into a room, and it is usually a small square or rectangular grille on a floor, wall or ceiling. A return air vent is the large grille that pulls room air back to the furnace or air handler, and it collects noticeably more dirt because it is designed to catch it. Bathroom and kitchen exhaust grilles belong to a separate fan entirely, and they respond to grease rather than dust.
Table of Contents
- What You Need Before You Clean Air Vents and Registers
- Step-by-Step: How to Clean Air Vents and Registers
- 1. Turn Off the HVAC System Before You Clean Air Vents and Registers
- 2. Remove and Vacuum the Vent Registers
- 3. Wash Removable Registers and Grilles
- 4. Clean the Inside of the Accessible Duct Opening
- 5. Reinstall the Vents and Restore the System
- Common Mistakes
- Frequently Asked Questions
- How often should I clean my air vents and registers?
- Does cleaning air vents help with dust and indoor air quality?
- How do I get caked dust out of vent slats?
- Can I clean inside the ductwork myself without professional equipment?
- Do I need an HVAC professional if I see mold or black specks near a vent?
- Does homeowners insurance cover air duct cleaning?
- Conclusion
What You Need Before You Clean Air Vents and Registers
Most people can do this with what is already in the closet. The list below is what actually gets used, and what you can skip.
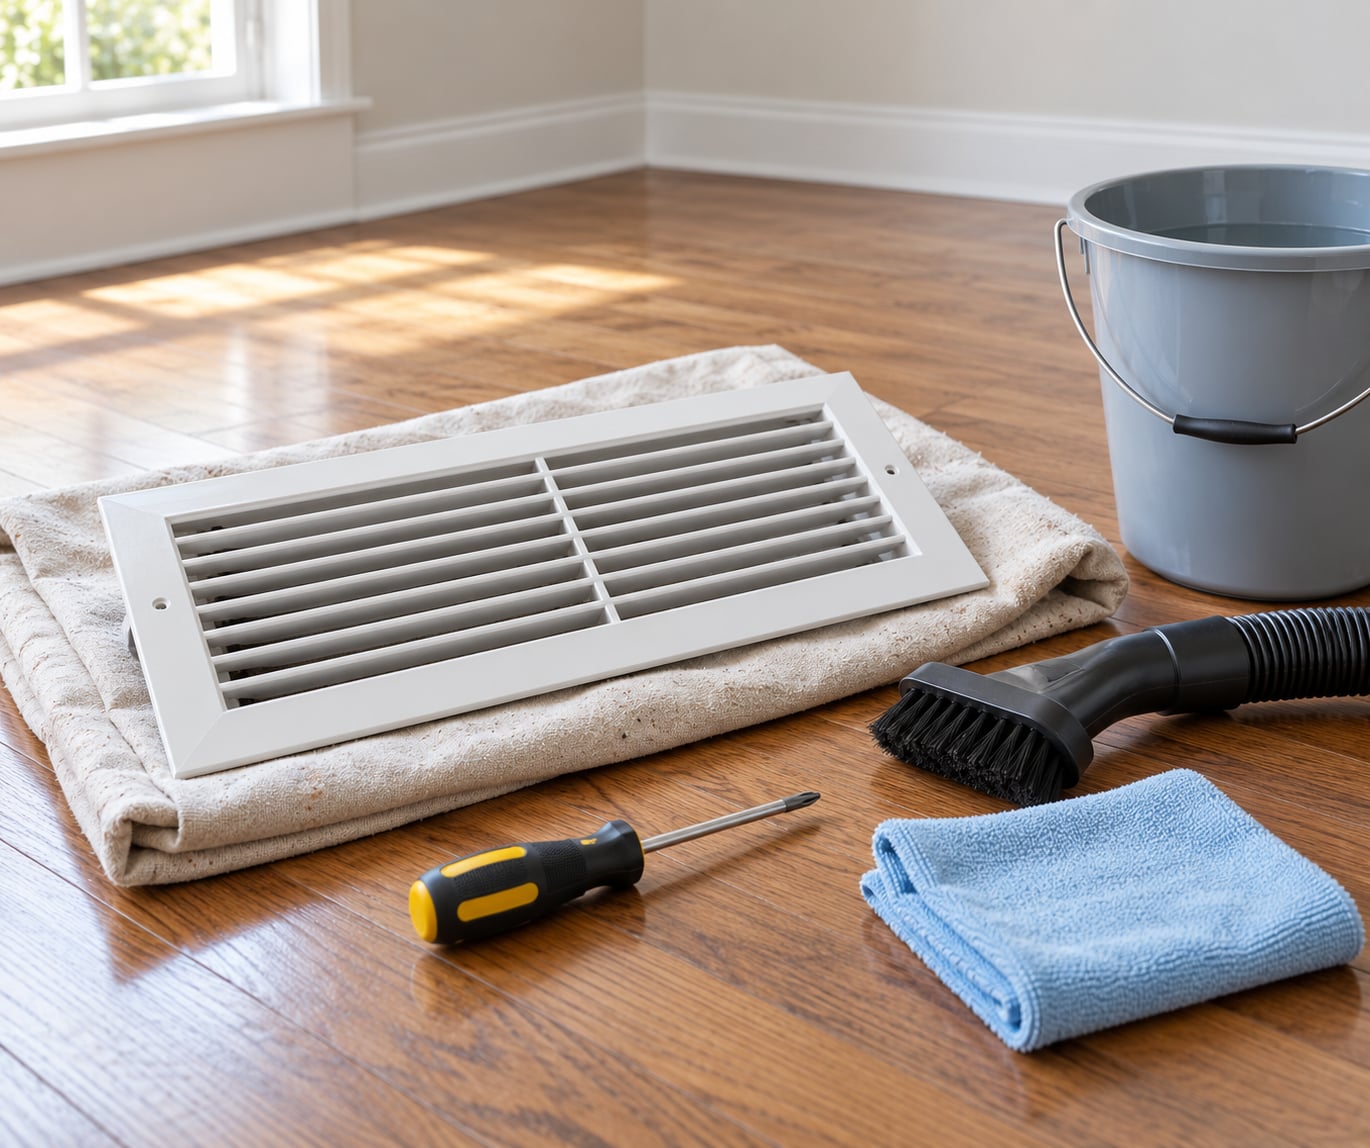
- A vacuum with a soft brush or crevice attachment. This does the real work. A bare hose nozzle leaves caked dust sitting in the corners of the slats, and a hard-bristle brush attachment can bend thin aluminum louvers.
- Microfiber cloths. One for the grille face, one for the duct lip, and a separate one for the wall around the vent so you do not scrub grime into the paint.
- Mild dish detergent and lukewarm water. That is all a wash needs. Hot water warps some plastic diffusers, and bleach or ammonia-based sprays are unnecessary on a surface you are about to touch with bare hands.
- A Phillips and a flat-blade screwdriver. Register screws are usually one of the two. Keep a magnetic tray or a folded strip of masking tape under the register to hold them.
- A flashlight or headlamp. You are looking up into a duct opening that gets no light at all, and that is where the surprises are.
- Work gloves and a drop cloth. Old dust is fine for skin but unpleasant to breathe, and a folded sheet under a ceiling vent catches everything that falls.
- A sturdy step stool. For anything above shoulder height.
Optional: an N95-style dust mask if your system has a lot of buildup or if anyone in the house has asthma, and a small nylon brush for the tight gaps between louvers. What you do not need is a pressure washer, a steam cleaner, a ladder taller than the job or any chemical cleaner. If a vent sits above a two-story drop, or if the register turns out to be wired to a fan or a damper that will not stay put, stop and call an HVAC technician. That is not a cleaning job anymore.
Step-by-Step: How to Clean Air Vents and Registers
The order matters more than the technique. Shutting the system down first, and drying the cover completely before it goes back up, are the two steps that separate a clean vent from a problem.
1. Turn Off the HVAC System Before You Clean Air Vents and Registers
Set the thermostat to off, then switch the fan from auto to on. Running the fan for a couple of minutes with the thermostat off loosens dust that has settled on the blower and the coil, and it stops the moment you go to work on the vents. After that, cut power at the breaker that serves the furnace or air handler. A cover near a live system is not worth the gamble over a few minutes of saved setup.
Now walk the house and identify what you have. Count the supply registers that blow air into rooms, then find the return grilles, which are almost always on an interior wall near the furnace. Note the return vents separately, because they need a heavier vacuum pass and a wet wipe. Mark the bathroom and kitchen exhaust grilles too, but treat them as a different job.
Look at each cover before you touch it. You are checking for three things: visible mold, water staining or a warped panel that suggests condensation damage; pests or nesting material in the opening; and screws that will not turn or a cover that rattles in the wall. Any of those means stop. Mold growth, a leaking duct or an opening full of nesting material needs a professional, and no amount of scrubbing fixes the source.
Use a flashlight and look up inside the opening. Dust bunnies are normal. A grey-brown film, dark spotting on the duct interior or insulation that looks chewed or pulled away is not, and it is the point where cleaning ends and inspection begins.
2. Remove and Vacuum the Vent Registers
Lay the drop cloth down, then remove the register. Most are held by one or two screws on a diagonal from the corners; on larger floor registers the screws sit on either side. Back the screws out slowly and keep them in your hand or taped to the trim, because they will fall into the duct if you set them on the ledge.
Lower the cover straight down and slightly toward you rather than pulling it toward the edge. Ceiling registers with a cardboard or plaster border are brittle, and a sharp tug is what cracks them. If the cover resists, stop pulling. It may be caught on a damper arm, or it may be painted shut along the trim, and both are reasons to work the screws a little further rather than force the panel.
Vacuum the front and back of the cover with the soft brush attachment, working along each slat. Then run the crevie tool into the corners, the stamped lettering and the joint where the grille meets the frame. Tip the register over and vacuum the back face, which is usually the dirtiest part and the one nobody looks at.
Change the vacuum canister or bag before you start the next register, especially if you are working on a return vent. Fine dust is easy to reinject once the filter is full, and a half-full canister loses suction exactly when you need it.
For caked dust that will not lift, do not fight it with a hard brush. Let the slats sit for ten minutes with a microfiber cloth dampened with warm soapy water, then wipe and vacuum. The warm water softens the film and the cloth carries it off the metal instead of grinding it into the brush.
3. Wash Removable Registers and Grilles
Fill a sink or bucket with lukewarm water and a small amount of mild dish detergent. Submerge the cover, let it sit for ten to fifteen minutes, then work the slats with a soft nylon brush or a microfiber cloth. Rinse with clean lukewarm water and dry it on a towel. Completely dry, not nearly dry, before it goes back into the wall.
Some finishes need different handling. Factory-painted metal and powder-coated grilles should get a spot test in a hidden corner first, and no bleach or abrasive pad, because white spray paint blisters and peels in a mottled pattern that takes a repaint to fix. A register with a spring-loaded damper or a wired motor attached is not a soak candidate, since the water gets into the mechanism. Clean those with a damp cloth only.
Before you lift the cover back up, look at the paint line where the register meets the wall or ceiling. A thin caulk bead there is often what keeps drafts out and keeps the trim from chipping, and pulling the cover can tear it. If a bead already cracks, run a fresh line of paintable caulk along the edge and let it cure before reinstalling.
4. Clean the Inside of the Accessible Duct Opening
This is the part most people skip, and it is the part that answers the question I get asked most often: how do you clean what is behind the cover. The answer is that you clean the part you can see and no further.
With the register off, run the vacuum hose into the opening and clean the visible lip and the first few inches of the duct interior. Wipe the inside rim and the metal collar with a damp microfiber cloth. On many ceiling and floor registers you will also find a small plastic damper blade or an adjustable plug sitting just inside, and you can wipe or brush that clean while keeping it in place.
Everything past that is off limits. Do not reach deep into the duct, do not push on flexible ductwork, do not pull on wiring, and do not puncture the fiberglass or foil insulation lining the duct. Do not blow into the opening with compressed air either. It feels like a quick fix, and instead it drives dust and grit down into the plenum where it resurfaces in another room. If the visible interior is heavy with debris, that is the point to bring in a technician with an agitation tool and a vacuum rated for HVAC work.
5. Reinstall the Vents and Restore the System
Let the cover dry fully, then seat it back in the opening. Push it in gently and evenly rather than pressing one corner first, which is what bends a frame out of square. Refit the screws and tighten them until they are snug, not until the trim dimples. A strip of masking tape across the seam before you screw it home helps you line the gap up the same way it was.
Once every cover is back, restore power at the breaker and set the thermostat back to your normal mode. Turn the system on and check three things over the first few minutes: air is coming out of every register you opened, nothing rattles or whistles that did not before, and the thermostat holds the set temperature without the system short-cycling.
Your visual checklist for a job done well looks like this. The slats read as one clean color rather than a mix of light and dark patches, the air moves evenly without spitting dust, the cover sits flush with a uniform gap all the way around, and the wall or ceiling around it is clean and unmarked. A vent that gets dirty in two weeks is telling you something else, which is the next section.
Common Mistakes
Almost every problem I see comes down to one of these seven, and each has a simple fix.
- Leaving the system running. The blower pulls loosened dust straight back into the room, and you are working near live equipment. Fix: thermostat to off, fan to on for a few minutes, then power off at the breaker.
- Using compressed air. It looks effective and it just relocates dust, often into rooms you already cleaned. Fix: vacuum only, with a soft brush.
- Spraying cleaner into the vent. Liquid runs into the duct and onto the coil where it does not dry. Fix: apply detergent to a cloth, or to a basin of water for removable covers.
- Soaking a painted or wired grille. Paint blisters, and water gets into dampers and fan motors. Fix: spot test first, and use a damp cloth on anything with moving parts attached.
- Cleaning only the grille and leaving the surrounding dirt. Most of the visible grime is the dust halo on the wall or ceiling around the opening, plus dirt collected on the outer slats. Fix: wipe the trim and the perimeter of the opening with the same damp cloth.
- Forcing the register off the wall or ceiling. This cracks the border, chips the paint and tears the caulk seal. Fix: back the screws out fully, lower the cover straight down, and support it with a hand.
- Assuming a clean vent means clean ducts. Cleaning the covers is a surface job. If the house stays dusty, something is happening inside the ductwork or the filter, and that calls for an inspection rather than another round of scrubbing.
One more worth naming: cleaning bathroom and kitchen exhaust grilles the same way you handle an HVAC register. Those grilles carry grease and soap scum, and a dry cloth and vacuum will smear it around. A warm soapy wash or a degreaser suited to the finish, followed by a rinse, does that job properly. Leave the grill off the fan’s own motor housing alone unless the manual says otherwise.
Frequently Asked Questions
How often should I clean my air vents and registers?
A quick wipe-down and vacuum pass every month keeps dust from building up, and a deeper wash of the removable covers twice a year is usually enough for a typical home. Do the spring clean before cooling season and the fall clean before heating season. Households with pets, allergies or recent renovation work may want the monthly pass more often, while anyone prone to asthma may prefer a shorter interval.
Does cleaning air vents help with dust and indoor air quality?
It helps with the dust you can see, because a grimy register blows collected particles back into the room instead of letting clean air pass through. It does not reach contamination deeper in the ductwork, which is where most of a house’s fine dust actually settles. Expect a visible difference in a dusty room, but not a dramatic change in overall air quality for the whole home.
How do I get caked dust out of vent slats?
Soften it first, then lift it. Hold a microfiber cloth dampened with warm soapy water against the slats for about ten minutes, wipe along the length of each one, and vacuum immediately afterward while the dust is still loose. A hard brush on dry caked dust tends to grind it into the finish rather than remove it, and a bare vacuum nozzle leaves the corners untouched.
Can I clean inside the ductwork myself without professional equipment?
You can clean the visible portion of a short duct opening behind a removed register, and that covers most of what a homeowner can safely reach. Beyond a few inches you are dealing with insulation, wiring and dampers that can be damaged by hand, and professional tools exist to agitate debris loose while containing it. If dust is deeper than you can see from the opening, an inspection is the sensible next step.
Do I need an HVAC professional if I see mold or black specks near a vent?
Yes. Mold growth, water staining, condensation damage or a musky smell around a register point to moisture somewhere in the ductwork or the air handler, and cleaning the cover does not address the source. Black specks can be soot from a problem, or simply concentrated dust, but they need looking at in place. A technician can identify the moisture source before it spreads to nearby drywall.
Does homeowners insurance cover air duct cleaning?
Most policies treat routine duct cleaning as maintenance rather than a covered loss, so it is usually paid out of pocket. Coverage becomes more likely after a documented event such as a fire, smoke damage or major water leak, and sometimes after a mold remediation claim. Read your specific policy and ask your agent in writing, since terms vary widely by carrier and by how the home was damaged.
Conclusion
Start with the thermostat, the breaker and a vacuum. Learning how to clean air vents and registers properly comes down to four habits: vacuum each register front and back, wipe the slats with a cloth dampened with warm soapy water, wash and fully dry the covers you can remove, and clean only the visible lip of the duct opening before everything goes back up.
Stay out of the ductwork beyond that. Deep duct cleaning is worth arranging when a professional inspection points to debris inside the system, when you have mold or a moisture problem, or when a clogged filter and dirty return vent explain a persistently dusty house. For a vent you cannot comfortably reach, a technician is the cheaper option than a ceiling repair.